The sensor is known to sound the alarm/dash light when no water is present in bowl. Usually happens at idle and a slight incline in any direction, for me anyway.What happened to the old one? Cracked bowl? Housing?
What did you do to or on your Kubota today?
- Thread starter gurn
- Start date
GibbyESS9
Active member
Equipment
2020 Bx23s,BX2672 plow, Titan Forks, Land Pride 48” BB, FEL, Bestco Flail mower
That's very similar to my stump bucket. You're right, they're very handy for trenching if you don't have a backhoe. Perhaps not quite as fast or clean, but they do the job.Did you ever have one of those small tasks that somehow acquired 'project creep'?
I have a small area on the north side of our house that I wanted to replant grass in. It hasn't been touched in 30 years.
It's only about 40 x100 so I planned on ripping it with the box blade then use the tiller. Part A was no problem. The BB ripped up the ground nicely. I just wasn't prepared for all the potatoes is would bring up.
Using the tiller presented a problem. The space is small bordered by the house with AC units sitting there, a fence and a drop off into the woods (artificial wall I built when the grape arbor was there). There is only one 'open' end. Ok will only use tiller where I can reach without destroying anything.
Then I thought this is the time to replace my conduit line that goes from the house into the woods for my critter cameras and low voltage lighting. So... it may not be a backhoe but its a whole lot better than a shovel!
View attachment 82027
The stump bucket has turned into a very used implement. Of course trenching / replacing the cables now has doubled the scope of the job.
The good thing about project creep is more seat time.
Yup, it will. Not much to be done for it. I normally dig 'em out, but that would leave a bomb crater right now, and you'd probably need a yard of top to put back on it. It'll still crater a little with time, but not like the sink hole that will form when micro critters and bugs eat that thing out. The WORST part about a rotting stump in the South is that it makes for a PERFECT homestead for yellow jackets. Yellow Jackets build in the ground because they want to be that little bit closer to Hell where they came from. Ground dwelling bumble bees MIGHT attack a soft pine stump, but they'll typically just build under deadfall.Perhaps…but doesn’ that make a “sink-hole”.?
So far this year, I've stirred up one ground dwelling bumblebee nest (like getting hit with a hammer in the back of the head and a headache that lasted for days), one yellow jacket nest with a couple thousand nest mates (dunno how I didn't get stung), and one baseball sized red wasp nest with about 50 bad boys on it. Fortunately, I'm not super allergic to anything, and even honey bees only swell me just a bit. Anything in the hornet family, however, triggers a rage you've never seen. Doc said it was the pheramones from the sting. Won't hurt me, but sure does piss me off. If one gets me, I locate the nest, then go back at night fall and share a drink of 87 octane or a can of Raid Hornet Spray with 'em. I make sure I get 'em all by waiting for 'em all to come home at night.
Looks good. Let me know how that turns out. I need to take mine off and do something with it, as well as paint the braces I made for it. When I take 'em off, I'll photo them and post pics. Have some on here somewhere, but unfinished (unpainted) and not very good angle after already installing.Used Herculiner bed spray on the step. Let it cure for 4 days before I reinstalled it on the tractor. We’ll see how well it holds up.
View attachment 83683
ejb11235
Well-known member
Equipment
BX23S, Braber BBR4G 4'BB & LRM5G 5' rake, Redline 48" rock bucket, PFL1242
Oh yeah, I know exactly what you're talking about now. I have a small gas-powered towable DR chipper and have read the instructions on checking and adjusting that.Bed plate is the anvil that’s taking the beating from the blades hitting the material being chipped. It’s adjustable to set the gap between it and the blades. After that kind of damage, figured it would be prudent to check it.
This is an EXTREMELY crucial setting. As you might guess if you get it wrong, you're gonna destroy all 4 knives. Err on the side of caution, and set it at the max gap. ALSO, make sure you do the adjustment with the PTO shaft OFF, and thrust the flywheel shaft all the way toward the rear (max gap). It isn't supposed to move, but there is a slight thrust to those bearings, and it WILL hit the knives if you set it for minimum gap. Not my favorite thing to do on the WC-68, because it's pretty much eyeballing it. The anvil (stationary part) can also 'wobble' a little when setting it, leaving it not parallel to the knife edges. This presents a bit of a problem too. I'm working on a 'feeler' gage that I can reach down into the chipper with to properly set them quickly. I'd even suggest opening that gap up to 5/32 or 3/16 if you're chipping mostly large stuff. That doesn't work well for smaller brush though, especially stuff in the birch or elm family. Stringy bark doesn't chip well.View attachment 83775
Bed plate is the anvil that’s taking the beating from the blades hitting the material being chipped. It’s adjustable to set the gap between it and the blades. After that kind of damage, figured it would be prudent to check it.
The front to back movement of the flywheel shaft (as best I could tell) is fixed by shoulders on the shaft that are retained by the pillow block bearings. I didn’t see any option for adjustment of the flywheel shaft in any direction.
Made sense the front bearing wasn’t damaged; no force applied to it as the front shoulder slid away from the bearing. The rear bearing took all of the force and (thankfully) was weaker than whatever it’s counterpart was in the rear ended of the tractor. Whatever that is in the tractor must be pretty stout. Definitely dodged a bullet on that one.
I got mine a little too tight at the top edge of the anvil when I set it the first time (didn't thrust the flywheel to the back) and put some minor gaps on the blades. Still usable, but certainly affected the performance. Just about time to rotate them now and order a backup set that I can use while I send the originals out for sharpening.
NCL4701
Well-known member
Equipment
L4701, T2290, WC68, grapple, BB1572, Farmi W50R, Howes 500, 16kW IMD gen, WG24
Yeah
Yeah, with the bed plate/anvil at the bottom of the flywheel housing it took a bit of thought to figure out how to set it properly with any reasonable precision. Ended up making a 3” wide by about 24” long “feeler gauge” out of a scrap white oak board so I’d have something relatively non-compressible that wouldn’t potentially dull the knives. Bandsawed it to about 1/4” and used a planer to get it to final thickness to ensure both faces were parallel. There’s a very visible gap at the back of the assembly that is left exposed so if it’s cocked at an angle that’s pretty easy to see/measure. Without the feeler gauge board I don’t know how you’d set it other than eyeballing it, which just didn’t seem like a good idea.This is an EXTREMELY crucial setting. As you might guess if you get it wrong, you're gonna destroy all 4 knives. Err on the side of caution, and set it at the max gap. ALSO, make sure you do the adjustment with the PTO shaft OFF, and thrust the flywheel shaft all the way toward the rear (max gap). It isn't supposed to move, but there is a slight thrust to those bearings, and it WILL hit the knives if you set it for minimum gap. Not my favorite thing to do on the WC-68, because it's pretty much eyeballing it. The anvil (stationary part) can also 'wobble' a little when setting it, leaving it not parallel to the knife edges. This presents a bit of a problem too. I'm working on a 'feeler' gage that I can reach down into the chipper with to properly set them quickly. I'd even suggest opening that gap up to 5/32 or 3/16 if you're chipping mostly large stuff. That doesn't work well for smaller brush though, especially stuff in the birch or elm family. Stringy bark doesn't chip well.
I got mine a little too tight at the top edge of the anvil when I set it the first time (didn't thrust the flywheel to the back) and put some minor gaps on the blades. Still usable, but certainly affected the performance. Just about time to rotate them now and order a backup set that I can use while I send the originals out for sharpening.
How did the event turn out Ken? Busy time here and could not getaway for it.Have been spending this week prepping my land for a "open house" event highlighting prairie/oak savanna habitat restoration. I have guest speakers from US Fish and Wildlife and Central Wisconsin Invasive partners plus self guided tours and a few other activities. If any of the fine folks here that live in Central Wisconsin would like to stop in please PM for more information. The event is July 16th 9:30am to 2pm.
The pictures below are the main parking areas that I have been mowing with the L2501.
View attachment 83536
View attachment 83537
pokey1416
Well-known member
Lifetime Member
Equipment
Grand L4060HSTC, BH92 Backhoe, HLA Snow Pusher, Dirt Dog Tiller, EA DiscHarrow
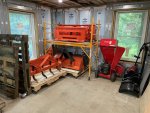
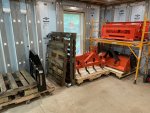
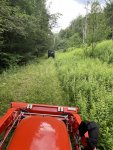
That's a great idea using the scaffolding!After using my flail mower to clean up some trails I had to reorganize the basement/storage for Bessy’s attachments. Had to make room for her and the Ranger.
View attachment 83791 View attachment 83792 View attachment 83793
ken erickson
Well-known member
Equipment
B7100 hst, 2650 front mount snowblower, L2501 hst qa loader
"How did the event turn out Ken? Busy time here and could not getaway for it."
Perhaps if I hold the event next year again. This time I will give a longer heads up!
Thanks for asking! The event turned out very good. A nice crowd, good speakers. Everyone enjoyed the self-guided tours. The weather cooperated.
A few event pictures below.


Perhaps if I hold the event next year again. This time I will give a longer heads up!
Thanks for asking! The event turned out very good. A nice crowd, good speakers. Everyone enjoyed the self-guided tours. The weather cooperated.
A few event pictures below.
Absolutely nothing today....had it mow the field yesterday, gave it a bath. Today I let it rest as I enjoyed a nice Bourbon old fashioned with it. Life is good.
Thanks for the update on the event. I'm happy to hear it was a success and the weather cooperated too! Nothing better than learning something new in Nature! Life amazes me every day outside here. We are fortunate to live in this part of the Country."How did the event turn out Ken? Busy time here and could not getaway for it."
Perhaps if I hold the event next year again. This time I will give a longer heads up!
Thanks for asking! The event turned out very good. A nice crowd, good speakers. Everyone enjoyed the self-guided tours. The weather cooperated.
A few event pictures below.
View attachment 83813 View attachment 83814
ken erickson
Well-known member
Equipment
B7100 hst, 2650 front mount snowblower, L2501 hst qa loader
One of the attendees discovered a, new to my land, plant species . Pepsissewa (chimaphila umbellate)Thanks for the update on the event. I'm happy to hear it was a success and the weather cooperated too! Nothing better than learning something new in Nature! Life amazes me every day outside here. We are fortunate to live in this part of the Country.
Chimaphila_umbellata
Precisely what I was saying. I like the idea of the wooden gage. I may borrow your idea, or perhaps use plastic or fiberglass so that it doesn't dry rot or split, and make it where it covers the whole anvil to make sure it sets the anvil parallel to the knife edge. I've been too busy using my chipper to take the time to make a tool. I set the knives when I got it, as you say by eyeballing it, and paid the price. I now have some pretty significant gaps in the outer ends of the knives where they touched the anvil when the flywheel thrusted rearward (toward the anvil). Never heard it and didn't know about it until I opened it to clean out a clog due to a large chip getting stuck in the chute plenum. If there was one thing I'd ask Woodland Mills to improve, it would be the procedure/access for setting the knife/anvil gap. Ain't no way to get your hands in there to hold anything, and if you can see the knife/anvil gap, you can't see the anvil bolts because the housing blocks your view. Very inconvenient and frustrating, and something that would definitely make me shy away from doing chipper service for a living. I like things with SOLID and FIXED measuring tools and gages when the setting is so critical. The procedure says nothing about checking the thrust, either. Normally, the material being chipped should be pushing the flywheel away from the anvil between each knife, but since the end of the knife closest to the center tends to hit the material first, and then pull itself back toward the anvil, especially on larger material where the cut is much longer. It only takes the difference of a few thousandths to make a big boo-boo on the knives, and there could be that much run-out in the flywheel. Still, my chipper, my responsibility, my mistake. I own it, just making observations on how a good chipper could be better.Yeah
Yeah, with the bed plate/anvil at the bottom of the flywheel housing it took a bit of thought to figure out how to set it properly with any reasonable precision. Ended up making a 3” wide by about 24” long “feeler gauge” out of a scrap white oak board so I’d have something relatively non-compressible that wouldn’t potentially dull the knives. Bandsawed it to about 1/4” and used a planer to get it to final thickness to ensure both faces were parallel. There’s a very visible gap at the back of the assembly that is left exposed so if it’s cocked at an angle that’s pretty easy to see/measure. Without the feeler gauge board I don’t know how you’d set it other than eyeballing it, which just didn’t seem like a good idea.
Used existing holes in loader frame, 2 5/16x 1 3/4” bolts with nylon lock nutsHow'd did you attach that to the FEL bracket?
Spaced it away from frame with 2 3/4” pipe unions cut down to about 3/4”
I look out the window at the orange machines and thought of all the stuff I needed to get done but it's like 92 and super humid out there so I got a cold one and headed for the sofa 

I like that design. The only addition I would make is a cover for the can. If you put one on both sides you could keep two chains handy, a biggun and a littlun. I like a 1/4" chain for dragging stuff, but want a 3/8" if I'm gonna get rough with what I want to move. I'll assume you drilled some holes in the bottom to prevent it catching full of water. Was that 4" x 4" x 1/8" steel box beam that you used for the can? That's plenty sturdy looking at the photos. I like the smaller profile, and it's amazing how much chain you can store in a relatively small place.Used existing holes in loader frame, 2 5/16x 1 3/4” bolts with nylon lock nuts
Spaced it away from frame with 2 3/4” pipe unions cut down to about 3/4”
The hardest thing I've been trying to design is something to carry a double bit axe, SAFELY. Anywhere you put a double bit axe short of the head being stuck inside something leaves at least one exposed blade. I don't think I have to say how dangerous a sharp axe is, especially with young grandchildren that want to play around on the tractor. So far, I just haven't found a convenient/safe place to put my axe. I've had my axe since I was 14 (50 years), so as you might guess, I'm sort of used to it now. Anyone got something they're willing to share? A single bit isn't a problem, only one blade. I just don't like single bit axes.


