Reviving a G1900

lmichael

Well-known member

Equipment
Kubota G2160
Apr 23, 2021
633
277
63
Rockford IL area
So, how many hours on that 1900 of yours again? Overall what kid of shape did you find that little alternator in? I opened mine up to add the tachometer tap to the windings but didn't feel the need to go into it all that far. My buddy has a brand new Delco alternator (back when I was a Cadillac tech in the late 60s/early 70s we weren't allowed to call them "alternators" we had to still call them "generators" per GM because since they were internally rectified they did output DC. Unlike Chrysler corp who IIRC copyrighted the name "alternator" because their units had external rectifiers, and preceded all the other companies.
I even remember their ad campaign from like 1958/59 showing the hood up on Chrysler and a bunch of guys standing around with electric shavers all running off the "alternator" with the engine "idling". Big things was then, a generator produced very low power at idle while Chrysler's "alternator" produced near full power at idle.
Anyway I digress: Just curious how the overall condition was. My 2160 just tripped over 1000 hours last summer. I'd love to have a "resettable" hour meter on it so I could actually "time" my service intervals rather than writing labels on my oil filter/air filter and so on :D
 

Hugo Habicht

Active member
Lifetime Member

Equipment
G1900
Jun 24, 2024
176
200
43
Ireland
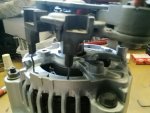
Generator Assembly

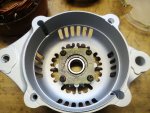
We push in the front bearing into the housing. If it has to be pressed in only apply force onto the outer ring. You can use the outer ring of the old bearing for a mandrel for pressing it in. Never hammer in a bearing, this will damage it and it will fail prematurely! Never press in the outer ring by applying force onto the inner ring or vice versa! This will also damage the bearing.

Put in the cover plate and tighten the four bolts.

IMG_20250209_092112.jpg

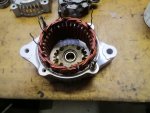
Push in the stator (if removed), I had pushed mine out in order to be able to clean the housing. Make sure the orientation is the same as before, visible at the marks of the bolts holding it in and the wire position for the rectifier / regulator. Screw in the two standoff bolts holding the stator and tighten.

IMG_20250209_093221.jpg

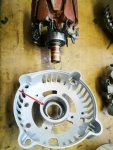
Press in the rear bearing onto the rotor, thin cover washer first, then bearing, then rear cover washer, flat side towards the bearing. Use a short piece of pipe as a mandrel. Again the warning: do not hammer onto the pipe / mandrel. The inertia of the outer ring will damage the bearing when applying hard hits!

IMG_20250209_095847.jpg

Push rotor shaft into front bearing. Now put wavy spring washer (red, shown in housing) on top of the rear bearing and push the rear housing over the shaft / rotor / bearing.

IMG_20250209_143013.jpg

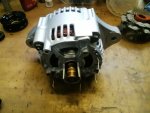
Make sure the four stator wires are fed through the appropriate holes in the enclosure. Insert the two bolts and tighten and put the two nuts over the standoff bolts and tighten.

IMG_20250209_100736.jpg

Feed the four stator wires through the small holes in the rectifier / regulator assembly and push down the rectifier carefully.

IMG_20250209_103940.jpg

Push back the brushes (yellow) when they reach the slip ring in order to push the rectifier fully down.

IMG_20250209_142236.jpg

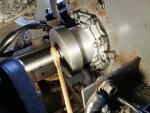
Bend stator wires into nice loops again, wire going clockwise direction and insert and tighten four stator wire bolts (red) and regulator bolts (blue).
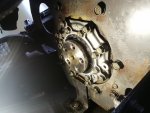
IMG_20250209_143213.jpg

Put rear cover over the rectifier and insert and tighten the three ground contact bolts (red). Then push insulating plastic standoff (blue) over battery stud, nut (yellow) over the battery stud and tighten and spring washer and flange nut (green) onto the stud as well for later assembly of the battery cable.

IMG_20250209_143759.jpg

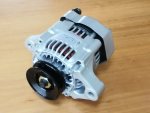
Slide spacer ring and pulley over the shaft and tighten nut holding shaft on the hex end. Apply a new home brewed nameplate sticker if it was damaged when cleaning the housing parts and we have a fine fully rebuilt generator ready to go into the tractor. :)

IMG_20250209_123343.jpg
 
Last edited:

Hugo Habicht

Active member
Lifetime Member

Equipment
G1900
Jun 24, 2024
176
200
43
Ireland
So, how many hours on that 1900 of yours again? Overall what kid of shape did you find that little alternator in?
The G1900 had 6045 hours on the clock when I collected it.

IMG_20240823_154355.jpg

I have no experience with those Denso generators but judging from car generators I would find it hard to believe that it was still original. There is still about 25% left in the brushes and slip rings now, so considering easy access to the generator I left the old ones in and did not wait for the spare parts order.

With respect to "generator" versus "alternator" I believe both expressions are used concurrently. I prefer generator because I think it better describes what the thing is doing and I think this is also what Kubota uses in their manuals.
 
  • Like
Reactions: 1 user

Hugo Habicht

Active member
Lifetime Member

Equipment
G1900
Jun 24, 2024
176
200
43
Ireland
Radiator

Did not want to do it at this stage but since the radiator was out already I did some corrosion removal on the side brackets, straightened all remaining bent cooling fins and sprayed the frame and top and bottom parts. Also sprayed the new drain plug. Should have left the nice brass maybe ...

IMG_20250209_155732.jpg


Looks good now with the refurbished mounts.
 
  • Like
Reactions: 1 user

Hugo Habicht

Active member
Lifetime Member

Equipment
G1900
Jun 24, 2024
176
200
43
Ireland
Seat mount

Corrosion was pretty bad here.

IMG_20250106_195833.jpg

So everything taken apart. The loops holding the lever had to be bent open to get the lever out. Everything sandblasted, zinc electroplated and sprayed black.

IMG_20250209_171851.jpg


Bonnet (hood) hinges

Also sand blasting and zinc electroplating here.

IMG_20250209_171919.jpg


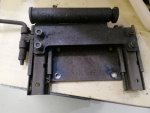
PTO brake

When taking off the brake pad to get the mechanism electroplated the pad cracked. No problem, just buy a new one, thankfully most parts are still available from Kubota.

Screenshot_20250107_194304_com.huawei.browser.jpg

162 quid for a 1 square inch size brake pad? I don't think so.

So made a new brake pad from brake lining material, made two rivets and riveted the brake pad on.

IMG_20250209_175558.jpg IMG_20250209_175606.jpg IMG_20250209_182338.jpg

Done:

IMG_20250209_194943.jpg
 
Last edited:
  • Like
Reactions: 1 user

Hugo Habicht

Active member
Lifetime Member

Equipment
G1900
Jun 24, 2024
176
200
43
Ireland
@Hugo Habicht are you doing your own electroplating or do you sent it out to a vendor?
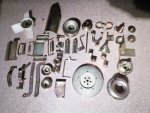
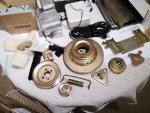
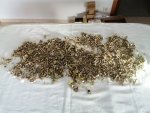
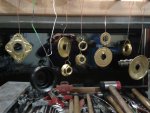
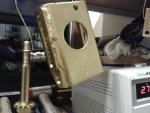
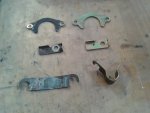
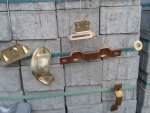
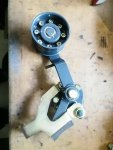
For a few items or if I need them urgently I would do it myself but for bigger amounts, like here, I go to a company abroad. First three pictures is this batch of Kubota G1900 parts, the last picture is a bunch of car parts. A bigger amount of smaller parts can be done in a drum which is very cost effective. At home it's basically doing parts individually which is fairly time consuming.

IMG_20250115_064451.jpg IMG_20250114_213653.jpg

IMG_20250114_165759.jpg IMG_20241020_082006.jpg

Those are parts I did myself

verzinken.pdf-image-009.jpg verzinken.pdf-image-010.jpg

index_20241211_195544.jpg 20210907_191543.jpg

Have you tried a product like this for rust removal?
Yes, I tried products like this in the past but what I do now is mechanical rust removal (sand blasting mainly) followed by chemical rust removal with phosphoric acid. The latter gives an iron phosphate passivation layer which is a weak rust protection already in case you spray the parts at a later date. In my humble opinion only mechanical or only chemical does not work long term.
 
Last edited:
  • Like
Reactions: 1 users

Hugo Habicht

Active member
Lifetime Member

Equipment
G1900
Jun 24, 2024
176
200
43
Ireland
PTO clutch / belt tensioner / brake

Since the idler wheel halves were welded together after inserting the bearings I had milled out the welding spots in equidistant angles and I bolted together the two halves now.

My replacement bearings got lost in the post, so I did not want to wait for the new order and decided to reuse the old bearings which are still usable. With the possibility to take the halves apart it is easy to change the bearings now. I took the seal disks off, cleaned them out and put new grease in.

IMG_20250210_084536.jpg

IMG_20250210_111451.jpg

I also replaced the grease nipple. The thread size on all grease nipples on this tractor is M6x0.75. You can buy them from aftermarket suppliers at very little cost.
 
  • Like
Reactions: 1 users