Reviving a G1900

Hugo Habicht

Member

Equipment
G1900
Jun 24, 2024
79
77
18
Ireland
Hello,

as some may have read already in another thread I rescued a G1900 lawn tractor that, I believe, would otherwise have ended up in a scrap yard. The last few years it had been neglected and is in very poor condition. But short wiring the starter I could get it running and it started first turn of the crank shaft. It cut the grass and since I needed a better lawnmower I thought it is worth repairing it.

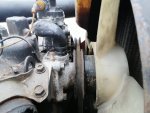
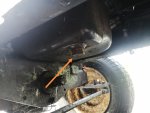
Since it has not seen a grease gun for a while a lot of joints and bearings are badly worn out, the worst being one of the rear steering knuckles where you can move the wheel more than 1/2". Bonnet (hood) dangling on one bolt, air filter hanging loosely of its hoses, steering wheel 360 degree (!) play. As you can see, a lot of tlc required.

North Idaho Wolfman, in another thread, had concerns about buying one of those with 3000 hours on the meter which I believe are based on lots of experience and should be listened to. Mine had 6045 hours when I got it. Yes, I hear you, scrap yard a.s.o., but since the engine is running fine and the hydraulic transmission seems to be reliable I decided to take the risk and give this little tractor another lease of life.

I would like to describe the various repairs and maintenance in this thread in the hope it may help others and although it may be seen as a project thread I think it should be here because it describes Kubota repairs. If it should rather be in the Project Forum I would ask the moderators to move it.

And yes, I am well aware that what I am doing may not make a lot of economical sense :)

Kind regards,
Hugo
 

Attachments

Last edited:
  • Like
Reactions: 1 user

Hugo Habicht

Member

Equipment
G1900
Jun 24, 2024
79
77
18
Ireland
Combination box and coolant hoses

The first thing was fixing the electrics. The starter motor would not turn. The solenoid is driven by the "combination box" which adds some safety features and also controls the preglow light and the engine shutoff solenoid.

The switches going into the box are PTO, brake and seat. I checked all wire harness connections and all switches and found the brake switch to be faulty. So I shorted this and it still would not start. Signal on box connector was clearly present. So the combination box itself must be faulty, I will knit my own electronics, and in the mean time I wired the starter directly.

Tightening one of the steering ball joint nuts reduced the steering play from 360 to 90 degrees. The rest seems to be in the front axle pivot, a job for another day.

So I could drive it on a trailer and bring it home and wanted to try it out. Oil levels are all fine and no leaks visible. It cut very low but I kept going and after just 10 minutes there was water on the cutting deck and after I stopped all the water ran out. Water pipe burst at the bottom of the radiator.

This ended my first attempt and I ordered all hoses from the Kubota dealer. I was considering using generic ones but the price is very good and the burst elbow for example has two slightly different diameters.

The numbers are:
16861-72850 radiator to connection
15881-72870 connection to water pump
16851-73350 return
16871-72940 thermostat to radiator S/N >= 11320, 16861-72940 otherwise
 

Attachments

Last edited:
Hugo Habicht

Member

Equipment
G1900
Jun 24, 2024
79
77
18
Ireland
Fan belt replacement

The fan belt was top on the long prioritised to-do list:

IMG_20240906_125313.jpg

Lugbolt here in the forum kindly pointed me in the right direction how to change it after I failed initially.

First take the mower deck off.

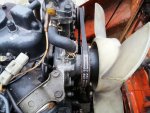
Then loosen the bolts on the dynamo, top and bottom. Just loosen them, don't take them off. Push the dynamo fully towards the engine.

IMG_20240906_132157.jpg

Now take off the three bolts connecting the driveshaft flange onto the flywheel. Accessible from below. I am not sure if that is required but I only turned it in normal direction of rotation when turning the crank shaft to get at the bolts.

IMG_20240907_080002.jpg

The flange can now be pulled backwards and the drive shaft moved aside to create a gap to get the fan belt through.

IMG_20240906_133209.jpg

I used an AVX 10x875 fan belt. As you can see the old one was slightly worn already. Maybe I could have got another few hours out of it. :whistle:

IMG_20240906_133336.jpg

Put fan belt over the fan, over the dynamo pulley, the flywheel and over the fan pulley. Then slide the dynamo and tighten the bolt so that you can push in the belt 10mm (0.4 in.) when applying 10kg (22 lbs.) force in the middle of the belt between the flywheel and dynamo.

IMG_20240906_134653.jpg

Now attach the driveshaft flange to the flywheel and tighten the bolts. I used low strength Loctite thread locker for those.

Attach mower deck.

Done.
 
Last edited:

Hugo Habicht

Member

Equipment
G1900
Jun 24, 2024
79
77
18
Ireland
Second test

Replaced the bottom hose and filled everything with water initially. The anti freeze and corrosion protection has to wait until I get the other hoses. I want to flush the system a few times because I do not know what anti freeze (if any) had been used. Mixing the wrong ones can lead to jelly, which is not really what I want inside the engine.

Greased all grease nipples, tidied up some of the cables.

Could not adjust the deck properly, it is running on the anti-scalp rollers now, but I was ancious to use the machine as intented by its manufacturer.

Started fine and I spent 2 hours cutting everything. Even grass over 60cm (2 feet) tall with the deck lifted and very slow forward movement. To distribute the cuttings I went over everything at full speed and was delighted. I do not think there are many lawnmowers where you can feel the air stream in your face :)

There are a lot of brown cuttings now that were left from my old grass cutter that have been chopped up now. Once I cut more often with the Kubota this should improve.
 

Attachments

Last edited:
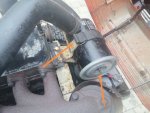
  • Like
Reactions: 2 users

Hugo Habicht

Member

Equipment
G1900
Jun 24, 2024
79
77
18
Ireland
6000 hours and that much neglect a testament to how stout that little diesel is. Keep it up!
Yes, you are 100% right, it is a stout little tractor.
Will definitely keep going.

Problems I identified so far:
- steering knuckles rear wheels excessive play
- wheel bearings front excessive play
- front axle pivot excessive play
- front axle grease nipple broken off
- steering ball joints some play
- steering ball joints rubber gaiters perished
- PTO front shaft bearings not running properly, worn
- oil pressure switch faulty (wiring and light good)
- engine oil dip stick not tight enough, possibly wrong type
- temperature too low (thermostat or sensor faulty)
- reverse speed too slow (adjustment, I think)
- dash board key switch mount broken
- rear reflectors cracked
- front light cover cracked
- lights not working
- starter and shutoff not working reliably (combination box)
- panels corrosion
- frame minor corrosion
- floor panel crudely cut out (for cabin mounted at some stage)
- bonnet (hood) holes drilled (for cabin)
- cutting deck reinforcement bar cracked
- cutting deck front mount too long, pin holes worn
- blades in bad shape, sharpened them but need new ones
- front left wheel losing air (had tyre off already, cleaned rim, improved matters but not fixed)
- battery bracket missing
- seat cover torn
- steering wheel center cover missing
- one rubber buffer for bonnet (hood) missing on radiator
- full service required (all oils, filters changed), will do that next

In total a bit of work, a good few new bearings, shaft seals, welding, corrosion removal and painting. Financially I think it should be acceptable, want to repair parts if possible instead of buying new. Although some Kubota parts are very reasonably priced (also considering the age of the tractor) I found some parts that I rather wish I will not have to buy :)
 
Last edited:
  • Like
Reactions: 1 user

lmichael

Well-known member

Equipment
Kubota G2160
Apr 23, 2021
605
254
63
Rockford IL area
Yeah, I bet parts are on the expensive side there. While not cheap here, not too bad. Good luck on saving that old little beastie.
 

Hugo Habicht

Member

Equipment
G1900
Jun 24, 2024
79
77
18
Ireland
Engine oil change

as a rule when you get a new vehicle you do a full service, so all operating fluids and filters are renewed. Imho it does not matter what the previous owner tells you what has been done.

I write it fairly detailed here. People who know how to do the oil change won't read this article anyway :)

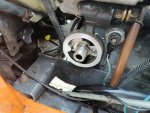
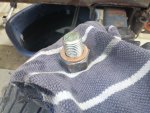
So for the engine oil we remove the cutting deck and put a tray with about 5l (1.5 gallon) volume under the engine oil drain plug, open the oil filler cap at the top of the engine and take the oil drain plug bolt out. Best done with engine oil hot.

IMG_20241102_174521.jpg

When most of the oil is out we can clean around the oil filter on the right side of the engine (white cylinder) and then unscrew it.

IMG_20240918_095426.jpg

Clean meticulously around the oil filter mount.

IMG_20240918_100034.jpg

apply a bit of fresh engine oil (3l API CC or CD with viscosity 10W-30) onto the rubber of the new filter (Kubota HH152-32432 or from complete Kubota or aftermarket service kit) and screw filter on handtight.

IMG_20240918_100156.jpg

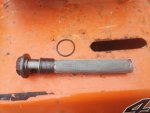
A new copper ring gasket onto the drain plug bolt and put that back in and tighten it.

IMG_20240918_100221.jpg

Fill in the oil in the filler opening on top of the engine until dip stick shows level at maximum (orange arrow) and close filler cap.

IMG_20241102_183657.jpg

Run the engine for about half a minute, check for leaks at the filter, stop the engine and top up oil to the maximum again.

That's it !
 
Last edited:
  • Like
Reactions: 1 user

Hugo Habicht

Member

Equipment
G1900
Jun 24, 2024
79
77
18
Ireland
Transmission oil change

Required:
5.7l Kubota UDT or Super UDT transmittion oil.
Kubota HH660-36060 hydraulic oil filter


Get a tray that can hold more than 8l (2 gallon) and place it under the rear axle, open the filler plug bolt above the dip stick at the back of the tractor and open the drain plug on the right hand side at.the bottom of the transmission.

IMG_20241102_201802.jpg

IMG_20241102_201959.jpg

While the oil is draining we replace the filter. It is located in front of the transmission accessible from the left hand side in fron of the rear wheel. Clean around the filter first and the unscrew it.

IMG_20240918_102646.jpg

Clean meticulously around the filter area and tighten the hollow screw where the filter is mounted lightly.

IMG_20241102_202437.jpg

Apply a thin layer of fresh oil onto the new filter rubber and screw into place handtight.

IMG_20240918_105335.jpg

When all the oil has drained use a new aluminium gasket ring on the drain plug and tighten.

Remove the suction pipe filter on the left hand side.

IMG_20241102_202024.jpg

Take out filter sieve and take care not to loose any O-ring. There is one on the outside and one on the inside (normally not removed) of the suction pipe. Clean the filter sieve with kerosene or diesel.

IMG_20240918_104719.jpg

Reassemble the suction pipe filter and tighten.

Fill in transmission oil until top level of dipstick is reached. I used a small funnel with hose to make filling a bit easier.

IMG_20240918_110236.jpg

Attach filler cap and dipstick. Run engine only on low to medium revs for a few minutes so that lubrication of all parts is ensured. Check for leaks at the filter and drain plug and suction pipe filter. Then top up again to maximun dipstick level.
 
Last edited:
  • Like
Reactions: 1 users

BastropMetal

New member
Lifetime Member

Equipment
L3400
Dec 20, 2022
17
5
3
Texas
Thank you for sharing! Very cool to save something from the trash heap.
 
  • Like
Reactions: 1 users

Hugo Habicht

Member

Equipment
G1900
Jun 24, 2024
79
77
18
Ireland
Air filter change

Required:
Kubota air filter 15852-11082

The operator manual says the air filter can be cleaned up to 6 times using pressurised air with maximum 2.1bar pressure (30 psi). I replaced the filter due to it's unknown state.

The air filter is located in front of the engine. Unstrap the rubber strap and remove the wing nut on the filter lid.

IMG_20241102_204403.jpg

Take out air filter and insert new filter element and tighten wing nut and attach rubber strap again.

IMG_20240918_120849.jpg

IMG_20240918_121539.jpg
 
Last edited:
  • Like
Reactions: 1 users

Hugo Habicht

Member

Equipment
G1900
Jun 24, 2024
79
77
18
Ireland
Fuel filter change

Required:
2 pieces Kubota fuel filter 12581-43012 (part number may vary with serial number)

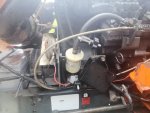
There are two fuel filters on the left hand side, one before the fuel pump over the rear axle and the second one after the fuel pump next to the engine.

In order to avoid draining the tank I used two hose clamps on the fuel hose before and after the filter to be replaced. One of the fuel hoses at the back has a protective metal spiral over the hose. Push that back to apply the clamp and prevent damage of the spiral.

Open the bracket holding the filter, apply the two hose clamps, open the hose clips and pull off hoses. Push hoses onto new filter and check correct filter direction (arrow). Close hose clips. Remove hose clamps. Attach filter with bracket again.

IMG_20240918_112738.jpg

IMG_20240918_113416.jpg

Repeat with filter at the engine.

IMG_20240918_115128.jpg

IMG_20240918_121740.jpg

Since we have air in the filters now we have to bleed the fuel lines. Simply switch on the "ignition" switch until the fuel pump has removed all air. This should normally take much less than a minute.
 
Last edited:
  • Like
Reactions: 1 user

Hugo Habicht

Member

Equipment
G1900
Jun 24, 2024
79
77
18
Ireland
Water hose replacement

Since one of the water rubber hoses (Kubota calls them pipes) had burst in my first test I decided to replace them all. There are 4 in total and they cost together about 50 quid (Euro, Dollar, Pounds...) which I find very reasonable. I bought two sets. Might be difficult to get them in years to come. As you can see, I want to hold onto that little tractor :)

To drain the coolant Kubota had fitted a little drain valve on the left side of the engine. You can attach a little hose to catch the coolant for disposal, open the valve and the draining is done. Phantastic !

So, I attached the hose into my tray, opened the valve and ...... nothing. Ok, valve blocked. Removed the turning part completely and poked around with a long drill bit removing a few corrosion products. Ok, take the whole valve out to speed up the process. With only minimal force applied the aluminium valve broke off. Great... :oops:

IMG_20241031_163340.jpg

IMG_20241031_163352.jpg

Poking out some of the corrosion products I could drain the old coolant but to get it back in I needed a valve. From the remaining 1.2 turns of the thread I deducted an M14x1.5 thread size. I drilled out the remaining aluminium parts and recut the thread having to make a tap extension first.

IMG_20241031_201145.jpg

The chips could be easily removed by pouring a few liters of water into the radiator. Then I made a new valve from brass.

IMG_20241031_213118.jpg

And fitted it onto the engine using aluminium gasket rings.

IMG_20241101_090203.jpg

Got too late for the hose change so I filled everything with water and drove the tractor into the garage until the next day.
 
Last edited:
  • Like
Reactions: 1 users

Hugo Habicht

Member

Equipment
G1900
Jun 24, 2024
79
77
18
Ireland
Water hose replacement (second attempt) and more.... (of course)

I also wanted to replace the thermostat because the temperature gauge showed a very low temperature. First thing I checked is the alarm connected to the over temperature switch located at the thermostat. Unplug the wire and short it to the engine when the ignition is on. Loud beep. Great, that works. I want to connect the oil pressure to this beeper as well, but that's for another day.

IMG_20241101_092058.jpg

I then checked the temperature gauge using two fixed resistors of 24 and 51 Ohm as per manual and the gauge showed as little as before.

IMG_20241101_092111.jpg

So the gauge has problem. Instruments have to come out and thermostat is staying for the moment.

Three hoses are easy to replace but one is in the middle of the engine and very difficult to get at. So I took the radiator out. Was the right decision, the radiator was half blocked up:

IMG_20241101_123535.jpg

IMG_20241101_123541_1.jpg

Now it was easy to replace the last hose.

IMG_20241101_141504.jpg
 
Last edited:
  • Like
Reactions: 1 user

Hugo Habicht

Member

Equipment
G1900
Jun 24, 2024
79
77
18
Ireland
Problem with fan belt

I had replaced the fan belt already but after only 2-3 hours it was slack and down by 1.5mm width already. It had beed fitted with the correct tension, checked with a belt tension gauge.

IMG_20241101_141755.jpg

My theory is that due to corrosion the pulleys are too rough and wear out the belt. So out comes the alternator and the fan pulley.

IMG_20241101_142636.jpg

I smoothed the surface with a file and wire brush on an angle grinder. I did all 3 pulleys. The one on the crank shaft by turning it with the starter while having the injection pump tied to the stop position.

IMG_20241101_150348.jpg

Also cleaned the fan once I am at it.
 
Last edited:

Hugo Habicht

Member

Equipment
G1900
Jun 24, 2024
79
77
18
Ireland
Radiator

The radiator was badly clogged up on the outside and dirty inside.

IMG_20241101_123541_1.jpg

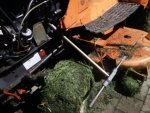
I cleaned the radiator with pressurised air and straightened the bent fins and flushed the inside with water a few times. The expansion vessel is difficult to clean from the outside with a brush due to the odd shape. I was not happy with the result so I threw in a handful of sand, filled it 3/4 with water and shook it vigorously. Worked a treat. Flushed it a few times to really get the last grain of sand out.

I applied corrosion protection wax over the few rusty bits to preserve the current state. Cosmetics is for a later date, the mechanics come first.

IMG_20241101_160330.jpg

Considering the damp Irish climate the tractor is in an impressive condition corrosion wise, the Kubota built quality was excellent I believe.
 
Last edited:
Hugo Habicht

Member

Equipment
G1900
Jun 24, 2024
79
77
18
Ireland
Getting the radiator back in ...

... was an altogether different story. I had taken it out with the brackets holding it to the frame. I thought of attaching the brackets first and the simply putting in the bolts from below and securing them with the clips.

IMG_20241101_140738.jpg

IMG_20241101_140759.jpg

Not a hope. After struggling for about half an hour I gave up, took the brackets out from the frame and attached them to the radiator. The bolts for the brackets can be easily reached from the side under the floor panel. Hindsight. Not easy to spot when you are lying under the tractor or standing over it.

I left the alternator out to have more space to work with the radiator and the fan suround. Not a good idea as it turns out that the long bolt holding the alternator at the bottom cannot be fitted any more. :rolleyes: Inserting it from the front is no option because it also holds a little bracket for the engine vent pipe with a second nut.

So I can say I am pretty good now at removing and assembling the radiator at this stage :)

The coolant mentioned on Orange Tractor Talks ("green stuff") I could not get here and also the Kubota coolant from the American manual is not available here. Other coolant from Kubota was prohibitively expensive, nothing like what I saw on Messicks web site.

After spending a lot of time on the internet researching coolants and their corrosion inhibitors I came to the conclusion that the manufacturers choice per region is driven by water quality. So I decided to fill in a 50/50 mix of BASF Glysantin G48 concentrate with water.

I will probably clean the cooling system with citric acid at some stage but for the moment this should do.
 
Last edited:

Hugo Habicht

Member

Equipment
G1900
Jun 24, 2024
79
77
18
Ireland
Oil pressure warning light

The oil pressure warning light was not working. I unplugged the cable of the oil pressure switch on the right side of the engine near the oil filter and shorted it to the engine block.

IMG_20241102_224001.jpg

Light in the dash came on immediately. So the switch itself is faulty. Had ordered a new one on ebay for just over 10€. Removed the old one, cleaned the thread in the engine and applied a tiny bit of engine sealer (Elring Dirko) to the thread of the new switch. The thread is conical and should seal itself but I think a bit of extra sealer cannot be a mistake here.

IMG_20241101_160927.jpg

Switching on the ignition the light comes on now and goes off when the engine is started. Great !

IMG_20241101_184420.jpg
 
Last edited: