I got a private request to post some pictures of my T&T setup in use.
First off, Why Top and Tilt (T&T) and Power Angle?
1. Quality of job.
2. Speed of job.
3. Trailering (no implement clearance issues loading)
4. Obstacle avoidance or handling in tight spaces.
5. Quick Hitch heaven. Any implement/any angle - pick and go, never leave the seat. Even non-QH benefits when on an angle hooking up.
6. More reasons - let me have them you guys in the know.
I have graded driveways/roads and spread and graded materials for years now. I have been complimented on the work many times by people in the trade. Obviously I have to drag the stuff there and do it, and the years of practice have been fruitful, but at the end of the day, it is the equipment that does the work.
The quality and speed I achieve would not be possible without the Top and Tilt and Power Angle
This is why I will always suggest 3 rear remotes to start if you aren't sure. They will cover most of your needs now and in the future.
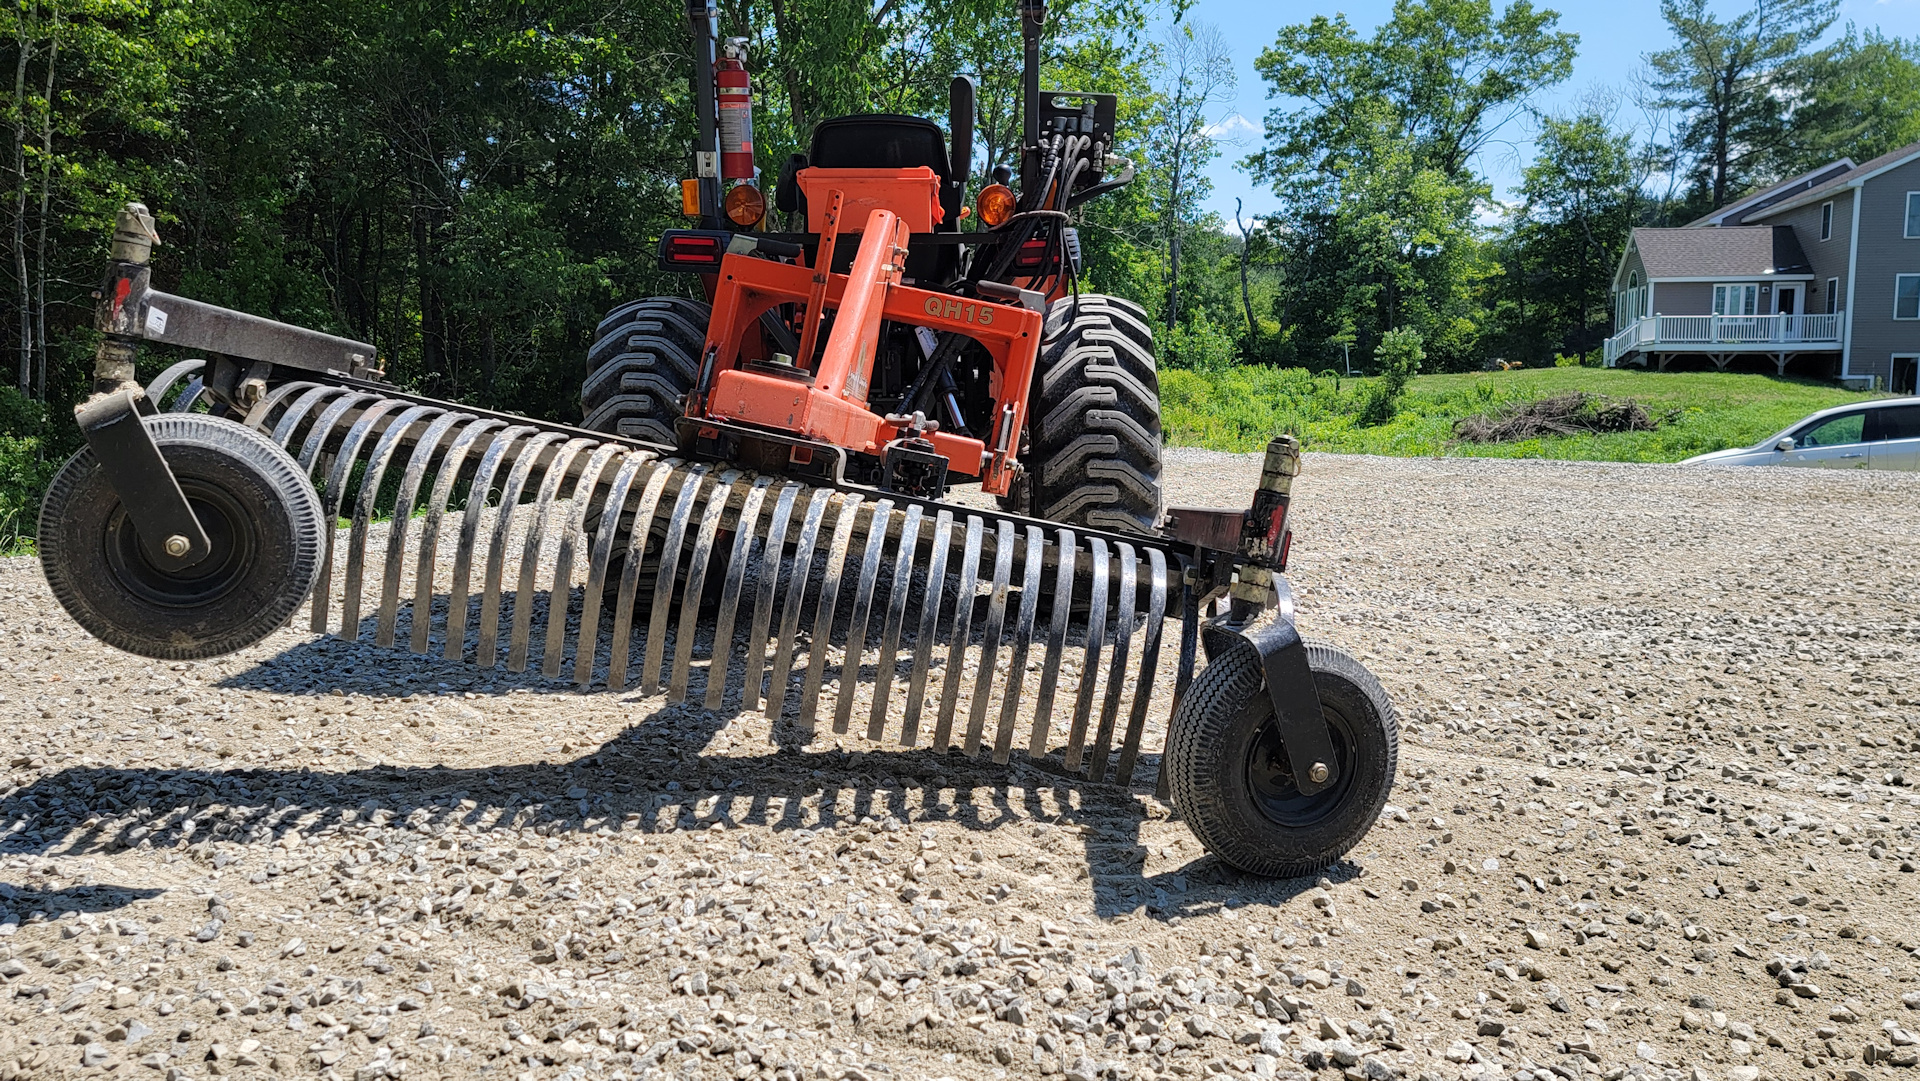
I have some pictures of my rake to illustrate. I also use all 3 on my boxblade I use them mowing fields, stump grinding etc. Every implement I have benefits from them in some way even if it is just loading on the trailer or attaching to the tractor.
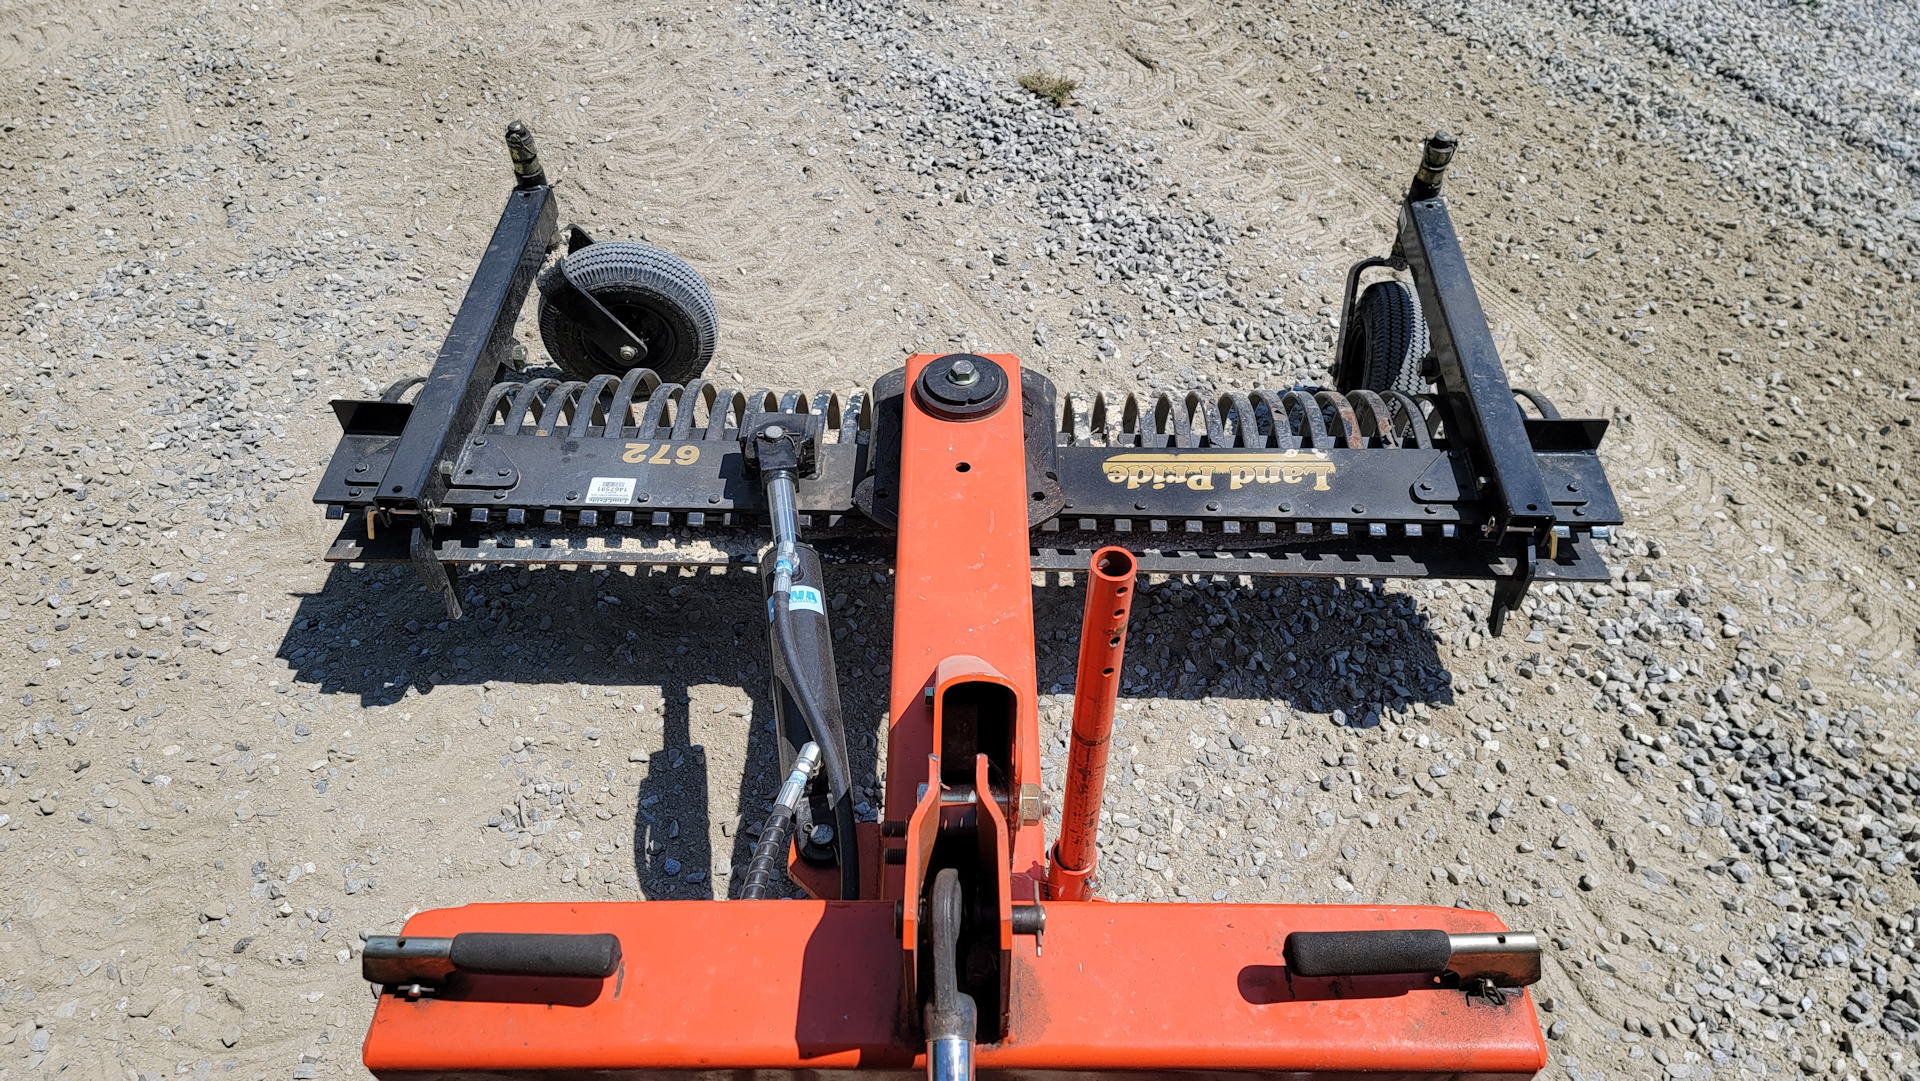
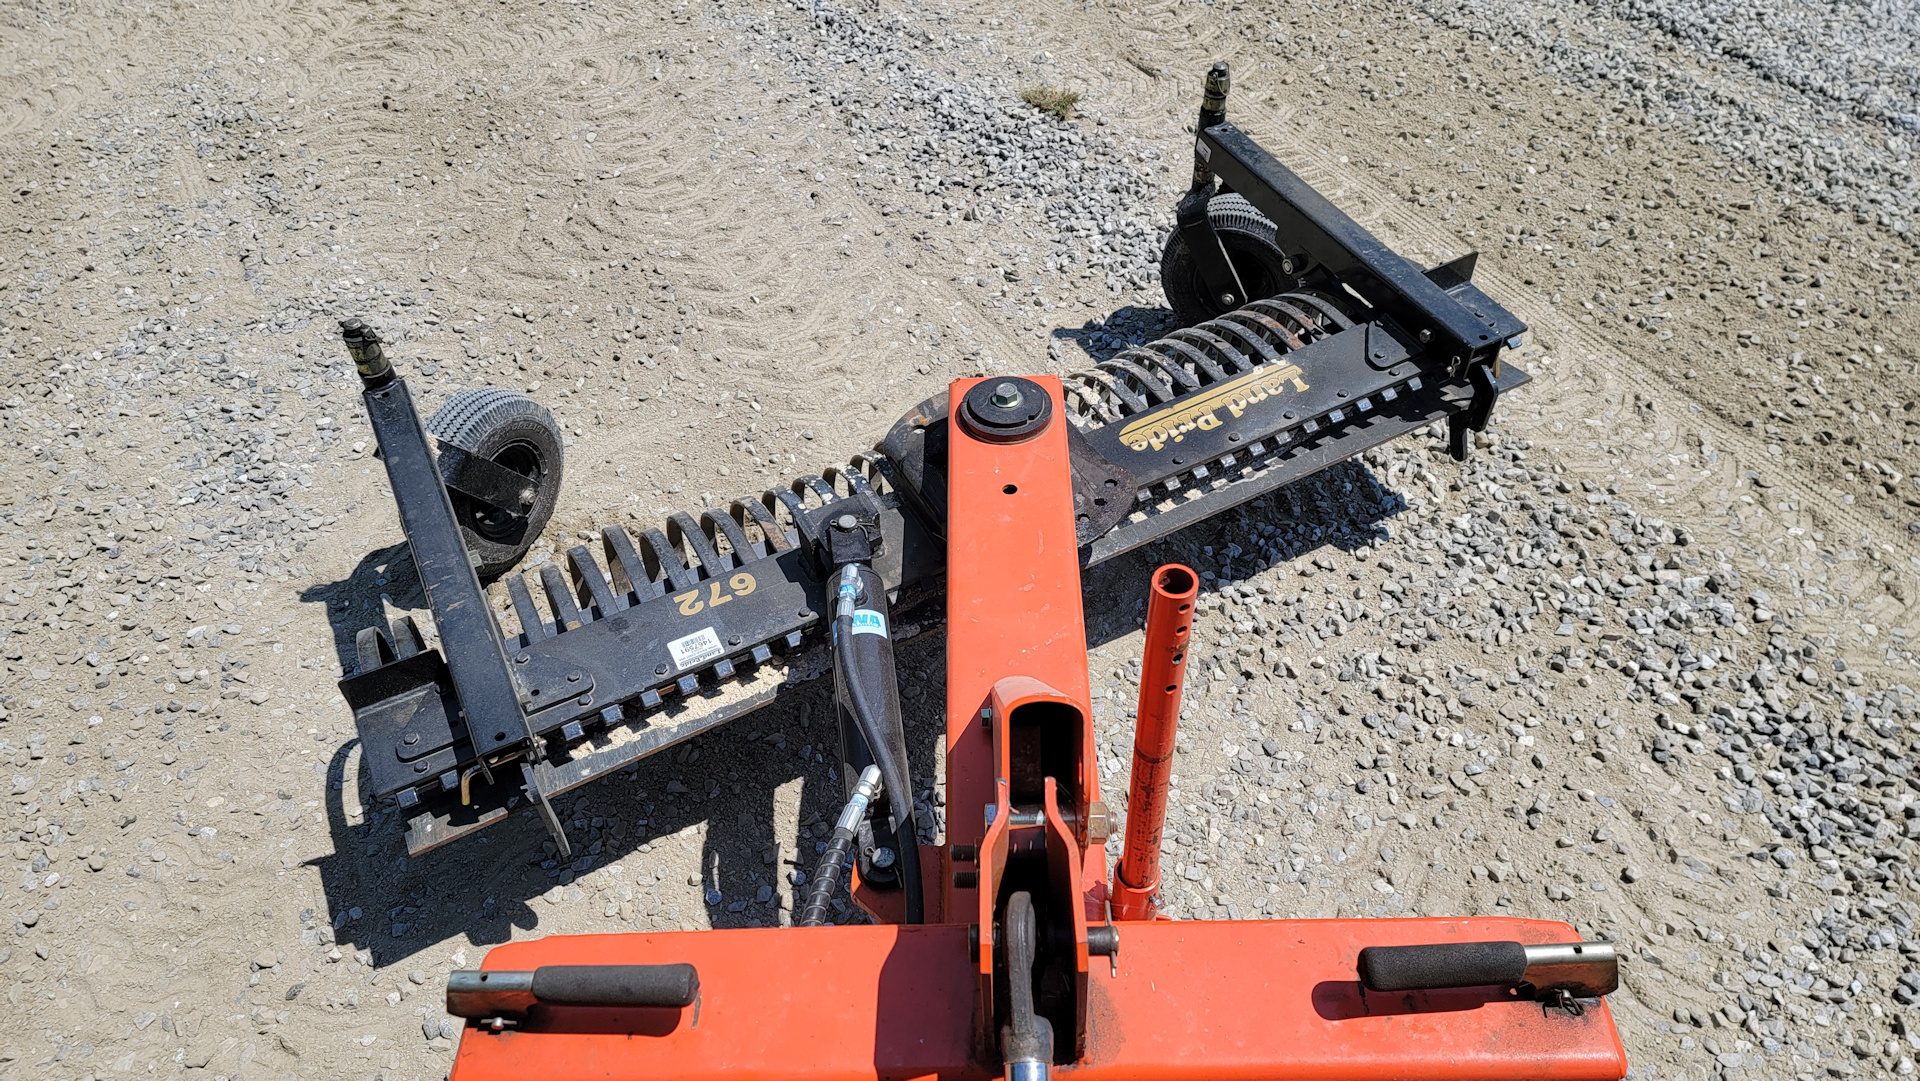
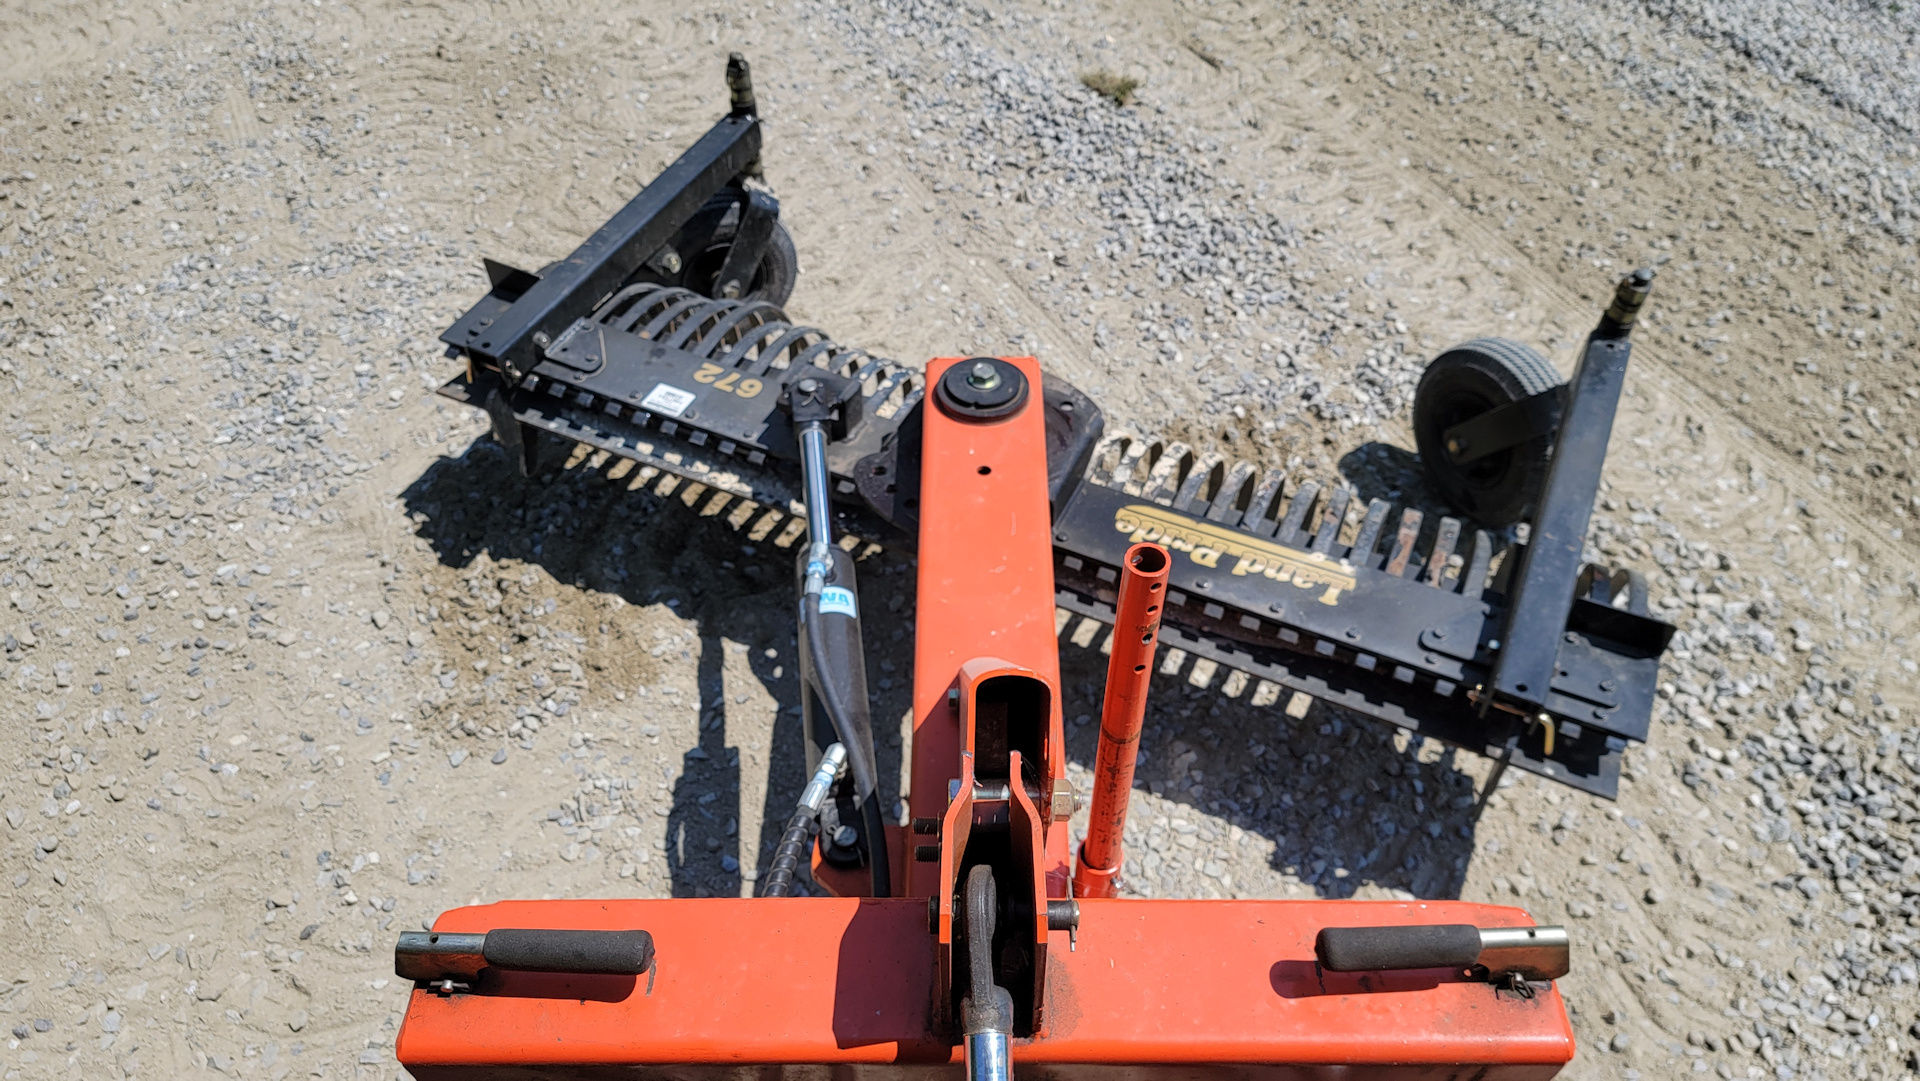
The "TOP" cylinder on the rake allows me to set the gauge wheels once and then on the fly adjust the rake angle to either dig or leave material and everything else in-between. Unfortunately I didn't turn the gauge wheels back in the pictures to really show the changes. When you are moving forward the wheels are always turned back.
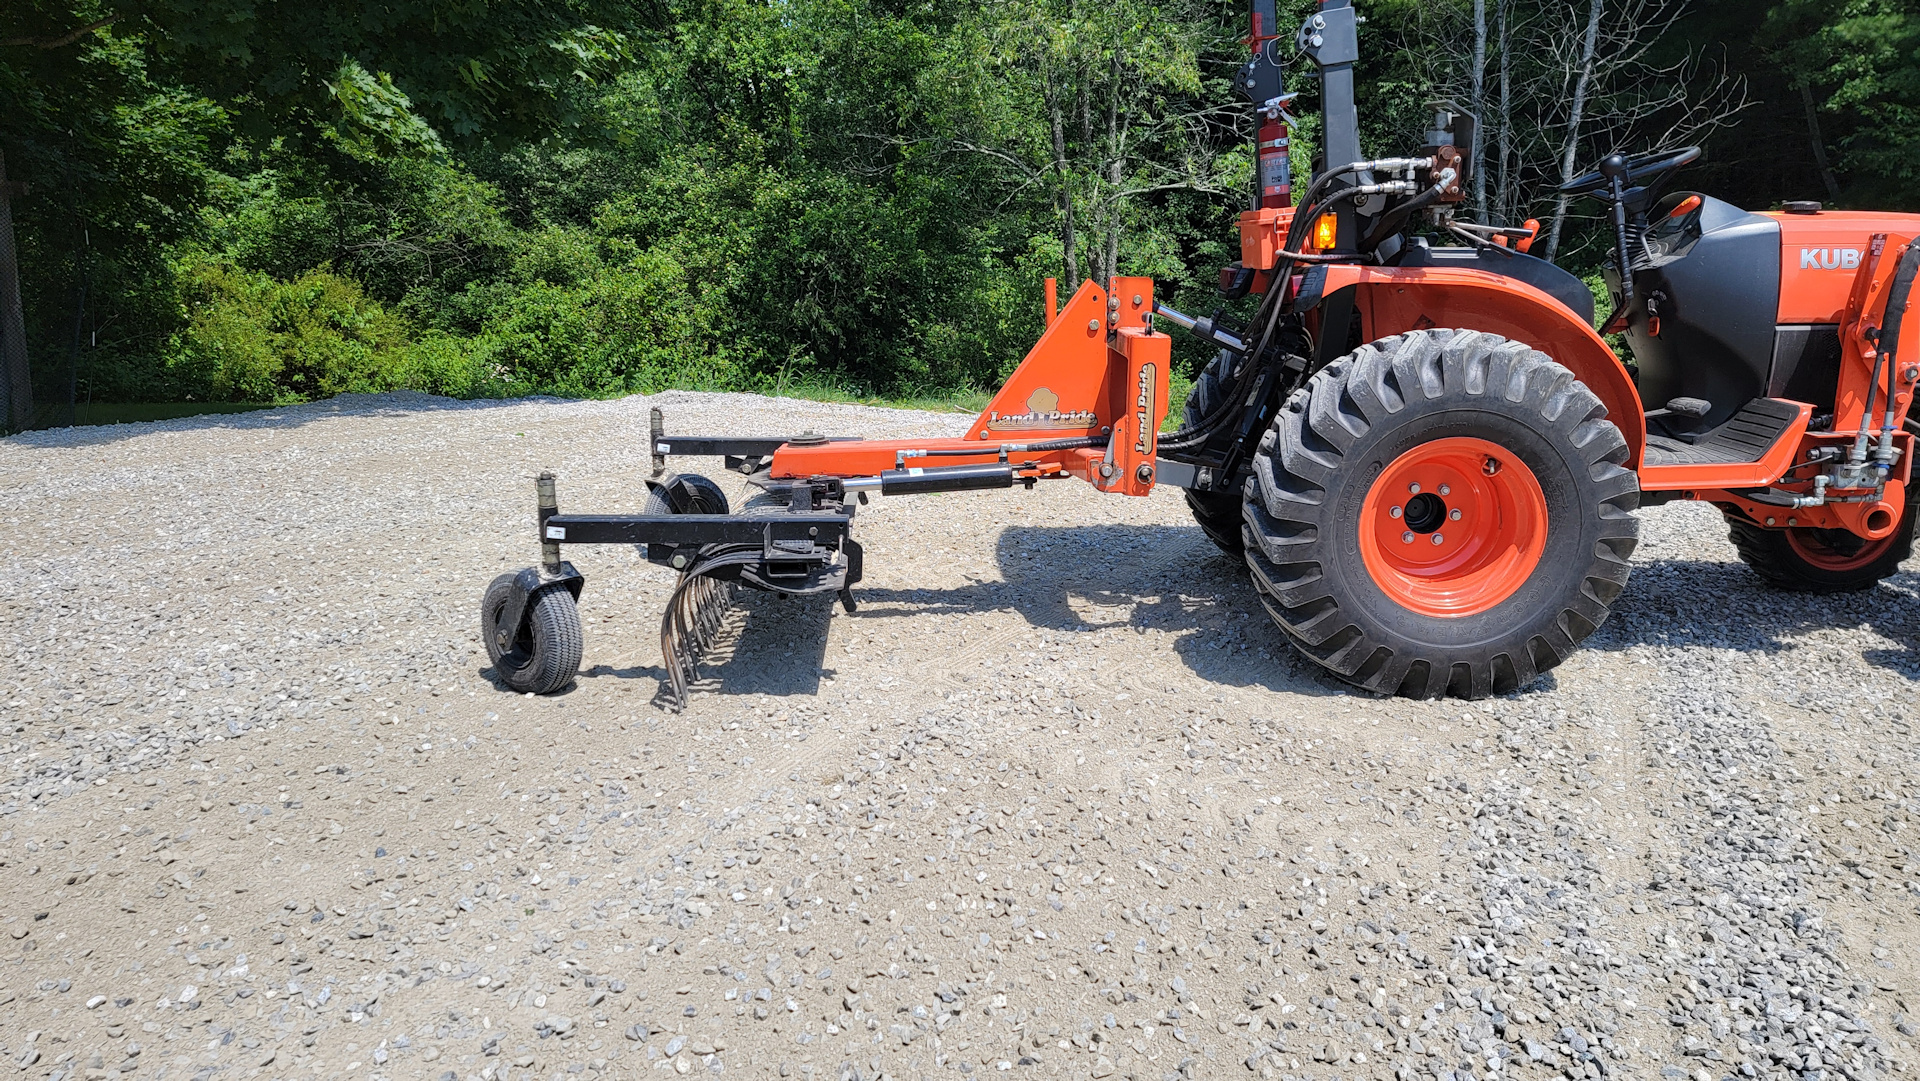
The wheels to the rake are pretty level in this shot and will basically just skim over the high spots and provide an even grade.
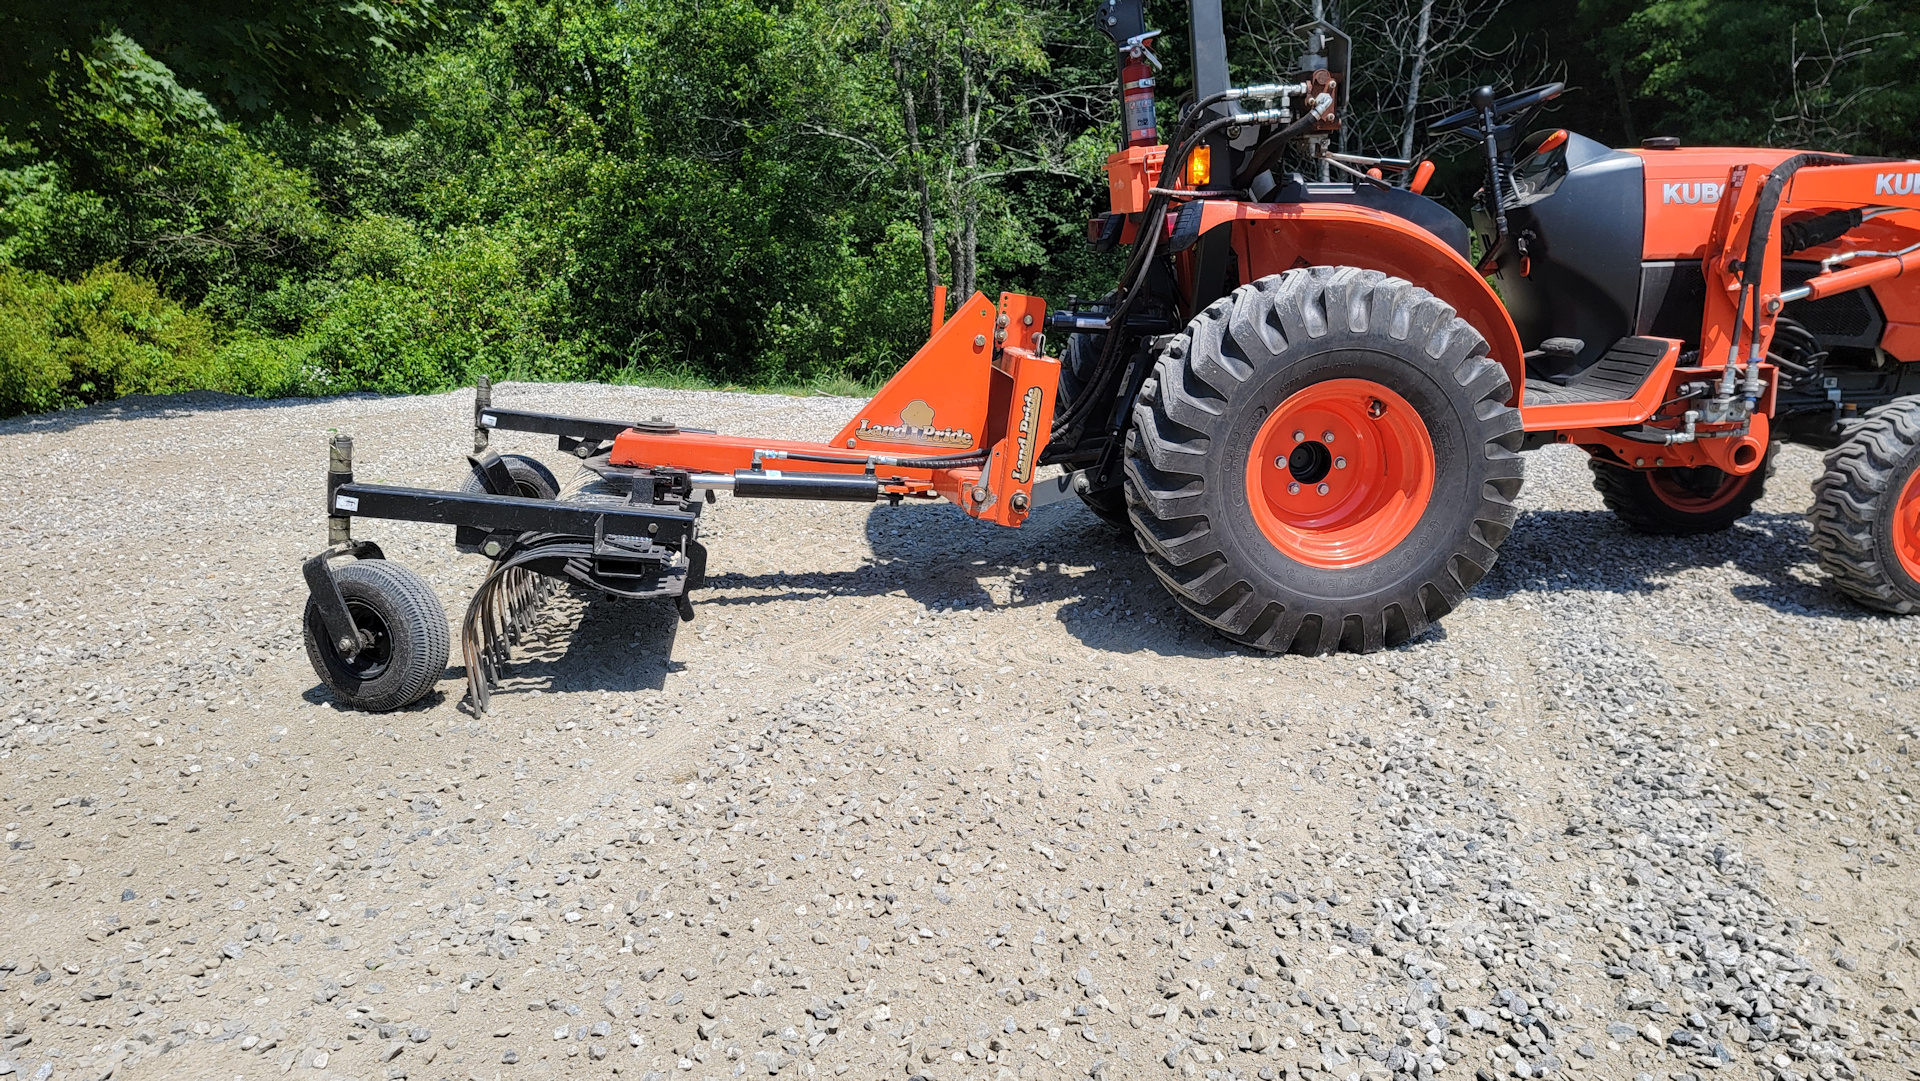
Here the wheels are basically floating and the rake has all the weight. This will be an aggressive raking that will carry material and leave windrows.
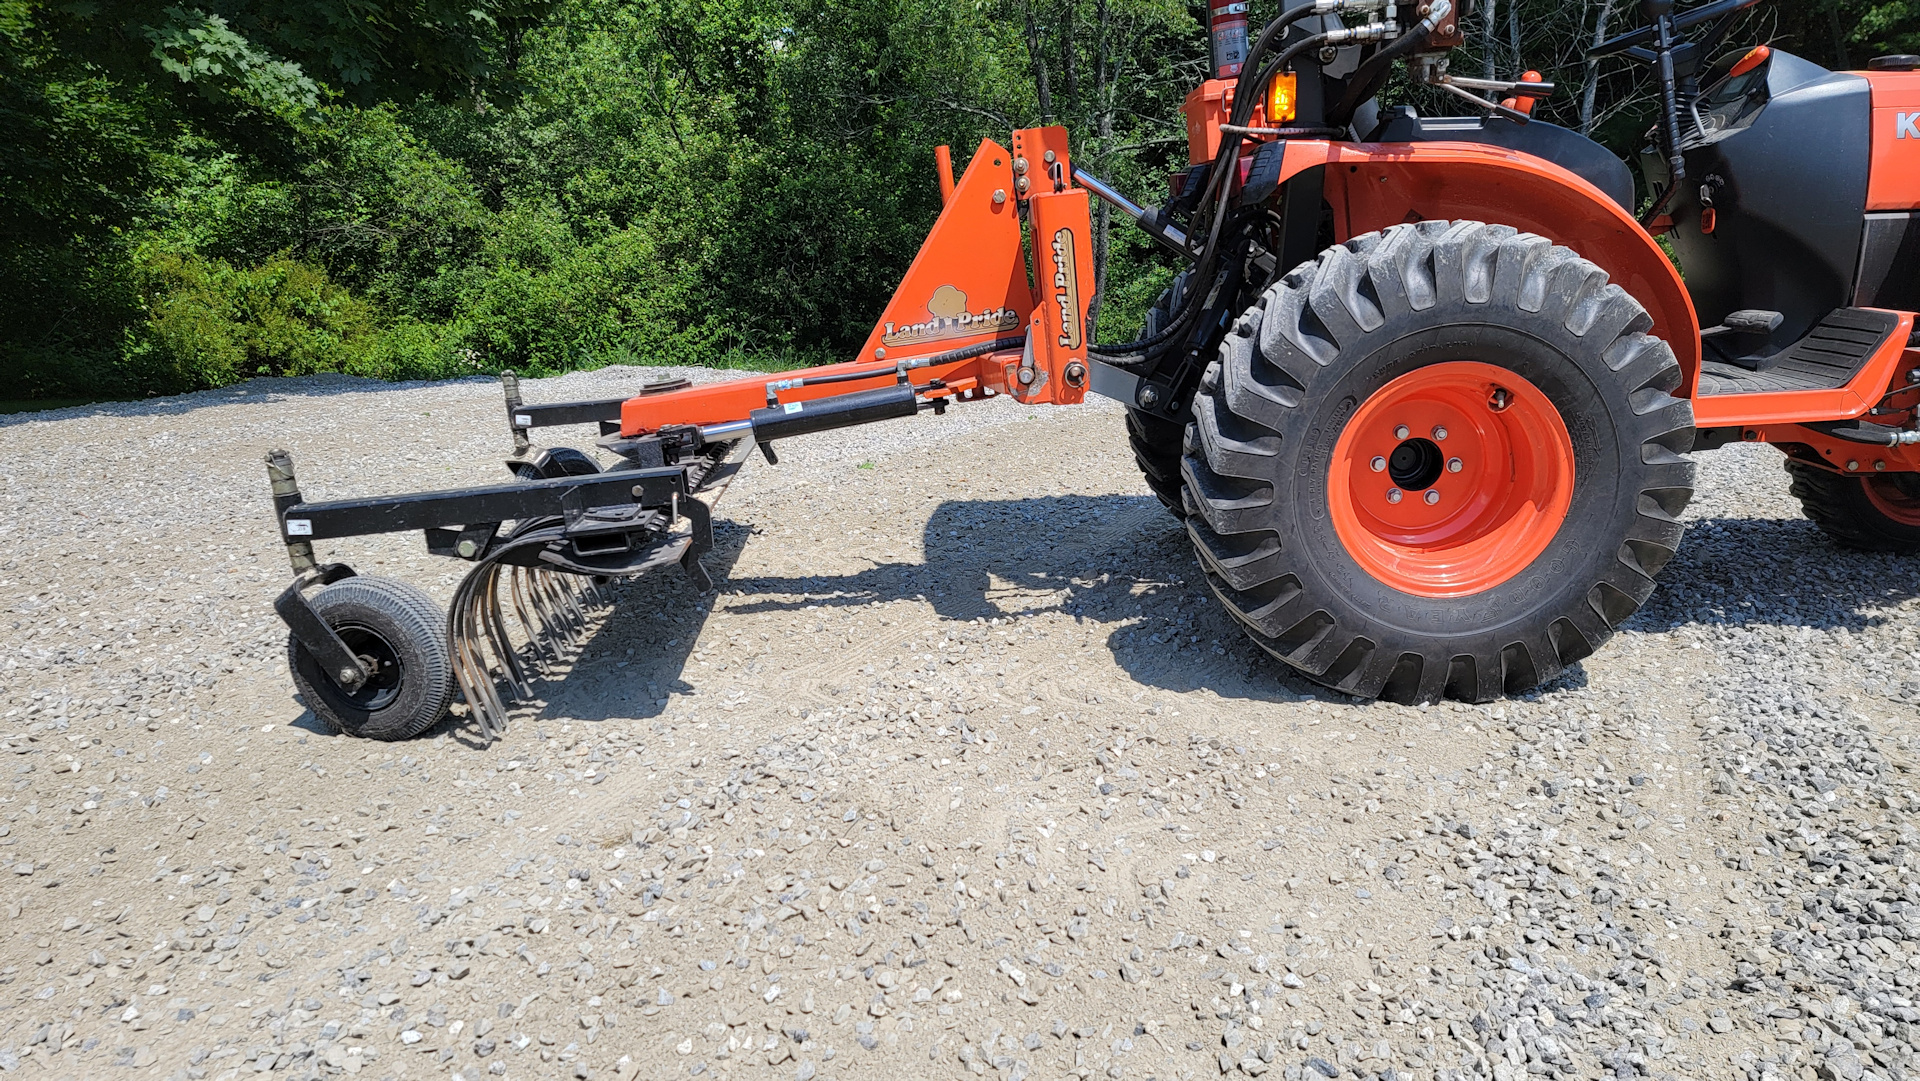
Here the wheels are taking all the weight, the rake isn't touching anymore and will leave material as you go. Very rarely do I need to change gauge wheel spacers.
Sure you can set this stuff manually (like the cut angle on a boxblade) but you can't do it on-the-fly. An easy example of the on-the-fly need is spreading top soil up over a septic system mound, or gravel over a hill in a driveway. With a manual set, I would leave material at the low spot at the beginning of the slope - then scalp the top, then leave material again at the low spot on the other side. Even doing flat work, if I want to "move" material, I could set it that way, but you generally want to "move form the high to the low etc., so I would "dig" on one side and "leave" on the other. The top cylinder is just a huge benefit and I use it all the time.
I set up the triple rear remotes as two spring center and one spring center/float detent. I usually keep the float on the tilt cylinder however, I also have quick connects to change them around when needed.
Up here the primary use on the tilt for me is crowning and sloping drives/roads. Pulling materials out of the ditch. Any odd angles I run into can usually be handled by the tilt, hillside stump grinding etc.
I use the 3rd set for power angle on my rake, power scarrifer teeth on my boxblade, power angle on my snow blade and the power offset on my flail mower.
While I find the "Top" cylinder to be the single most "effective" I find the power angle to be the single most "productive" of the set.
I added the cylinder to my rake. It was manually adjustable stock and it would work, but now when I get to the end of the row/driveway/road I just angle it the other way. This is a huge time saver. I use the PA all the time.
It would be good to add a bunch of T&T uses for others to get ideas from.
First off, Why Top and Tilt (T&T) and Power Angle?
1. Quality of job.
2. Speed of job.
3. Trailering (no implement clearance issues loading)
4. Obstacle avoidance or handling in tight spaces.
5. Quick Hitch heaven. Any implement/any angle - pick and go, never leave the seat. Even non-QH benefits when on an angle hooking up.
6. More reasons - let me have them you guys in the know.
I have graded driveways/roads and spread and graded materials for years now. I have been complimented on the work many times by people in the trade. Obviously I have to drag the stuff there and do it, and the years of practice have been fruitful, but at the end of the day, it is the equipment that does the work.
The quality and speed I achieve would not be possible without the Top and Tilt and Power Angle
This is why I will always suggest 3 rear remotes to start if you aren't sure. They will cover most of your needs now and in the future.
I have some pictures of my rake to illustrate. I also use all 3 on my boxblade I use them mowing fields, stump grinding etc. Every implement I have benefits from them in some way even if it is just loading on the trailer or attaching to the tractor.
The "TOP" cylinder on the rake allows me to set the gauge wheels once and then on the fly adjust the rake angle to either dig or leave material and everything else in-between. Unfortunately I didn't turn the gauge wheels back in the pictures to really show the changes. When you are moving forward the wheels are always turned back.
The wheels to the rake are pretty level in this shot and will basically just skim over the high spots and provide an even grade.
Here the wheels are basically floating and the rake has all the weight. This will be an aggressive raking that will carry material and leave windrows.
Here the wheels are taking all the weight, the rake isn't touching anymore and will leave material as you go. Very rarely do I need to change gauge wheel spacers.
Sure you can set this stuff manually (like the cut angle on a boxblade) but you can't do it on-the-fly. An easy example of the on-the-fly need is spreading top soil up over a septic system mound, or gravel over a hill in a driveway. With a manual set, I would leave material at the low spot at the beginning of the slope - then scalp the top, then leave material again at the low spot on the other side. Even doing flat work, if I want to "move" material, I could set it that way, but you generally want to "move form the high to the low etc., so I would "dig" on one side and "leave" on the other. The top cylinder is just a huge benefit and I use it all the time.
I set up the triple rear remotes as two spring center and one spring center/float detent. I usually keep the float on the tilt cylinder however, I also have quick connects to change them around when needed.
Up here the primary use on the tilt for me is crowning and sloping drives/roads. Pulling materials out of the ditch. Any odd angles I run into can usually be handled by the tilt, hillside stump grinding etc.
I use the 3rd set for power angle on my rake, power scarrifer teeth on my boxblade, power angle on my snow blade and the power offset on my flail mower.
While I find the "Top" cylinder to be the single most "effective" I find the power angle to be the single most "productive" of the set.
I added the cylinder to my rake. It was manually adjustable stock and it would work, but now when I get to the end of the row/driveway/road I just angle it the other way. This is a huge time saver. I use the PA all the time.
It would be good to add a bunch of T&T uses for others to get ideas from.


