Well, I've spent a lifetime (pun intended) getting it to this point.Yeah what lil foot said
Stump grinder build
- Thread starter Yooper
- Start date
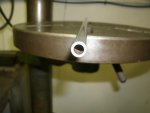
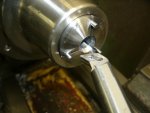
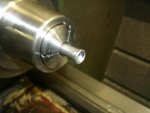
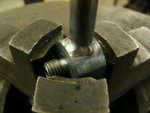
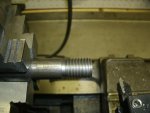
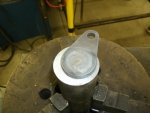
I bought the thickest wall 3/8" hydraulic tube to make the tig welding to the adapter easier. The bad part is, it cannot be flared using conventional tools. I found a video on youtube how a guy did it on his lathe, so I decided to give it a shot.
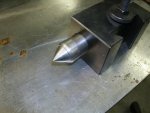
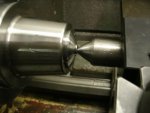
I got a machinable collet that I bored and reamed to clamp the tubing. Then I machined a 37* angle on the end to form the flare. I machined a lathe center to the same angle to act as the forming tool. Ran the lathe at about 200 rpm and did this practice tube using oil for lubricant.
Not too bad, but then I remembered having some white lead that the old timers used to use for lubricating the centers when turning on the lathe, and that is what is used for the actual tube. Turned out much better.
Attachments
-
31.1 KB Views: 554
-
46 KB Views: 593
-
66.5 KB Views: 546
-
41.8 KB Views: 559
-
40.8 KB Views: 565
bmblank
Well-known member
Equipment
2020 L3901HST, LA525 Loader, 66" Q/A Bucket, PFL2042 Forks, Meteor SB68PT Blower
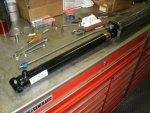
Had to put a slight bend in the tube to aim it back properly, and then tig welded it to the adapter. Looks like it will work. Just need to pressure test before assembly.
Attachments
-
44 KB Views: 591
-
85.4 KB Views: 564
All I can say is wow.This is way beyond anything I can do.Enjoying reading and seeing what your doing with this build.
I'm a semi retired metal fabricator/welder. That explains the water jetting and the forming.So are you a journeyman or just have a home shop?
Sent from my XT1254 using Tapatalk
Machining is a hobby for me. Ever since I turned a piece of metal on a lathe in high school, I've wanted one. So now I have three, plus a mill and a surface grinder and a hone and.....? Always keep my eyes and ears open for machine tools, and if it makes sense, I go for it. I'm lucky that I live in a part of the country that is a hot bed for machine tools.
I'm glad you're enjoying my posts. I'm flattered at how many views this thread has received. I enjoy seeing things being built, and I guess I'm not alone. 'How It's Made' on the Science Channel is my favorite show to watch. I suspect many of you share my same passion.All I can say is wow.This is way beyond anything I can do.Enjoying reading and seeing what your doing with this build.
I previously built a simple grapple loader (the grapple/rotator is a commercial unit) for loading trees into the chipper. Like you, it uses an PTO driven pump, external reservoir, external valves, etc. Was my first time working with hydraulics and definately a learning curve. A few things I can share:I'll be powering it with a separate pump driven by the PTO. I bought the pump and motor from Surplus Center and used their guide to match them up. It will have around a 30 gallon reservoir which I'm hoping will handle the heat issue. There will be a thermometer sight glass so it can be monitored.
I need to do some research as far as the valving goes. The double acting cylinders will operate with spool valves, but the motor and lock cylinders for the boom...I'm open for suggestions from those of you with more experience than me.
Getting the PTO pump mounted and stable proved more difficult than I expected. Assuming you are using the Prince unit, there is no shaft lock meaning the pump can come off the shaft without some other mechanism to secure it. I ultimately used a bar that secured to my drawbar with some flex to help with the load.
I only used a 5 gal reservoir, but my application is intermittant usage so could get away with the smaller one. Actually got a custom tank made of aluminum (wont rust) with the exact ports I wanted (and where I wanted). Is visible in the picture mounted to the fender.
I used the Prince SV sectional valve banks. 3 were 4-way double acting spring-center blocks (for the cylinders) and one was a 4-way motor spool spring-center for the grapple rotator (you want it to rotate in neutral). The SV sectional is nice because you can take it apart, re-arrange in whatever order you like, add more, etc.
I used ORB to JIC on the valves and JIC fitting everywhere else. Avoided NPT like the plague. You can put on and take off JIC multiple times without any leaking or issue.
Most hydraulic parts were purchased from Surplus Center or Discount Hydraulic Hose (hoses are way cheaper at Surplus Center if they have the length you need). Good luck with your build-- very interested to watch your progress.
Attachments
-
98 KB Views: 593
Thanks Vraz! Good Stuff!
Yes, I got a Prince pump and yes, I noticed there was no way to retain it to the shaft. I glanced at their instruction sheet and see they recommend a torque arm or something like that. If you could sometime, please post a picture of how you mounted yours.
Thanks for the valving info. Will be needing to get that worked into the plan soon.
Nice set up you have there for your grapple. That looks really handy for firewood. Real clean installation!
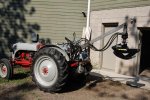
Having just gotten my new B2601 yesterday, I am retiring the 8N from rotary cutter duty which means I can remount the grapple loader. (Sadly, no firewood-- small diameter pine has little value so this setup is purely for putting it through chipper.)Yes, I got a Prince pump and yes, I noticed there was no way to retain it to the shaft. I glanced at their instruction sheet and see they recommend a torque arm or something like that. If you could sometime, please post a picture of how you mounted yours.
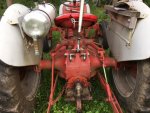
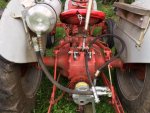
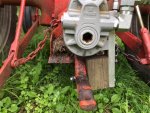
Three pictures to show what I did:
#1- 8N without anything attached, but you can see the hyd tank clearly.
#2- PTO pump attached, large inlet hose (only NPT on the setup), normal outlet with quick disconnect
#3- How it is mounted
Gravity feed from the tank to the pump via larger diameter hose worked very well for me. There is a full-port ball valve for shutting off the oil for disconnecting. (You want to think about how to remove your work of art as guessing your tractor wil not be dedicated to this one task.) The quick disconnect connects to an inlet on the valve bank (pictures next week).
In terms of mounting the PTO pump, it is a torque arm setup using the drawbar as the fixed point. The block of wood is both a spacer and has a little give to it. Not a great picture, but there is a chain that mounts to the the right lift arm limit chain. That prevents the PTO pump from walking off the shaft should it have that inclination. In the Prince kit, they use a single chain to both prevent the pump from spinning (my arm + wood block) and keep the pump on the shaft (my separate chain).
The pump works very well for my application. Will post a video at some point, but its really easy to pick up a pine, drop it onto the chipper chute, reposition back, grab it midway, push the tree into the chipper and then open the grapple before it gets pulled in by the chipper hydraulic feed. Dangerous as that sounds, you have me beat. I did combat robotics back in the day and the forces imparted by the spinners (self propelled stump grinders of one type or another) were frlghtening.
Nah-- we just spent our time in different places. Everyone brings different skills and knowledge and lots of stuff looks like magic until you know how its done. ;-)skeets>> See when you guys do stuff like this, to me at least it is like magic
Attachments
-
51.2 KB Views: 626
-
50.2 KB Views: 570
-
63.5 KB Views: 691
Wow! Really nice of you to post such a detailed reply.
You touched on something that I've got in mind for this build, and that is to try and make it easily removable. It looks like quick disconnects are going to be my friends on this one. I need to get the tractor in the shop to start measuring it for the next components.
That is the same pump that I have. Is that a relief valve on the right side in the second picture?
My pump is the Prince HC-PTO-7A (7 gpm). As far as I know, none of the PTO pumps have a relief valve built in.That is the same pump that I have. Is that a relief valve on the right side in the second picture?
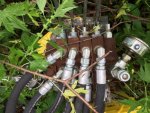
The relief valve is part of the inlet cover of the sectional valve body. That is what makes the SV sectional body nice-- you pick an inlet (with appropriate relief valve), collection of work sections (for the cylinders, motors, etc) and an outlet section. Bolt them all together and you have all the control bits required. They also make "port relief" work sections which includes per-port relief. Believe this is for cases where a subset of hydraulic circuits have much lower max PSI ratings than others. In that case, you would set the inlet relief to the highest any circuit needed (typically 2000 PSI) and then include a port-relief work valve if you had one circuit that only handle 1000 PSI (to relieve that one circuit). My circuits all handle 2000 PSI so I used exclusively work sections.
Attached a picture of the valve body (excuse the weeds). On the right side you see the quick-disconnect where the output from the pump connects. I included a tee with a pressure gauge so to watch operating pressure. The hex looking screw coming off the inlet block is the pressure relief adjustment. Though its difficult to see, there is a filter connected to the output section with a hose that returns to the tank.
If you have not seen it, here is the documentation for the SV sectional valves from Prince: http://www.princehyd.com/Portals/0/valves/ValvesSV.pdf
Attachments
-
63.2 KB Views: 513
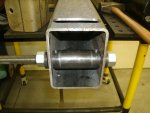
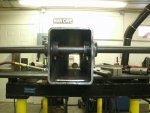
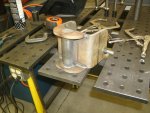
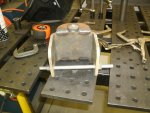
Working on the pivot end of the outer boom. Made up the 'bearings' out of 1-1/4" steel round stock and also made a spacer to allow for clearance of the extension cylinder. The cylinder and pivot will be using a common pin, made out of 4140 x .750.
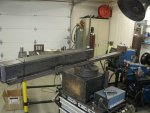
I'm showing my little positioner that I use for welding rounds. Made a holder out of some rectangular tube to rest the boom on to weld. A little duct tape and a large cut off for a counter balance.
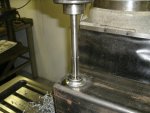
Guess you can tell I get along with reamers quite well. Install the grease fittings and that should be that.
Attachments
-
60.7 KB Views: 489
-
69.4 KB Views: 491
-
68.3 KB Views: 482
-
61.8 KB Views: 473
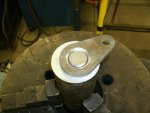
Made the weldment for boom swivel. Next will be getting it on the milling machine to drill and ream the pin bore and also true up the surfaces where it will be pinned to the 3 PH.
Attachments
-
77.1 KB Views: 449
-
72.8 KB Views: 446
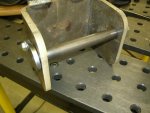
Shop time is going to be hard to come by for the next several weeks, but I managed a couple of hours yesterday. Enough time to make the horizontal pin for the boom swivel. I threaded the end because I left an 1/8" on each side for a thrust washer, and as it wears this will be able to take up the slack with a lock nut. Tig welded the pin anchor and located and drilled/tapped the hole on the swivel yoke.
Original plan was to use bronze washers, but I might try some sort of plastic. Anybody have any experience with what kind? Teflon, UHMW.......?
Original plan was to use bronze washers, but I might try some sort of plastic. Anybody have any experience with what kind? Teflon, UHMW.......?
Attachments
-
48.4 KB Views: 444
-
50.2 KB Views: 415
-
49.3 KB Views: 433
-
64.4 KB Views: 450
bmblank
Well-known member
Equipment
2020 L3901HST, LA525 Loader, 66" Q/A Bucket, PFL2042 Forks, Meteor SB68PT Blower
Plastics aren't really up for any sort of load. Since you're going as far as you are with this I would avoid the plastic and probably just go with bronze. If the friction concerns you, to can get oil impregnated bronze. I think plastic would do your project a disservice. Also, any plastic that would come close to working would probably be allot more expensive.
Sent from my XT1254 using Tapatalk
Sent from my XT1254 using Tapatalk
I second this. If not using actual bearings, then I tend to use oil-impregnated bronze bushings or washers where they are under load. I typically purchase from McMaster-Carr (mcmaster.com). Cannot beat the selection and technical detail, though pricier than most (though not typically an issue foe a few bushings or similar). Great to see the continuing progress.If the friction concerns you, to can get oil impregnated bronze.
bmblank
Well-known member
Equipment
2020 L3901HST, LA525 Loader, 66" Q/A Bucket, PFL2042 Forks, Meteor SB68PT Blower
I think I've actually seen graphite impregnated as well. That may be a better choice to prevent buildup. Sand/dirt/dust/debris tends to attach itself to oily things. Not sure if the bronze bushings are oily enough for that.
Sent from my XT1254 using Tapatalk
Sent from my XT1254 using Tapatalk


