Fixing hole in side of block

joesmith123

Active member

Equipment
L295DT, BX1500
Mar 18, 2023
563
159
43
earth
Sorry Joe, but that wasn't a funny!
yes yes, i am in agreement, i knew it was big mistake, even @dragfan66 i think said it about 30 pages ago, it make the statement true:

"if you put it back together without full intent on sealing, 100% chance of multiple leak"

let me take picture of the oil level

20241103_141326.jpg


yes, oil level from 15-20 hours break in engine, oil level was at full mark one month ago when break in start, i show you the oil leak:

20241103_141358.jpg


Yes, rear main leak, going into bell housing, plan to fix:

talk to dinosaur about splitting tractor, rig up those "pull away" ratcheting, "tag a long" apparatus

come up with low cost setup that would split tractor safely using maybe some kind of cart that each heavy component,

fall onto the cart, and I have pullers pulling it in one direction, then get in there and do the surgery, no touch of front of engine (radiator, head, everything pretty much)

The problem is I have jobs waiting and need the machine, run it for few months, zero chance i can afford to fix that leak now..

20241103_140728.jpg


yes, here is shop layout now, plan:

move everything away not being used, bring 3 pallet for the area of body/wire wheel/clean/paint

20241103_142807.jpg


20241103_142841.jpg


20241103_142913.jpg


I try to capture all the parts that go back onto the tractor, all of them need:

gather them and bring them to the pallet setup, instantly hit them air/diesel/absrasive

simply: clean shop floor, bring pallets, bring all body parts, do body work while thinking about the start/glowplug control, and rig up big wire and big battery, and see if alternator can charge


yes, full blown cold start: only thing i did before video: glowplug for 2 minute, and crank 20 seconds no compression to prime line, instant start

20241103_160740.jpg


yes, let the engine keep idle, bring pallet close to work area, bring all part to finish tractor assembly

20241103_160800.jpg


damage to factory hood: ripped out front bracket metal, both side

20241103_160811.jpg


tires are better on tractor with more hour, gonna use those, more parts ready for clean/hammer/paint

20241103_160726.jpg


The seat: its not that bad, i would like to salvage and save $, the only problem is it cut skin from the sharp plastic

maybe someone know how to how cover it with something, fasten it with washers with self tap in...

for now: let engine idle, start clean everything with air/diesel/abrasive/file/everything

hammer things back into place, consider the plan to weld front hood tore connection area, also

can make progress on battery/holder/air filter/alternator charging/glow plug and start controls


idle for 2 hour, 40 psi oil pressure steady, not shutting off, idle adjustment could go in a tiny bit,

also show you: start clean all body part with compress air and nice chisel, and

the weld job needed for hood damage

now: get clean bucket diesel, get nice big brush, brush diesel everything, hit with front face wire wheel, get more solvent, hit with solvent, hit with air


yes, in this clip, after she idle 3 hour, never shut off, I was doing cleaning body

oil pressure getting below 40 and she not shutting off, after video, she choked out from too little diesel

then, i make adjustment, tiny bit i turn that adjustment inward, get her running, now less see saw


caught on camera is when engine sink into that low and even pace

it has a slight whisle/chooch when it is in that state

15-20 hour break in, and adjusted the idle maybe 25 time so far
 
Last edited:

Hugo Habicht

Active member

Equipment
G1900
Jun 24, 2024
97
111
33
Ireland
Hello Joe,

but you read the part from North Idaho Wolfman about the clutch, did you? How do you want to do a job with this tractor with a slipping clutch I wonder?

Kind regards,
Hugo
 
  • Like
Reactions: 1 users

joesmith123

Active member

Equipment
L295DT, BX1500
Mar 18, 2023
563
159
43
earth
Yes

20241105_080749.jpg


while waiting paint to arrive, maybe it is not THAT much work to split tractor, and fix rear main leak

I'm thinking: put wheels on rear of tractor, put blocks under engine and front axle assembly, and put cart/dolley of some kind under the front transmission, then

disconnect the two entities, drop the transmission onto the dolley, roll back the entire rear of tractor away from engine

then get in there and seal properly

So far from break in period, oil level showing half on the dip stick, its definitely enough to bug me...

if that leak get fix, there would zero major leak, only tiny leak on gearcase where i tried the jb weld

It would much more work to fix later with everything in the way, arguably now would be the best time to fix it

After I install hood, all wiring, loader, etc

it would way much work to split tractor

yes, I wait on yalls words while getting the orange parts to paint

Screenshot_20241105_085015_Chrome.jpg


yes, here is the paint on the way

oil base enamel, $75 as opposed to $150 plus shipping for genuine kubota paint from messick

Hopefully it match

I really think that fixing this leak is a way bigger deal in my head than it is just to go ahead and do it

just like all the other problems/holds up in this thread

I put more energy and time worrying about it than the actual energy it take to fix it

the exact things that connect engine to tractor: throttle, diesel line, tranmisssion line, steering link,

if I disconnect those 4 things, then i can take the bolts off bell housing and entire engine and front axle come out...

yes, I am angling to fix it this week while doing body work on the orange panels, welding the ripped hood brackets, small weld and hammering of fenders...

now: keep cleaning body and getting it ready for paint, start imaging how you are gonna split tractor with that small cart idea, and the ratcheting puller, or even a winch that i find used for low cost, maybe do the weld on the hood

yes, we go on body restoration detour while imaging splitting tractor and fixing rear main leak

I think it would be way more than a quart a month since,

While running it leak the most, and if machine running for 14 hours a day for long time, it would nee a quart every few days, right?

and if it leak this much idling, then imagine how much it gonna leak when running full throttle, high oil pressure, big heat, and machine is trying to carve earth?

Meaning, it would leak like crazy while it is in actual work condition as oppose to a baby idle with low oil pressure...

And i remember how much energy it take me to take off and put on the front loader, and I imagine it put together and having that leak,

and at that point, I would say, "it would be 4 days straight of dissassembly to fix that leak, i should have fix it when yall told me"

(which is at this point)

now: while narrative marinate in our mind, clear out everything off the ground until only what work on is visible to you (me)

clear out everything but all panels needing orange paint, continue to work on those panels and get them ready for perfect paint,

and imagine the splitting of tractor using the tag along pulley on a cart/other end on block idea

yes, another huge helpful talent would be:

I disconnect the engine and leave front axle and radiator and everything connected, I do the surgery on the big leak, then

somehow get the engine running disconnected from the tractor, get it up to temperature, and make sure that leak no longer an issue

possible problem: hydrualic line would not be connected, maybe that doest matter?

yes, let the narrative marinate while doing actual task that need to be done

20241105_101448.jpg


tears in the hood: hammer it back into place using 2x4s, set it up for weld

20241105_101500.jpg


fender damage, not much, but hammer fender back into proper shape

20241105_101549.jpg


shop layout: clear everything not dealing with current task, get blocks ready to put under engine and front axle, having trouble reassembling front bracket/air holder, look at diagram

20241105_101859.jpg


icing on the cake: somehow I would like to emulate the factory decals:

blue strip on hood both side double traction l295dt

blue kubota strip on cover of diesel tank, white font blue background

somehow: use paint and maybe some decal to make that look factory

20241105_102920.jpg


steering wheel restore: i point to gaps in steering wheel,

plan: mix jb weld and fill in all gaps using brush, let them cure somewhat, come in with grinder and sandpaper to smooth them out

both steering wheel and seat need restore

20241105_123131.jpg


wiring wheeling inside of hood, prop it up get it ready to hammer on dents, get them into somewhat proper shape, maybe take off grill/headlight assembly, then

do the weld using what you have on both side of ripped hood bracket

20241105_132834.jpg


Take off grill assembly, hammer areas all over back into place

20241105_143622.jpg


hammer hood back into shape, get to areas to meet where you will weld

clean areas that rip, put weld on each one
 
Last edited:
  • Like
Reactions: 1 users

joesmith123

Active member

Equipment
L295DT, BX1500
Mar 18, 2023
563
159
43
earth
Weld hood, continue get body ready for paint, prepare to split tractor

20241105_145944.jpg


weld areas clean, bring torch, flux coated bronze, igniter, dark glasses, open acetylene then oxygen

now: put pressure on areas to come together, successfully bind the 2 areas

20241105_160522.jpg


20241105_160532.jpg


20241105_160541.jpg


20241105_160549.jpg


got bucket of water close by, used what i learn from the iron skillet, tried to mate the two metal

went through 2 and half flux coated bronze rod

let it cool, see if it hold, hit it again if needed

also, hammer on fenders and do the same weld on torn metal

20241105_165442.jpg


flip hood on its side, use gravity to form puddle inside crevice, right hand pointing flame down, left hand pushing bronze into intended areas

20241105_165507.jpg


hammer on fender, shape back to original structure, do same weld on the tear

20241105_171753.jpg


hammer all over fender, get back to shape, brush solvent area getting weld, hit with compress air, use gravity to make puddle on the tear

20241105_172954.jpg


got puddle inside crevice, big heat and rod pointing sideway, aim at rod melt it into the crevice

now: grind down all the weld, make sure they hold good enough
 
Last edited:

L35

Well-known member

Equipment
L35/TL720/BT900/York rake/Valby chipper
Jun 13, 2010
524
429
63
CT
If you squint, it’s mint. Keep that progress rolling joe.
 
  • Haha
Reactions: 1 user

joesmith123

Active member

Equipment
L295DT, BX1500
Mar 18, 2023
563
159
43
earth
Weld holding tight, split tractor in depth

20241106_084748.jpg


used 4 rod bronze, grind down, then slap jb weld to fill gap

20241106_084802.jpg


20241106_084810.jpg


all the welds holding tight

20241106_084827.jpg


splitting tractor plan:

secure under front axle and engine, do not block the propeller shaft

disconnect: throttle, diesel, 2 transmission line, exhaust, steering, front propeller/axle shaft, then

place the cart (I imagine it is on four wheel) under the front of transmission, unbolt the bell housing (8 bolts), then

the front of transmission drop on the cart, engine and front axle stay in their position since blocks are holding them

put rear wheels on tractor, then roll back the transmission half of tractor away from the engine/front axle half of the tractor

please give tips if you can, and let me know what that cart is called or how tog get one cheap

someone in this thread has mentioned that "tag a long", manual winch tool that I been meaning to get

then I can put pickup truck behind tractor, and attach that tag a long, ratchet them pulling tractor away from engine, then

when I want to push tractor and engine back together: run the manual winch the opposite direction, hook it up the trees in front of shop,

then tighten it and it would push tractor forward into the engine and they would mate

easier than with using bx1500 bucket

task to do now: get blocks under front axle and engine, disconnect all of those connections between engine and tractor, then later

figure out the cart/tag a long purchase

my mind eye say: this talent is one of the most useful, where you can be a sniper and get to problems without too much dissassembly,

you quickly can separate machine get to the solution safely and low cost, and add big value to your usefulness

20241106_104541.jpg


20241106_104601.jpg


Lift front of tractor, place block under front wheel hub

remove: loader brackets both side, diesel, throttle, hydraulic filter, hydraulic line, entire exhaust, steering link,

plug transmission line, next:

only thing left to remove is propeller/front axle shaft, then:

put blocks under engine, then at that point:

take off all bolts but the two stud holding engine, then maybe:

put rear wheels on, then it would need that cart/tag a long winch apparatus

now: take off propeller, but blocks under engine

20241106_113417.jpg


cant take off propeller shaft, I remember being able to take it off before at this point, plan:

slide the cover all the way down, get really good grip on the axle shaft, hit hard with sledgehammer

20241106_121022.jpg


remove propeller and shaft, had to hit front part with torch and apply diesel with brush multiple time

ton of grip on shaft, slam hard with sledgehammer

was a bit nervous thinking, "did I have to take off entire front axle to take off shaft?" nope, now:

fully ready to separate, ready to:

put block structure under oil pan, put rear wheels on, do something like @D2Cat suggest:

have jack with wheels supporting front of transmission on a flat surface, separate engine and tractor, roll back rear part of tractor away from engine...

i really do want that cart i imagine, the only jack I have has tiny wheel, gets stuck on a pebble, I sit and think

task to do while thinking: put rear wheels on, get it off rear blocks, take off last transmission line, build structure under engine

also now good time to take oil out of engine while planning

20241106_135937.jpg


drain out break in oil, looked perfect, remove last hydraulic line, lift up rear of tractor, one wheel filled with water, took out valve,

let it sit sideway pushed out 6 or 7 gallon water, put valves on, install wheels, put some air in them, got rid of rear block structure

now: put structure under engine, start to unbolt bell housing, then

more and more i think I can make it happen with what I have, that cheap jack on those tiny wheel, I setup lumber that it can roll on,

it doesnt have to go back that far, just enough to take out flywheel/clutch...
 
Last edited:
  • Like
Reactions: 1 user

D2Cat

Well-known member
Lifetime Member

Equipment
L305DT, B7100HST, TG1860, TG1860D, L4240
Mar 27, 2014
13,913
5,743
113
40 miles south of Kansas City
Since you have no tires/wheels to support the tractor you need cribbing under the rear housing (you could install the tires for this) , then more of the same under the front of the transmission. This will support the rear of the tractor when you unbolt the engine.

Then place some plywood under the front of the tractor and install the front tires. Put floor jack under back of engine (on the plywood). Separate the engine/transmission and pull the floor jack forward to separate. Repair seal.
 
  • Like
  • Love
Reactions: 2 users

hagrid

Well-known member
Lifetime Member

Equipment
K1600GTL, ZX-14R
Jun 11, 2018
948
1,253
93
Pittsburgh
Get the metal hotter before you apply the filler rod so the filler will flow in rather that lump up on the surface.


Or there's contaminants aplenty.
 
  • Like
  • Love
Reactions: 4 users

joesmith123

Active member

Equipment
L295DT, BX1500
Mar 18, 2023
563
159
43
earth
split tractor setup

20241107_102812.jpg


got moving dolly with 4 wheel, can roll on dirt, then place cheap jack onto it and push up on transmission, all bolts removed, pull on tractor, engine should fall on block structure

20241107_102837.jpg


this is the tool i reference, its called winch puller, i see others use it to do this nature work

move stuff out of way, bring bx1500, connect winch puller to bx, ratchet tool, pull tractor away from engine

20241107_111652.jpg


Almost separated, but a bit nervous that engine might want to flop forward, might put more support under front axle

20241107_113638.jpg


20241107_113709.jpg


separate 2 entity


Video showing you the split moment

20241107_152015.jpg


attach rope from bx to the dolley, took off trailer winch off of tractor

pull on dolley, rolls easy and stable, and straight

20241107_152235.jpg


the engine: now get inside and do the surgery, while I do that -

Can we run engine exactly the way it is shown in this picture? maybe:

put a strap on it hold it tight, rig up diesel to it, run it for hours and hours until all leak fix, then recouple entire tractor assembly

My instinct say it is not dangerous, but I listen to yalls input

20241107_160042.jpg


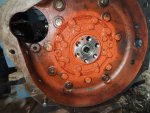
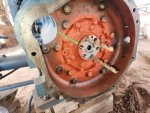
yes, take off starter, lightly tap flywheel, opposite side put crowbar, slowly work flywheel until it fall on the dirt

20241107_160028.jpg


The culprit area: from what I can tell, the leak can be fix from at this point, no need for more dissassembly

There is a new kubota seal somewhere, I'll find it,

Take out the seal: clean area, apply gasket maker, install new seal, back into position, then gasket maker on top all in one shot so it form one piece, let it cure a day

edit: although no other leak visible outside of the seal, you are in it this deep, you might as well:

continue dis assembly, seal up entire area, i try to take out the center area and leave the bell housing attach to engine, seal up anything that can leak...
 
Last edited:
  • Like
Reactions: 1 users

D2Cat

Well-known member
Lifetime Member

Equipment
L305DT, B7100HST, TG1860, TG1860D, L4240
Mar 27, 2014
13,913
5,743
113
40 miles south of Kansas City
There will be resistance when the tractor is at the point of separation, be prepared for it. If you plan on dragging the rear backwards the front need to be anchored to something solid so it does not fall off the blocks.

Dragging that dolly with a jack on it may be a problem in sand because the tires are not on something solid and their difference in elevation will cause the parts to not release from each other.

If this configuration allows you to separate the engine/rear, how will you reverse the process?
 
  • Like
Reactions: 1 user

joesmith123

Active member

Equipment
L295DT, BX1500
Mar 18, 2023
563
159
43
earth
Expose leak

20241107_163909.jpg


on the cover are two bolts that you screw in and it pushes it out, take off ccover

do comprehensive operation you surgically seal, with real intent

hammer out the seal cover, clean it perfectly, put bead of gasket maker on cover, hammer in new japanese seal, then

clean engine and get it ready for sealing: use brush to apply nice gasket maker on all potential leak area, then put cover on, imagining

that your work is not in vain, that it will seal properly

20241107_171457.jpg


found genuine seal, heat up old seal, use clamp like last time to push out

20241107_173449.jpg


surgical main seal operation: fully clean surface, gasket maker, push it in snug


20241107_175600.jpg


Fully clean surface ready to seal

20241107_180030.jpg


clean outer gasket, use index finger to put on perfectly

20241107_180035.jpg


inner gasket, same

20241107_181406.jpg


put both gasket on, line up with bolt hole

20241107_181838.jpg


the cover: glob on using finger generously

20241107_191934.jpg


put cover on, tighten all bolt, bend in bolt keeper, then

use brush, finger, and direct application, stab area with firm brush push into all crevice, muttering to yourself,

"no way it is gonna leak, crazy to think that other method had any chance of not leaking"

put generous amount testing theory: just put a bunch on it and eliminate all possibility of leak

imagining it sealing perfectly, and it purring hot hot with no leak

surgical, comprehensive, sealing of main seal leak, could be the one that seal the engine enough to move forward

only mistake: that inner gasket, was to be put onto the cover, not the main bearing case

realized this after i tighten all bolts, who cares, since:

plan is to run it not on tractor until confirm there is no leak, let it cure and see what happen after curing

now: somehow conjure up some energy to run all parts from other engine into diesel, since:

they have been rained on and covered in dirt, and that assembly might not take place for long time, maybe few months

for now: run them through some diesel, cover them from element, cover them with sheet

@Russell King

yes i listen, i notice that now, the cinderblock is sideways, quick fix: lift up on front of bell housing, fix the block

boards in the direction of the travel of the tractor: yes, i still need to work on that setup,

put boards on longways, let transmission sit on them, then yank on the dolly, not the tractor,

it did this today even with my flawed setup once i yank on dolly with bx1500, rolls so nice

today that narrative hit me right in the forehead saying:

"woah, you really can just separate machine easily, fix the problem, put them back together, with not THAT much effort..."

definitely a milestone in this thread...

narrative fully reveal to you, today you saw the receipt, that:

with a dolly and that winch puller, you can separate machine and do surgery, on any side of the engine,

for essentially junk laying around, you can fix that diesel engine and it is worth 5-7 thousand dollar

you will get the gold, i cant believe it myself

still need a plan for: running the engine not attach to tractor,

let it cure, put back flywheel and starter, put oil in it, strap it down to something somehow, rig up diesel, try to start it

what about that open hydraulic line? now it is not attached to tractor, it will spin that hydraulic gear, maybe it is sealed and will not matter?

and we know that gear will be getting oil, but it will be pumping zero fluid..

lay out few task that need done: get all parts from other d1301 engine cover in diesel, then put them away from element for few month, I can assemble front of radiator: air box/battery/battery holder/rig it all up properly, paint should arrive day or 2, we go on paint detour, fill up on solvent, fill up on diesel in shop area, some trouble figuring out air box holder fastening, look at the diagram for that area,

more stuff you can do with the dolly: anything heavy, you can put one end on the dolly, strap to it, then come in with bx1500 3 point lift, attach to other end of heavy object, and at this point:

you can move easily anything that is too heavy to lift, and you can drive it around safely without dropping, arranging your estate to increase its worth

more reflection of today lessons

20241107_202311.jpg


all the part for other d1301 engine, sitting out in element, rain, dirt,

clean them up, get diesel on everything. If i had energy/time:

I did get that expensive bolt to start that rebuild, I can get all the way up to putting piston in, meaning

all the parts are available to get engine on tractor, all the gears, the gearcase, everything but top of engine,

only things missing: all connecting rods, pistons, rings

i go do few tasks that are available, and let the plans marinate
 
Last edited:
  • Like
Reactions: 1 users

L35

Well-known member

Equipment
L35/TL720/BT900/York rake/Valby chipper
Jun 13, 2010
524
429
63
CT
How was the crankshaft surface? And grooves where the seal rides? I’ve had to speedi sleeve automotive crankshafts before.
 
  • Like
Reactions: 3 users

Russell King

Well-known member
Lifetime Member

Equipment
L185F, Modern Ag Competitor 4’ shredder, Rhino tiller, rear dirt scoop
Jun 17, 2012
5,454
1,469
113
Austin, Texas
@joesmith123
I am warning you about your cribbing material and techniques.

This is how you currently have the front half of the tractor supported (copied from above post #849
IMG_0212.jpeg

First the materials are not correct for supporting loads. The concrete masonry unit (CMU, Concrete block, cider block, whatever name you use) is a brittle material and can collapse easily if the load shifts slightly. Many people use them but solid wood is much safer.

Your application of wood above the CMU does help separate the hard cast engine from the brittle concrete material so reduces the risk somewhat. But you would be much safer if all the concrete block was replaced with wood.

Second the way you have one block (top of picture) is a much stronger way to use CMU blocks than the orientation of the block in the bottom of the picture. Notice that the top block has much more webbing in the vertical (load bearing path) and is therefore stronger in supporting a vertical load. It also will resist a buckling (collapse, pancaking) event if any side loads are applied. The block at the bottom only has three vertical sections and there is nothing that cross braces that block. Imagine if you started pushing on the side of the engine (along the line of the front axle and pointed wood). The top of the block would start to move, the vertical webs become somewhat slanted and the vertical load will now exert a force that wants to lay those three sections down horizontally. The block would rapidly collapse and crush anything under the weight of the engine. It might not kill you but you could become trapped and that would not be good at all.

I don’t think I would try to do much about it now other than add more wooden cribbing under areas that you can get it under. I would just be very careful when you start trying to mate the two halves back together and NOT bang or jostle the front half much.

The use of the wheeler is clever but the wood blocking would have been better if you put it with the longer dimension on the horizontal plane. It would make it less likely to fall over. But only a little safer.

I do know there are some “freeze plugs” in the rear of the engine behind the bell housing that tend to leak. There is no evidence (rust) of that on the inside of the bell housing so it appears to be fine. But you may want to look at it since you have the tractor split already.
 
  • Like
Reactions: 3 users

Hugo Habicht

Active member

Equipment
G1900
Jun 24, 2024
97
111
33
Ireland
Arghhh, Joe,

you should not have spread the gunk over everything. It does not help on the outside and near the shaft seal I am not sure, it may be counter productive. Thinly on the fixed gasket and outside the seal ring, yes, but not anywhere else.

Kind regards,
Hugo

p.s.: use grey stuff next time, looks better if it not obvious. The orange stuff, particularly applied on the outside, always reminds.me of botch jobs.
 

Attachments

  • Like
Reactions: 4 users

joesmith123

Active member

Equipment
L295DT, BX1500
Mar 18, 2023
563
159
43
earth
recouple entities, let it run hot, see if it leak

20241107_213652.jpg


all the part for other engine, ran through diesel and big paint brush

cover them with drop clothes

decided: the build for this engine will be done in different order, I start with front axle

Why its better: the last day working on this split tractor, it is very nice to be able to walk 360 degrees around the area you are building

20241108_113155.jpg


yes, it is cured enough, couple tractor assembly and do test run

decided not to run it off the tractor because: worried about hydraulic line running empty,

also the labor it take to rig it up off the tractor is the same as if you just put it back together properly,

plan: install start flywheel clutch, push everything back together, install not all the bolts, everything not too tight, get her running

@Hugo Habicht
yes it does give that low quality repair look, i rig it up and see if she leak, no worry, if she does, not hard to fix it

20241108_124923.jpg


always have trouble putting on flywheel and the bolts match

I have done damage to one of the thread from misalignment

solution: get a stud that screw into it, then it should line perfect, now i try these drill bits before sacrifing bolts

20241108_130720.jpg


solved: top of crankshaft has a small hole that make mark on the flywheel, line those two up and all bolt go in

put in starter, push tractor onto engine, use cheap jack to line up studs on bell housing that go into transmission

idea to push tractor: bx1500 bucket lift rear wheels up, i try to get video

20241108_133318.jpg


install starter and flywheel

I notice bolts are not all the same, good to always have the diagram close by, 2 of the bolts are smaller, did some thread damage from guessing where they go

20241108_140646.jpg


bx1500 using loader to lift up on rear wheel of split tractor sitting on dolly,

look at your stud, move apparatus trying to make the stud go in the hole

20241108_140748.jpg


almost stud in the hole, push split tractor closer, use jack to lift transmission up a bit to line the hole, push it rest of way with bx1500


video: moving rear wheel tractor lining up the stud holes

20241108_140748.jpg


lines were a bit off, i sit down and think, i move the tires using the loader, then next i went up and somehow it was in place, meaning

sometime, nature figure itself out without your effort,

20241108_150240.jpg


got bell housing bolts in hand tight, remove all block/jack/dolley/everything from underneath

get rid of rest of block under engine, fill it with oil, rig it up to run: 2 hydraulic line, throttle, diesel line, oil pressure,

good time to finally clean hydraulic filter, keep forgetting

dont install steering/front axle/exhaust until sure leak fully fix
 

Attachments

Last edited:

Hugo Habicht

Active member

Equipment
G1900
Jun 24, 2024
97
111
33
Ireland
Hi Joe,

the surface where the flywheel is mounted is a precision surface and fit. You cannot have any sealer on it, the flywheel may work itself loose. So PLEASE take the flywheel off again and remove the sealer.

Kind regards,
Hugo
 

Attachments

  • Like
  • Haha
Reactions: 3 users

Hugo Habicht

Active member

Equipment
G1900
Jun 24, 2024
97
111
33
Ireland
Hello Joe,

by the way, the original subject of this thread, with now 857 posts, was fixing a hole in the block. Is that actually fixed and leak free? I know you wrote something about that but I cannot find it any more.

Kind regards,
Hugo
 
  • Haha
  • Wow
Reactions: 1 users

amschind

Member
Lifetime Member

Equipment
Kubota M6800/Westendorf TA26, IH 82, NH 648
Sep 30, 2024
35
19
8
Texas
Hello Joe,

by the way, the original subject of this thread, with now 857 posts, was fixing a hole in the block. Is that actually fixed and leak free? I know you wrote something about that but I cannot find it any more.

Kind regards,
Hugo
That kind of got lost, but basically he had an identical separate donor tractor with some other issue and an intact block. He used that block with most of the parts from the "hole in the block" tractor and wound up with the Frankenstein monster from the remainder of the thread.
 
  • Like
  • Haha
Reactions: 2 users

joesmith123

Active member

Equipment
L295DT, BX1500
Mar 18, 2023
563
159
43
earth
Rig it up, run it hot for 10 hour

20241108_152534.jpg


took out hydraulic filter, clean everything
20241108_152606.jpg


clean it nice and new

20241108_152612.jpg


inside of filter housing, clean it with solvent and brush, then compress air

20241108_160042.jpg


install 2 hydraulic line, throttle, diesel line, oil pressure, put new oil in engine to full mark

get battery close, heat glow plug, get her running 10 hour

Got everything ready to start then Realize diesel tank empty

So far machine idle and use one whole tank

No more diesel at the shop. Need to go fill barrel of diesel
 
Last edited:
  • Like
Reactions: 1 users

hagrid

Well-known member
Lifetime Member

Equipment
K1600GTL, ZX-14R
Jun 11, 2018
948
1,253
93
Pittsburgh
You're out of diesel? What have you been doing with it?!
 
  • Haha
Reactions: 1 users