Kubota B2650 Cab Fabrication

bird dogger

Well-known member
Vendor Member

Equipment
Kubota B2650 and lots of other equipment
Feb 24, 2019
1,598
1,456
113
North Dakota
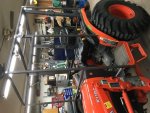
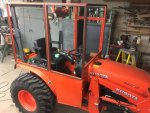
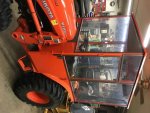
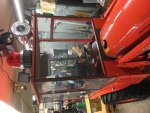
Here is my winter cab build for my new B2650 tractor. I wish I would have taken more pictures but with a mere two week timeframe to get the main structure completed, documenting every step with pictures wasn’t in the plans. Hopefully there’s enough to show what was done and if anyone wants particular shots or higher resolution pics I’d be more than happy to oblige. Also, I might be able to use some pics that are farther into the build that might still show some of the earlier steps and pieces of construction. Along with the descriptions, those pics might help you understand and critique what I’ve done.

A little background: I had purchased a JD750MFWD compact tractor back in 1985. In 1996 I fabricated a cab for it using somewhat the same methods and that cab worked extremely well and is still functional today. Although it was much less refined it served as the main pattern to follow in building this one for the new B2650.

My goals for this cab were to refine and improve the function and looks of the previous cab. Being retired and getting older, I wanted it to be easier to remove and install as it needs to be off for summer mowing, yard and field work, and working around and in the woods, etc. Plus, while mowing ditches and on slopes I didn’t want to add anything that would raise the center of gravity and make it more tippy (thus removeable). The visibility had to be excellent. The overall height had to be managed in order to get under the OH garage door in my shop without stripping any additional work lights off the top or having to worry about damage if another family member wasn’t aware of any height limitations while using the tractor with the cab on. Since the tractor is new, I didn’t want to start drilling into the framework or do anything that would or could alter its structural integrity. It also had to be affordable (and I mean relatively CHEAP compared to the factory cab or aftermarket options). I’ll leave it open for comments about whether my goals were met or not. Pictures and more to follow soon. Bear with me, please, as I’m a complete newbie at this posting stuff! :) Thanks!

David
 
  • Like
Reactions: 1 user

bird dogger

Well-known member
Vendor Member

Equipment
Kubota B2650 and lots of other equipment
Feb 24, 2019
1,598
1,456
113
North Dakota
Unfortunately, I don’t have pictures to show my initial measurements, string lines, clamps and levels used to determine the layout and outside dimensions of the proposed cab. It took a few days just to determine what was needed and a few more to decide how to go about it. Then the real fun started!

The steel structure is made with 1” square tubing and 1” flat bar around the curved edges.

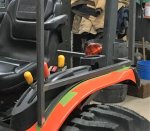
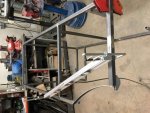
First, the top half of the roll bar came off and an alternate one (lower in height and with the appropriate angled and level top) was made. It would also serve as the “resting place” for the rear portion of the cab, support its share of the cab’s total weight, and be a point of attachment to index the cab to the back end of the tractor. It was made out of the same material and dimensions as the original and attached in the same way and place. You can see it in place in this photo taken later in the build.

The tractor’s “grip handles” and outside rear lamp fixtures were removed to give a clean bottom edge of the cab to follow and make it easier to seal up the gaps between it and the tractor.

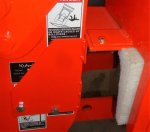
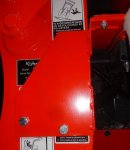
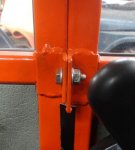
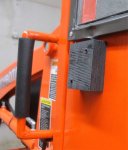
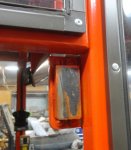
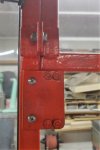
The cab’s front mounting points was the next problem to solve. I wanted the hood to be able to be opened yet the cab needed to extend forward enough to enclose the foot controls, steering wheel, and be comfortable size wise while sitting inside. Two holes were noted in the loader post near the bottom and
brackets were fabricated using those to holes for attachment. The brackets provided the two front “rests” needed for the cab’s attachment points. Here’s some pics of those brackets.
DSC05648.JPG

DSC05649.JPG

OHRV2047.JPG
 

bird dogger

Well-known member
Vendor Member

Equipment
Kubota B2650 and lots of other equipment
Feb 24, 2019
1,598
1,456
113
North Dakota
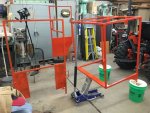
As usual, the hardest and more time consuming part is figuring out what to do. Once the front mounting points were established the rest started to fall into place quickly. In wanting to meet the goal of “easy on” & “easy off” I decided to build the cab in three separate pieces: rear half, front half, and roof. An acceptable “door width” and practical division point was picked as the separation point of the two halves. This point was near the front of the fender mounted control levers.

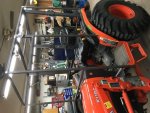
I wanted the cab to follow the lines of the tractor on its lower edge and be sealed to it as much as was practically possible. I don’t have a picture of this but it was accomplished by hand forming a piece of 1” flat bar to rest on and follow the curve of the fenders. It was cut to length and started just forward of the rear “plastic” light fixture and extended along the fender to the “separation” point. This piece was then later welded to the bottom edge of the cab framework. Same goes for the lower portion of the door and the front half of the right hand cab frame. You can see 0ne of the pieces (identical on both sides) welded in place already in this pic. IMG_1652 (2).jpg

I calculated my framework dimensions to allow for the tiniest gap between the final framework and the tractor’s fenders which would be made up by the seal material. (I found that the seal used in mounting pickup toppers to the box worked perfectly when trimmed to fit.) Here’s a pic of the framework being welded together:
IMG_1654.JPG
 

bird dogger

Well-known member
Vendor Member

Equipment
Kubota B2650 and lots of other equipment
Feb 24, 2019
1,598
1,456
113
North Dakota
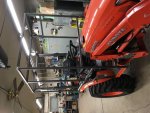
I welded a few pieces of flat stock to each half’s framework so that the two halves could be bolted together when installed on the tractor. Additionally, a couple of “tabs” were welded to the inside of the top rear half to index it in place when it rested on the alternate roll bar top. Some flat stock tabs welded to the lower front framework provided the means to bolt the front down to the loader post brackets mentioned earlier. Here’s pics of those tabs and the two halves bolted together:
DSC05670.JPG IMG_1652.JPG

Since the front half would sit just forward of the dashboard console and actually just over the rear edge of the hood, the window frame had to allow a little space for the hood to open without hitting said framework. Filling in this gap between the hood and cab framework was done with a custom cut piece of dense upholstery foam. It seals the gap perfectly and goes in and out in seconds when the hood needs to be opened up.

IMG_1653.JPG DSC05663.JPG

Not sure why some pics turn out sideways and some don't. They're all right side up in my computer file. I guess you'll just have to tilt your heads or your viewing screen.....which ever is easier! I can blame it on myself not knowing what to do yet being quite new to this game! Time to take a break and continue this tomorrow. Thanks for looking!

David
 

Ping

Active member

Equipment
BX2370-1
Dec 25, 2018
311
226
43
Troy, Ohio
Welcome to the forum.
Your cab's looking good.
So, for your easy off design, you'll remove in sections?
I may be getting ahead but, I got stumped on door latches for by BX cab or rather lack of real estate for the catch until my better half suggested magnets.
Looking forward to seeing your progress.
Regards
 

rkidd

Active member
Lifetime Member

Equipment
B2650, FEL With QA 60"mmm, 3pt FDR1672,homemade ballast box, BB 1572 box scraper
Dec 7, 2015
743
67
28
Jefferson Ohio
Very nice build bird dogger. Looking forward to the rest of the build as I have the tractor. Pretty unique design.
 

bird dogger

Well-known member
Vendor Member

Equipment
Kubota B2650 and lots of other equipment
Feb 24, 2019
1,598
1,456
113
North Dakota
Welcome to the forum.
Your cab's looking good.
So, for your easy off design, you'll remove in sections?
I may be getting ahead but, I got stumped on door latches for by BX cab or rather lack of real estate for the catch until my better half suggested magnets.
Looking forward to seeing your progress.
Regards
Thanks for the welcome, Ping. Yes the cab comes apart in three easy to install/remove sections. (a real easy lift for two people when you have a helper) or a light rope block and tackle or boat winch type setup if your a one man show like I usually am.) It sounds like you won't be too surprised to find out that there's a magnet in the future for this cab too. :) They help solve a lot of problems or make easier solutions to some more difficult problems anyway.

Since the cab's already been built and ready for use just as the first snowfall hit this winter you'll see quick progress being made. I just have to do some more writing and organizing of some pics. Thanks for your interest and comments! More to come real soon.

David
 
  • Like
Reactions: 1 user

bird dogger

Well-known member
Vendor Member

Equipment
Kubota B2650 and lots of other equipment
Feb 24, 2019
1,598
1,456
113
North Dakota
Very nice build bird dogger. Looking forward to the rest of the build as I have the tractor. Pretty unique design.
Thanks, rkidd! It won't/shouldn't take long to get the rest of the description and pics in order to finish since the cab's already been built and in use. Just need to make time to finish the write up and get the pics that I have organized.

I'm hoping you might find the final outcome pretty neat and affordable. Maybe even a few ideas you can use on your tractor if you don't have a cab already. I'd certainly answer any questions you might have or supply more detailed pics of anything you'd like to see better. Pretty much the general build method should show up in the coming pics I did take and any specific pics or details can be had just for the asking. I'll try and have the next few steps written up and posted tomorrow. Might be able to finish everything up by the weekend.....except we're supposed to get more snow again. Which isn't a problem anymore!

David
 

bird dogger

Well-known member
Vendor Member

Equipment
Kubota B2650 and lots of other equipment
Feb 24, 2019
1,598
1,456
113
North Dakota
Nice! Looking forward to more info amd pics.
Thanks, chim! The next batch should be on the way shortly as we had no snow to take care of last night. A balmy -3 degrees F here already this morning. Almost shirt sleeve weather compared to the last couple of weeks.
 

D2Cat

Well-known member
Lifetime Member

Equipment
L305DT, B7100HST, TG1860, TG1860D, L4240
Mar 27, 2014
13,816
5,559
113
40 miles south of Kansas City
For you guys building cabs, I have an assortment of weatherstripping that may help seal your projects. Here's some pictures.
 

Attachments

bird dogger

Well-known member
Vendor Member

Equipment
Kubota B2650 and lots of other equipment
Feb 24, 2019
1,598
1,456
113
North Dakota
The lower areas of the framework were enclosed with some light gauge metal I scrounged from some old metal cabinet door skins. In order to lift the cab halves on and off some handles were made and welded to the corners as seen in some of these pics.
DSC05679.JPG DSC05681.JPG
I mounted the two unpainted halves on the tractor in order to build the door to size.
IMG_1652.JPG
For a removeable door, weld on bullet hinges were used. With the door built it was ready to paint all the framework. This paint seemed like a very close color match and was very friendly budget wise. Primer used was Rustoleum metal etching primer in spray cans. The top coat was brushed on.
First coat of paint on.
IMG_1658.jpg UWJL5068.JPG

Sorry for the rotated pics. I even rotated them 90 degrees in my computer files again to try to correct them in the final post but to no avail....yet anyway. :eek:
 

bird dogger

Well-known member
Vendor Member

Equipment
Kubota B2650 and lots of other equipment
Feb 24, 2019
1,598
1,456
113
North Dakota
While the paint was drying the planning and procurement of the window materials was accomplished. And this is where my cab build is different from others that I’ve seen. I came up with this method of installing windows back in 1996 in building the first cab for the JD750 compact tractor. I use aluminum pop rivets to attach common window screen frames to the cab window openings. Then a clear vinyl plastic (think convertible top window material, etc.) is substituted and installed just as regular window screen normally would be. Its much cheaper than any plexiglass, tempered glass, etc. and is tough as nails. It cuts to size with scissors and installs easily. Its lasted for over 20 years in the first cab without a tear or puncture. Its not as crystal clear as glass but it’s a very close second and the difference is hardly worth mentioning. You can find it most anywhere and in up to 60 inch wide rolls so it will fit any window opening on a tractor cab. If you do happen to cut or puncture a window its simple to replace the vinyl with no special tools. It has no more or less fogging issues than regular glass that I have noticed. You can find window screen kits that include the sides and corners or you can buy the pieces individually in different lengths, colors, etc. Check Menards, Lowes, any home building supply store.

IMG_1671.JPG

IMG_2030.JPG
 

bird dogger

Well-known member
Vendor Member

Equipment
Kubota B2650 and lots of other equipment
Feb 24, 2019
1,598
1,456
113
North Dakota
I found out a door “bumper” was needed when the first time I parked the tractor outside a little breath of wind opened the door against the front lifting handle and put a small dent in the door window frame. Darn…Its first dent. Oh, well. It happens.
DSC05682.JPG

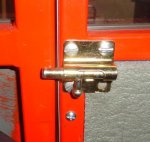
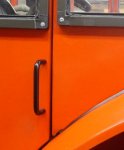
For a door latch, a magnet was installed in the top corner of the framework and also a little door hasp was bolted on to the inside of the door itself to prevent accidental opening when the operator is inside.
DSC05678.JPG DSC05671.JPG DSC05676.JPG

A couple of handles added inside and out make the door easy to grab also.
DSC05652.JPG
 

bird dogger

Well-known member
Vendor Member

Equipment
Kubota B2650 and lots of other equipment
Feb 24, 2019
1,598
1,456
113
North Dakota
For you guys building cabs, I have an assortment of weatherstripping that may help seal your projects. Here's some pictures.
That's a nice assortment of weatherstripping to keep in mind for future projects. Thanks for looking and commenting!
 

bird dogger

Well-known member
Vendor Member

Equipment
Kubota B2650 and lots of other equipment
Feb 24, 2019
1,598
1,456
113
North Dakota
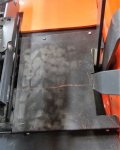
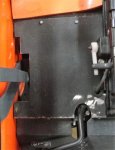
Filling in the gaps in the framework. I found a piece of a rubber insulating blanket that just happened to be orange. After cutting it to fit it was bolted into and under the rear window ledge and it has satisfactorily sealed off the back of the tractor while allowing the three point lift arms to function as needed. The orange color was an unintended bonus. Any thin sheet of rubber neoprene or similar material would work just as well. On my old cab I used a piece of carpet.....a little crude....but worked just as well. A couple of light gauge custom cut metal plates bolted under the seat area helped seal off more of the area around the control levers on each side.

DSC05642.JPG

DSC05643.JPG

DSC05661.JPG

DSC05662.JPG
 

bird dogger

Well-known member
Vendor Member

Equipment
Kubota B2650 and lots of other equipment
Feb 24, 2019
1,598
1,456
113
North Dakota
. By the floor boards (on the door bottom and right side bottom) a little metal plate cut to fit was added and the same sealing material was applied to the parts. Two last pieces of foam cut to fit sealed off the openings where the floorboard curved inward and upward at the front on each side. Here’s some pics of those areas.
DSC05644.JPG

DSC05673.JPG

DSC05648.JPG
 

bird dogger

Well-known member
Vendor Member

Equipment
Kubota B2650 and lots of other equipment
Feb 24, 2019
1,598
1,456
113
North Dakota
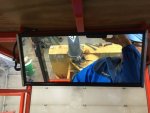
An outside truck mirror mounted horizontally and allowed to tilt at the inside roof of the cab allows me to see the whole back end of the three point snowblower so that I can blow snow traveling in reverse without turning around or putting any strain on the neck. Its also great for watching for anyone approaching from the rear when you’re moving forward. Great for keeping an eye on traffic if you’re out at the end of your driveway. The cool part is when you’re backing up and blowing snow in reverse and watching the blower in the mirror…..if you need the blower to move to the left or right to follow your path….you turn the steering wheel in the same direction as you want the blower to move. Works perfect and is just as natural as driving forward looking out the front window!

IMG_1671 (2).JPG

IMG_2033.JPG

IMG_2035.JPG
 

bird dogger

Well-known member
Vendor Member

Equipment
Kubota B2650 and lots of other equipment
Feb 24, 2019
1,598
1,456
113
North Dakota
At first, I didn’t think a metal roof would get cut and bent in time so I had applied two pieces of plywood that I had laying around. When the metal roof was ready it was just placed on top of the plywood. The plywood acts as a bit of insulation anyway and may just stay in use where it is. It makes it easy to install fasteners for the wiring, etc.

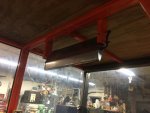
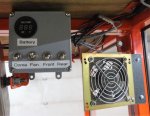
Since the tractor as is uses a dynamo for charging I changed out all the original light bulbs for led bulbs. Adding the additional led lights to the top of the cab and using the electric chute controls have been no problems for the dynamo to keep up. Two little muffin fans circulate the air inside the cab and its just enough to keep the windows from fogging up on all but the coldest days. (and at this location…..cold means a temperature of -20 degrees F. or colder). I think a cab heater might be a necessity in the near future! The controls for the added lights, fans and dome light are fed off the rear cigarette lighter charging port. The power for the snowblower chute controls are fed from the rear power leads. All hookups properly fused, of course. Cheap cell phone holder from Menards.

DSC05665.JPG

DSC05667.JPG

DSC05668.JPG
 

bird dogger

Well-known member
Vendor Member

Equipment
Kubota B2650 and lots of other equipment
Feb 24, 2019
1,598
1,456
113
North Dakota
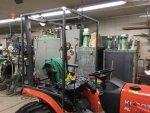
When it comes time for cab removal in the spring it simply involves removal of a few bolts to lift and remove the roof. Unplug the wiring to the control box, remove a few bolts that hold the two halves together and secure the front corners, and lift the two halves off. I can set the roof and rear half on by myself. But because the front half goes over the hood its nice to have someone on each corner to guide it into place without scratching the hood. A small block and tackle hung from the ceiling or a hand crank winch setup would easily lift it up high enough to slide the tractor out from under it if no help was available.

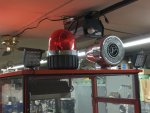
I was going to add this Federal Signal deer whistle and tiny rotating beacon but thought it might be too much bling! Plus, it would've been extra hard to run the current carrying welding cable necessary for operation within the square tubingand it wouldn't have fit under the door header.
IMG_2074.JPG

IMG_2075.JPG
 
Last edited:
  • Haha
Reactions: 1 user