Lugbolt
THANK YOU, THANK YOU, for all the detail. I am planning to have a friend that is a transmission mechanic help me with the final part, but at this point I am wondering if I will not end up doing the entire job. I am having more trouble finding TIME then anything at this point.
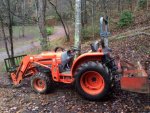
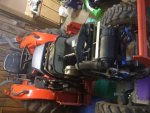
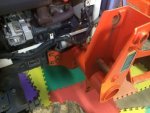
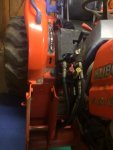
I am taking a ton of pictures, usually AFTER a label parts and bolts with a sharpie. I am aware it may not be cool to have a few items labeled on your tractor but I figure it may come in handy on a later repair. I am wondering if there is a better method to label parts, I would have preferred to use my label maker, but the heat would leave them black.
It's easy, I've done a bunch of them.
Leave the loader main frames attached. Put jack stands under each side. Floor jack in the middle part of the rear half of the tractor. You better have a good concrete LEVEL floor.
I've go the tractor on the concrete floor of my barn/workshop. it's a touch tight, but the wood-store also makes it a great place to work.
Remove wire harness from the front of the tractor, start at battery, unplug everything as you work rearward. Wrap the harness around the steering wheel loosely.
I have been following the repair manual closely, I think this is where this is going. I am going to have to mark the route of the wiring harness closely with a sharpie, and perhaps take a video of that route.
Remove the hydraulic pipes at the right side under the floorboard, and remove the suction hose from the back of the pump (I just remove the clamp only).
Good info, the repair manual only covers the basic tractor and skips the loader and hydraulics.
Remove front wheel propeller shaft, if applicable (4wd drive shaft under the oil pan).
Yes, mine is 4WD so this applies.
remove both brake rods and clutch rod. And throttle cable(s) from the engine.
Remove the dash panel.
Remove the steering shaft or hoses (I can't remember if these had a shaft or controller). The shaft is much easier to deal with, IMO.
Remove the steering pedestal complete. There are about 7 or 8 bolts at the bottom, then two on the side. Maybe one or two with spacers at the top. Then at the bottom of the steering pedestal assembly there is a rubber plug. You'll want to remove the plug and then spray the ever living poo out of the shifter shaft with PB blaster, and if you're really lucky, it'll come off easy.
What is "PB Blaster"? (Sorry)
The repair manual shows this all coming out as a single unit with the fenders. My only concern there is weight, the book shows an electric lift. The mechanic I am working with says 2 men could do it.
To remove the pedestal assembly, grab the steering wheel and pull it upwards. Once the brake rods clear the floorboard, just put the pedestal assembly back on the floor towards the seat and leave it sit there. That shifter shaft is only present on the DT and GST models only. HST thankfully does not have it, but it does have a big hydraulic pipe that's kind of in the way.
Mine is the GST model (4 speed).
Now you're home free. Remove bellhousing bolts and nuts, split it and then support the rear half securely. Don't rely on the jack alone. HOPEFULLY there's no hydraulic oil in the bellhousing. If there is, you'll have to replace the propeller shaft, bearings, collars, seals and spacer....all while you have it apart. That or put it all back together and keep throwing UDT in it every so often, and take the chance of smoking another clutch.
Sorry, what is UDT? Point taken on lining things up well and looking closely to make sure there is no oil in the bell-housing.
Watch the flywheel. If it's really worn, heat checked, either have it machined or replace it. I've seen more than one that have had the splines completely removed from the disc, causing what feels similar to a failed pressure plate or a worn disc. If you see that, make sure to look at the splines on the trans shaft closely!
I ordered a matching set of Clutch and pressure plate so I don't have to worry about machining it or having a clutch plate that does not work well with the Pressure-plate.
Rarely does a rear main seal leak on a Kubota engine. Unless it's a ZD326 or ZD331. I wouldn't mess with it if there's no black oil in the bellhousing.
I ordered the seal, but will take your advise on skipping that if it's not an issue. I have noticed the seals appear to be silicone so they will not dry out by time alone.
Reassembly is exactly the reverse.
Having done about 15 of them last year, L30's and older grand L's (2900's) and a couple L40's, it typically takes me about 12-14 hours if I work steady. I can hurry it and do it in 10-ish but I sure hate taking the chance of screwing something up during the rush! I left out a few small details which you'll figure out along the way; but after you're done, you'll agree that it's not that hard. Just be careful. Stuff is pretty heavy and will remove toes/feet if you don't support it carefully. If you remove the flywheel, watch your fingers!
Please let me know what you mean about that last sentence on the flywheel. Strangely, it seems people often call BOTH the clutch and the pressure -plate the "flywheel". I always though of the pressure-plate as the "flywheel" but maybe I am off.
Tools...you'll want a good floor jack at the minimum, 4 tall jack stands, some wood in different thicknesses to shim the jack stands, all kinds of hand tools (air and electric make it easier), and a good digital camera to take pics. I take notes too but that's just me.
I've had to buy a few tools, such as a torch wrench, but I needed those anyways. I have borrowed rechargeable electric impact wrench. I had to buy some 1/2" sockets since mine were 3/8". Wearing out my phone taking pics and such and taking notes on a printed copy of the repair manual although I look at pics on my phone so I can zoom in.
When placing your jack stands, you'll want them to hold the tractor at "normal" level...IOW the same height that it sits at normally. When splitting and then sliding it back together, there are shafts that have to line up perfectly. If one end is too high or low, or too far left or right, it won't go together and you'll invent new words trying to make it fit.
I am planning to buy a few hydraulic jacks and backing up with some larger wood as cribbing. Because there is a sawmill on the property, there is an abundance of large, thick boards (Railroad tie size) in a wide variety of sizes to fit.
Thanks again for your help! I am planning to post some step by step pics for anyone that follows this later down the line.


