Splitting the L3130 - Repair thread

27acres

New member

Equipment
L3130D, LA513 Loader, Box Blade, Fork Lift Attachment
Jan 28, 2016
14
0
0
North GA
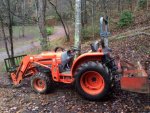
Bought a 27 acre property that used to be a goat farm. I don't know it still counts as a "Farm" without the goats, but I got a nice L3130D, 4WD Kubota along with the house and barns (I insisted).

In the pandemonium that is buying a house and moving, I foolishly gambled that the tractor, with just over 350 hours , was in good shape. I thought I was OK but sometimes felt the clutch was not really kicking in. hit the parking brake coming down off of the mountain and in just a few hundred feet the clutch was gone. I am told this was not enough to blow out the clutch, and was later told that it had never been adjusted and had to have been ridden by someone prior to purchase to be gone <10 hours after I bought it. It can't even make it up a hill. NO, I was not riding it.

So here I am with resources tapped from buying, repairing and moving to a new house with a dead tractor that only moved again after I adjusted the clutch to it's max. I have a road that has been ripped up by torrential rains and now a snow. I NEED MY TRACTOR!

After a quote of $1,600-1,800 to have it taken to the dealer I found a local mechanic that could work on site but he is covered up. My final decision is to do this myself with the understanding the mechanic (more a friend these days) will come by for the final engine work after I disassemble the parts in the way. I don't call myself a mechanic, but I can hold my own when I have that elusive thing called "time". I feel though that I need to know how to work on this tractor myself.

I've now got a tractor in my barn, a repair manual, most of the tools I need and some major work to do.
 

Attachments

ShaunRH

New member
Lifetime Member

Equipment
L3200
May 14, 2014
1,414
6
0
Atascadero, CA
I'm not sure what kind of clutch that unit has on it.

Once you get all the attachments off of it (loader, 3pt stuff) it should go pretty easy. There are plenty of threads here on OTT that show the tractors being split. You should be able to order a kit that has all the replacement parts you'll need and new gaskets, etc. Just make sure you have the right tools to hold up the various parts of the tractor once you start moving it in half.

Most guys seem to favor putting a dolly under the front half and rolling it away from a fixed back half.

If you're going to work on your own tractor, it's something we all need to learn how to do. I'm sorry that you have to learn it so soon! :(
 

Dave_eng

Well-known member
Lifetime Member

Equipment
M7040, Nuffield 465
Oct 6, 2012
5,235
1,018
113
Williamstown Ontario Canada
You need to find a way to get someone with serious mechanical knowledge to diagnose the problem before you start taking it apart.
350 hours is not very many especially when I don't see a front end loader on it.
I don't understand your comment of the parking brake: hit the parking brake coming down off of the mountain and in just a few hundred feet the clutch was gone. Can you explain further plse.
Could you have water in the clutch housing? On some models there is a drain plug


This link appears to be a 600 page workshop manual for your tractor which you will find helpful.
http://www.kubota.cz/data/manualy/l-30-wsm-en.pdf
Dave M7040
 
Last edited:

27acres

New member

Equipment
L3130D, LA513 Loader, Box Blade, Fork Lift Attachment
Jan 28, 2016
14
0
0
North GA
You need to find a way to get someone with serious mechanical knowledge to diagnose the problem before you start taking it apart.
350 hours is not very many especially when I don't see a front end loader on it.
I don't understand your comment of the parking brake: hit the parking brake coming down off of the mountain and in just a few hundred feet the clutch was gone. Can you explain further plse.
Dave M7040
Yes, I have had someone that repairs tractors diagnose the problem. There are a few questions that will be answered once it's split, such as "is there an oil leak in there causing premature wear?". However, yes the clutch is gone and the adjustment had been set very off a while back. I have a mechanic that will be coming over for the actual final split and to help me install the new clutch, shift bearing and clutch plate. We are planning on replacing the rear main engine seal while we are in there so I have a few gaskets and seals also ordered along with the alignment tool.

BTW, there IS a front-end loaded, I have just removed. The previous owner used the front-end loader with the forks attached to load his sawmill with logs and drag them out of the woods.
 
Last edited:

Dave_eng

Well-known member
Lifetime Member

Equipment
M7040, Nuffield 465
Oct 6, 2012
5,235
1,018
113
Williamstown Ontario Canada
I looked at the WSM in the link I posted and the job looks to be quite involved. Take the time to read it over before jumping in.
Good luck.
Dave M7040
 

27acres

New member

Equipment
L3130D, LA513 Loader, Box Blade, Fork Lift Attachment
Jan 28, 2016
14
0
0
North GA
Re: Splitting the L3130 - Remove ALL of Sub-Frame?

I looked at the WSM in the link I posted and the job looks to be quite involved. Take the time to read it over before jumping in.
Good luck.
Dave M7040
Yes, it IS quite involved. By the time I resolved that I would do much of the work myself, I nearly had memorized the WSM procedures.

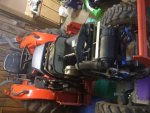
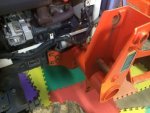
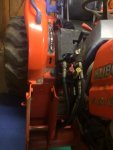
The only question I have really had outside of simply following that manual is determining if the entire sub-frame and hydraulics will need to come off. I removed the lengths on the bottom that run the length of the tractor. However, the sub-frame connects just in front of the bell housing line. It does get in the way of removing the dash and fuel tank supports, at this point I don't know if it's in the "Has to go, it's in the way" or "awkward to work around" category. I added a few pics for anyone that might want to chime in that is familiar. I was going ahead and removing when I was out of time. I would love it if someone knows that answer.

I have been going through it slowly, marking every part and step off as I go. I am labeling items, and marking where they go and the (page/item number in the WSM) to make the re-assembly simple I have found some other minor issues as I have gone, such as rust in hidden areas, and a few hoses that could use replacement that I am resolving as I go.
 

Attachments

Last edited:

BadDog

New member

Equipment
B7100D TL and B2150D TLB
Jun 5, 2013
579
2
0
Phoenix, AZ
Re: Splitting the L3130 - Remove ALL of Sub-Frame?

Not much help for your specifics, but I recently had the pleasure of spitting my B2150 and replacing the 2 stage clutch. And, much like you, I got suckered on the purchase. I also felt something a little off initially, but I knew it had been sitting for a long time, so didn't think too much of it. Then, after way less than 6 hours of use, it rapidly got to a point where it wouldn't move in any of the higher gears. Anyway, my main point in posting is that my loader/backhoe frame sounds very similar to yours, and I debated it much the same. In the end, I unloaded the loader but left the frame in place. It served very nicely to provide support points to keep everything up and in place while working as well as tweaking to realign and assemble. Good luck!
 

27acres

New member

Equipment
L3130D, LA513 Loader, Box Blade, Fork Lift Attachment
Jan 28, 2016
14
0
0
North GA
I don't understand your comment of the parking brake: hit the parking brake coming down off of the mountain and in just a few hundred feet the clutch was gone. Can you explain further plse.
I graded the road about a month ago. On the way back, it was quite dark, I don't know if my foot hit it, or I simply forgot, but I left the parking brake on and drove the tractor say 80-100 yards before I caught it. I got that asbestos smell and knew immediately something was wrong. I was hoping it was the brakes, but afterwards it could not get up a hill. :(

Could you have water in the clutch housing? On some models there is a drain plug
I am thinking that that asbestos smell was not just water. However, that Image link would not work, what was it?
 
Last edited:

27acres

New member

Equipment
L3130D, LA513 Loader, Box Blade, Fork Lift Attachment
Jan 28, 2016
14
0
0
North GA
Re: Splitting the L3130 - Remove ALL of Sub-Frame? (Good Idea)

Not much help for your specifics, but I recently had the pleasure of spitting my B2150 and replacing the 2 stage clutch. And, much like you, I got suckered on the purchase. I also felt something a little off initially, but I knew it had been sitting for a long time, so didn't think too much of it. Then, after way less than 6 hours of use, it rapidly got to a point where it wouldn't move in any of the higher gears. Anyway, my main point in posting is that my loader/backhoe frame sounds very similar to yours, and I debated it much the same. In the end, I unloaded the loader but left the frame in place. It served very nicely to provide support points to keep everything up and in place while working as well as tweaking to realign and assemble. Good luck!
Thanks for the info, sorry about your misfortune. I thought EXACTLY the same as you, that was my first time *EVER* on a tractor, and it had not been started in a while, plus the shuttle did not seem to be really "sticking" in right when engaged forward. This might end up being the cause and will also be looked at.

Funny you would say this, about those outside Sub-frame supports. I was thinking myself that those outside sub-frame brackets would work well to help keep tractor balanced. You think they are sufficient to hold the full weight of 1/2 the tractor? This plus I REALLY don't want to have to remove all those hydraulic lines.
 

BadDog

New member

Equipment
B7100D TL and B2150D TLB
Jun 5, 2013
579
2
0
Phoenix, AZ
Re: Splitting the L3130 - Remove ALL of Sub-Frame? (Good Idea)

I wouldn't want to cantilever the tractor off it, but it is more than sufficient to support a tractor half that has most of the weight still supported on the axles. So really, all it does is prevent rotation on the axles and support a few hundred pounds (at the very outside). And you also need to block up the front axle pivot between axle tube and frame/block to keep the nose from laying over when you split it. Remember that the front axle has NO ability to stabilize it's load left to right.
 

Dave_eng

Well-known member
Lifetime Member

Equipment
M7040, Nuffield 465
Oct 6, 2012
5,235
1,018
113
Williamstown Ontario Canada
I graded the road about a month ago. On the way back, it was quite dark, I don't know if my foot hit it, or I simply forgot, but I left the parking brake on and drove the tractor say 80-100 yards before I caught it. I got that asbestos smell and knew immediately something was wrong. I was hoping it was the brakes, but afterwards it could not get up a hill. :(


I am thinking that that asbestos smell was not just water. However, that Image link would not work, what was it?
The image was just a small part of the WSM that you now have describing with an illustration how to drain water from the clutch housing.

Thanks for the explanation re the hand brake and clutch. In your case it was just the last straw for an abused clutch. Most of those on this forum have forgotten to release the parking brake and driven that way until they suddenly realized something was dragging.

I am with D2cat in suggesting pictures, lots of pictures at least if you are an old guy like me :)
Dave M7040
 

lugbolt

Well-known member

Equipment
ZG127S-54
Oct 15, 2015
5,207
1,893
113
Mid, South, USA
It's easy, I've done a bunch of them.

Leave the loader main frames attached. Put jack stands under each side. Floor jack in the middle part of the rear half of the tractor. You better have a good concrete LEVEL floor.

Remove wire harness from the front of the tractor, start at battery, unplug everything as you work rearward. Wrap the harness around the steering wheel loosely.

Remove the hydraulic pipes at the right side under the floorboard, and remove the suction hose from the back of the pump (I just remove the clamp only).

Remove front wheel propeller shaft, if applicable (4wd drive shaft under the oil pan).

remove both brake rods and clutch rod. And throttle cable(s) from the engine.

Remove the dash panel.

Remove the steering shaft or hoses (I can't remember if these had a shaft or controller). The shaft is much easier to deal with, IMO.

Remove the steering pedestal complete. There are about 7 or 8 bolts at the bottom, then two on the side. Maybe one or two with spacers at the top. Then at the bottom of the steering pedestal assembly there is a rubber plug. You'll want to remove the plug and then spray the ever living poo out of the shifter shaft with PB blaster, and if you're really lucky, it'll come off easy. To remove the pedestal assembly, grab the steering wheel and pull it upwards. Once the brake rods clear the floorboard, just put the pedestal assembly back on the floor towards the seat and leave it sit there. That shifter shaft is only present on the DT and GST models only. HST thankfully does not have it, but it does have a big hydraulic pipe that's kind of in the way.

Now you're home free. Remove bellhousing bolts and nuts, split it and then support the rear half securely. Don't rely on the jack alone. HOPEFULLY there's no hydraulic oil in the bellhousing. If there is, you'll have to replace the propeller shaft, bearings, collars, seals and spacer....all while you have it apart. That or put it all back together and keep throwing UDT in it every so often, and take the chance of smoking another clutch.

Watch the flywheel. If it's really worn, heat checked, either have it machined or replace it. I've seen more than one that have had the splines completely removed from the disc, causing what feels similar to a failed pressure plate or a worn disc. If you see that, make sure to look at the splines on the trans shaft closely!

Rarely does a rear main seal leak on a Kubota engine. Unless it's a ZD326 or ZD331. I wouldn't mess with it if there's no black oil in the bellhousing.

Reassembly is exactly the reverse.

Having done about 15 of them last year, L30's and older grand L's (2900's) and a couple L40's, it typically takes me about 12-14 hours if I work steady. I can hurry it and do it in 10-ish but I sure hate taking the chance of screwing something up during the rush! I left out a few small details which you'll figure out along the way; but after you're done, you'll agree that it's not that hard. Just be careful. Stuff is pretty heavy and will remove toes/feet if you don't support it carefully. If you remove the flywheel, watch your fingers!

Tools...you'll want a good floor jack at the minimum, 4 tall jack stands, some wood in different thicknesses to shim the jack stands, all kinds of hand tools (air and electric make it easier), and a good digital camera to take pics. I take notes too but that's just me.

When placing your jack stands, you'll want them to hold the tractor at "normal" level...IOW the same height that it sits at normally. When splitting and then sliding it back together, there are shafts that have to line up perfectly. If one end is too high or low, or too far left or right, it won't go together and you'll invent new words trying to make it fit.
 

27acres

New member

Equipment
L3130D, LA513 Loader, Box Blade, Fork Lift Attachment
Jan 28, 2016
14
0
0
North GA
Lugbolt

THANK YOU, THANK YOU, for all the detail. I am planning to have a friend that is a transmission mechanic help me with the final part, but at this point I am wondering if I will not end up doing the entire job. I am having more trouble finding TIME then anything at this point.

I am taking a ton of pictures, usually AFTER a label parts and bolts with a sharpie. I am aware it may not be cool to have a few items labeled on your tractor but I figure it may come in handy on a later repair. I am wondering if there is a better method to label parts, I would have preferred to use my label maker, but the heat would leave them black.

It's easy, I've done a bunch of them.
Leave the loader main frames attached. Put jack stands under each side. Floor jack in the middle part of the rear half of the tractor. You better have a good concrete LEVEL floor.
I've go the tractor on the concrete floor of my barn/workshop. it's a touch tight, but the wood-store also makes it a great place to work.

Remove wire harness from the front of the tractor, start at battery, unplug everything as you work rearward. Wrap the harness around the steering wheel loosely.
I have been following the repair manual closely, I think this is where this is going. I am going to have to mark the route of the wiring harness closely with a sharpie, and perhaps take a video of that route.

Remove the hydraulic pipes at the right side under the floorboard, and remove the suction hose from the back of the pump (I just remove the clamp only).
Good info, the repair manual only covers the basic tractor and skips the loader and hydraulics.

Remove front wheel propeller shaft, if applicable (4wd drive shaft under the oil pan).
Yes, mine is 4WD so this applies.

remove both brake rods and clutch rod. And throttle cable(s) from the engine.
Remove the dash panel.

Remove the steering shaft or hoses (I can't remember if these had a shaft or controller). The shaft is much easier to deal with, IMO.

Remove the steering pedestal complete. There are about 7 or 8 bolts at the bottom, then two on the side. Maybe one or two with spacers at the top. Then at the bottom of the steering pedestal assembly there is a rubber plug. You'll want to remove the plug and then spray the ever living poo out of the shifter shaft with PB blaster, and if you're really lucky, it'll come off easy.
What is "PB Blaster"? (Sorry)

The repair manual shows this all coming out as a single unit with the fenders. My only concern there is weight, the book shows an electric lift. The mechanic I am working with says 2 men could do it.

To remove the pedestal assembly, grab the steering wheel and pull it upwards. Once the brake rods clear the floorboard, just put the pedestal assembly back on the floor towards the seat and leave it sit there. That shifter shaft is only present on the DT and GST models only. HST thankfully does not have it, but it does have a big hydraulic pipe that's kind of in the way.
Mine is the GST model (4 speed).

Now you're home free. Remove bellhousing bolts and nuts, split it and then support the rear half securely. Don't rely on the jack alone. HOPEFULLY there's no hydraulic oil in the bellhousing. If there is, you'll have to replace the propeller shaft, bearings, collars, seals and spacer....all while you have it apart. That or put it all back together and keep throwing UDT in it every so often, and take the chance of smoking another clutch.
Sorry, what is UDT? Point taken on lining things up well and looking closely to make sure there is no oil in the bell-housing.

Watch the flywheel. If it's really worn, heat checked, either have it machined or replace it. I've seen more than one that have had the splines completely removed from the disc, causing what feels similar to a failed pressure plate or a worn disc. If you see that, make sure to look at the splines on the trans shaft closely!
I ordered a matching set of Clutch and pressure plate so I don't have to worry about machining it or having a clutch plate that does not work well with the Pressure-plate.

Rarely does a rear main seal leak on a Kubota engine. Unless it's a ZD326 or ZD331. I wouldn't mess with it if there's no black oil in the bellhousing.
I ordered the seal, but will take your advise on skipping that if it's not an issue. I have noticed the seals appear to be silicone so they will not dry out by time alone.


Reassembly is exactly the reverse.

Having done about 15 of them last year, L30's and older grand L's (2900's) and a couple L40's, it typically takes me about 12-14 hours if I work steady. I can hurry it and do it in 10-ish but I sure hate taking the chance of screwing something up during the rush! I left out a few small details which you'll figure out along the way; but after you're done, you'll agree that it's not that hard. Just be careful. Stuff is pretty heavy and will remove toes/feet if you don't support it carefully. If you remove the flywheel, watch your fingers!
Please let me know what you mean about that last sentence on the flywheel. Strangely, it seems people often call BOTH the clutch and the pressure -plate the "flywheel". I always though of the pressure-plate as the "flywheel" but maybe I am off.

Tools...you'll want a good floor jack at the minimum, 4 tall jack stands, some wood in different thicknesses to shim the jack stands, all kinds of hand tools (air and electric make it easier), and a good digital camera to take pics. I take notes too but that's just me.
I've had to buy a few tools, such as a torch wrench, but I needed those anyways. I have borrowed rechargeable electric impact wrench. I had to buy some 1/2" sockets since mine were 3/8". Wearing out my phone taking pics and such and taking notes on a printed copy of the repair manual although I look at pics on my phone so I can zoom in.

When placing your jack stands, you'll want them to hold the tractor at "normal" level...IOW the same height that it sits at normally. When splitting and then sliding it back together, there are shafts that have to line up perfectly. If one end is too high or low, or too far left or right, it won't go together and you'll invent new words trying to make it fit.
I am planning to buy a few hydraulic jacks and backing up with some larger wood as cribbing. Because there is a sawmill on the property, there is an abundance of large, thick boards (Railroad tie size) in a wide variety of sizes to fit.

Thanks again for your help! I am planning to post some step by step pics for anyone that follows this later down the line.
 

Russell King

Well-known member
Lifetime Member

Equipment
L185F, Modern Ag Competitor 4’ shredder, Rhino tiller, rear dirt scoop
Jun 17, 2012
5,367
1,415
113
Austin, Texas
PB Blaster is a rust penetrant similar to Kroil, most will say similar to WD-40 but the PB Blaster performs much better than WD-40
UDT is Kubota's transmission/hydraulic fluid
A flywheel is a large metal plate that is used to smooth the pulsations of an engine. It is bolted to the crankshaft, the pressure plate will push the clutch plate against the flywheel when you release the clutch. The flywheel will be heavy and have gear teeth on the outer diameter. This combo makes it deadly to hands and feet between it and concrete!
I would not try to hold or lift any portion of the tractor halves when splitting the tractor, you will not be prepared to catch the weight when it decides to let go - use a wheeled jack as has been suggested. After it is separated two people may be able to lift and roll either half but you really need to have them well supported during the split operation


Sent from my iPad using Tapatalk
 

Fastdonzi

Member

Equipment
New Grand L3560
Dec 4, 2015
64
1
6
East Tn
I did the clutch on my Massey Ferguson 230 by my self. 3 floor jacks and an engine hoist, outside on my asphalt driveway. wasn't too bad of job. when putting it back together I used 4 pieces of 7/16 threaded rod about 12" long thru the bolt holes to "Pull" it back together, this also helped to assure it was lining up correctly... when I traded it for my Kubota the salesman was amazed I did it by my self...
 

CaveCreekRay

Well-known member
Lifetime Member

Equipment
L3800 HST, KingKutter box scraper, KingKutter 66" rake, County Pride Subsoiler
Jul 11, 2014
2,631
100
48
Cave Creek, AZ
27,

Sorry to hear you have to do major "tractor surgery" so soon after moving in. Its all for a good cause though! I am two and a half years into a renovation of an old horse property and I bought a 126-hour L-3800 tractor that suffered a major hood mashing that crushed the lights and hood sheet metal. At least I was able to remove the hood and keep working! I waited a year before getting the hood repaired. You don't have that option.

The pictures you take would make a great thread for those facing a split of their own. Someday, when you have time to upload them, we'd appreciate it.
Good luck and be careful.

Somewhere on this forum is a split article and the owner had little wheeled supports made out of angle iron and bolted to the half that moved. That made it safer and easier to move as well as much easier to re-assemble.

Good luck.

Ray
 

D2Cat

Well-known member
Lifetime Member

Equipment
L305DT, B7100HST, TG1860, TG1860D, L4240
Mar 27, 2014
13,827
5,570
113
40 miles south of Kansas City
27 acres, go back up and reread post #11 by BadDog. You overlook what he described there and you can get hurt.

The front axle pivots right and left and if you don't provide some blocking between the engine and the frame, when you separate the front from the back the front will "flop" to one side or the other.
 

5thhorseman

Member

Equipment
B7000, Allied 95 FEL, Sovema Tiller, Blade, on 3 overgrown acres
Oct 21, 2010
107
0
16
Aldergrove, BC
27 acres, go back up and reread post #11 by BadDog. You overlook what he described there and you can get hurt.

The front axle pivots right and left and if you don't provide some blocking between the engine and the frame, when you separate the front from the back the front will "flop" to one side or the other.
I'm about to split my own tractor in the next day or so (B7000). Will wheel chocks prevent the front half from "flopping" or do I need stands/jack on three points?
 

North Idaho Wolfman

Moderator
Staff member
Lifetime Member

Equipment
L3450DT-GST, Woods FEL, B7100 HSD, FEL, 60" SB, 743 Bobcat with V2203, and more
Jun 9, 2013
30,206
6,378
113
Sandpoint, ID
I'm about to split my own tractor in the next day or so (B7000). Will wheel chocks prevent the front half from "flopping" or do I need stands/jack on three points?
No, it will still flop around.

Three or 4 jack stands is best, or block the axle to the frame as the axle tilts side to side, and also block or crib the front and back.
It's not super heavy but it will take you off guard if your not used to it moving around.