Bolt Trouble

In Utopia

Active member

Equipment
L175 FEL
Apr 21, 2013
613
113
43
Utopia,Tx/Pasadena,TX
A few weeks ago the bolts that hold the front axel on my 2wd L175 with FEL broke and allowed the front housing to part from the front of the motor.
I successfully drilled out the 3 broken bolts.
I then installed 7/16" 20 helicons, went back with grade 8 bolts, torqued to 65# lubricated.
Thought all was well until I grabbed a bucket of caliche.
The helicons pulled out and the housing and block split again.

Really don't know where to go with it next. First thought is to drill all the way through the holes in the block and try longer helicoils. This will only work if the blind holes have enough meat not to go into a cavity in the motor.
Thought about going to 1/2" NC helicoils, but don't know if I'd have enough room for the bolt head. Also While drilling out for the helicoil tap I found for some reason the metal at the bottom of the hole seemed extremely hard.

Can't tap for 1/2" standard, the holes are already to big for that.

Hate to think I'd have to replace the motor to solve the problem

Anyone have any suggestions?
 

D2Cat

Well-known member
Lifetime Member

Equipment
L305DT, B7100HST, TG1860, TG1860D, L4240
Mar 27, 2014
13,825
5,566
113
40 miles south of Kansas City
You mentioned not having enough space for the 1/2" bolt heads. If that process will work to reattach you could use some socket head cap screws.

I have a 6206 Deutz and the transmission is attached to the engine all the way around with socket head cap screws.
 

Daren Todd

Well-known member
Lifetime Member

Equipment
Massey Ferguson 1825E, Kubota Z121S, Box blade, Rotary Cutter
May 18, 2014
10,152
6,583
113
Vilonia, Arkansas
Fastenal has a bolt that has a round head thats keyed for an allen wrench. I'm not sure what size you have it tapped for. But i looked at the front end on mine, Those bolts would work for most of the stud locations:) personally i havent had any luck with a helicoil on anything structural. I have had good luck with tapping and going to a larger bolt or stud, then loctiting the hell out of it. Just my two sense. Keep us posted on your progress:)
 

Tooljunkie

Well-known member
Lifetime Member

Equipment
L1501,home built carry all, mini plow blade.
May 13, 2014
4,150
33
48
60
Lac Du Bonnet, Manitoba,Canada
The socket head capscrews are notoriously tough
Probably equivalent to an L9 grade. Drilling deeper
Holes may need a pilot hole, i suggest
Finding a sleeve of some kind to help center
The drill.
Good luck, patience will prevail.
 

In Utopia

Active member

Equipment
L175 FEL
Apr 21, 2013
613
113
43
Utopia,Tx/Pasadena,TX
I beginning to think I'm screwed on this.
With the helicoils pulled out it means the holes are now the major diameter of the helicoil. What that means is that they are already larger than the tap drill size for a 1/2" bolt.

In turn, I don't think any type of thread insert will work.

Hate to think about having the motor block replaced and what that might cost. Dang shame, it's a great running no smoking little motor.

Also, haven't decided if I should tear it back down in hopes of another repair, or leave it as is so I can load it and carry it to a Kubota dealer.

Still open for suggestions.
 
Last edited:

Dave_eng

Well-known member
Lifetime Member

Equipment
M7040, Nuffield 465
Oct 6, 2012
5,235
1,018
113
Williamstown Ontario Canada
What you need to be looking for is a highly skilled machinist. They can work miracles. Start asking around in the motorcycle and automotive racing circles. Ask farmers if you live in a rural area. Antique cars and motorcycles is another area where new parts are not available and the owners know who is highly skilled in welding fins back on engine cylinders, repairing head bolts that have pulled out of engine blocks made of aluminum.

My bacon has been saved many times by one of these guys. The dealers do not approach a problem like yours with any idea but to replace parts that are damaged.

Don't give up but don't let a hack work on it.
Dave M7040
 

In Utopia

Active member

Equipment
L175 FEL
Apr 21, 2013
613
113
43
Utopia,Tx/Pasadena,TX
What you need to be looking for is a highly skilled machinist. They can work miracles. Start asking around in the motorcycle and automotive racing circles. Ask farmers if you live in a rural area. Antique cars and motorcycles is another area where new parts are not available and the owners know who is highly skilled in welding fins back on engine cylinders, repairing head bolts that have pulled out of engine blocks made of aluminum.

My bacon has been saved many times by one of these guys. The dealers do not approach a problem like yours with any idea but to replace parts that are damaged.

Don't give up but don't let a hack work on it.
Dave M7040
Funny you bring it up, I'm a "highly skilled" production, maintenance, not automotive retired machinist and removed hundreds of broken bolts, and installed probably as many thread repair devices.
I think it's boiling down to having to remove the engine, either to replace the block or to fill and re-drill and tap the holes in question.
I can weld, but this is cast iron, and not sure how certainium or like rod would hold up. Also have a neighbor with a Bridgeport mill, but again it would involve pulling the engine to make the repairs. All this without any assurance any of this will work.
Being in the boonies does have it's drawbacks on how things get done.
I'd stand a better chance if the engine and front mount were removed and carried back to Houston for the work.

Still taking suggestions.
 
Last edited:

In Utopia

Active member

Equipment
L175 FEL
Apr 21, 2013
613
113
43
Utopia,Tx/Pasadena,TX
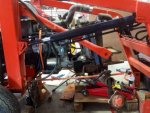
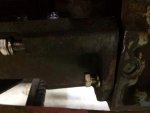
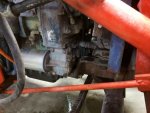
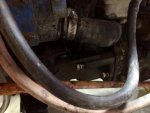
Don't know if this will help or not. I know I have a dilemma.

First one is when I had it apart for the repairs last time
ImageUploadedByTapatalk1403013253.418783.jpg
ImageUploadedByTapatalk1403013324.856940.jpg
ImageUploadedByTapatalk1403013342.224885.jpg
ImageUploadedByTapatalk1403013357.909537.jpg


Sent from my iPhone 5 using Tapatalk
 

In Utopia

Active member

Equipment
L175 FEL
Apr 21, 2013
613
113
43
Utopia,Tx/Pasadena,TX
After weighing all the options I think I'll pull the motor and carry it back to Houston. There is a company there that specializes in motor block repairs.
This way I won't have to take anything off the motor except the oil pan.

Their charge is $80 per hour, so this might be the best way to go.
 

North Idaho Wolfman

Moderator
Staff member
Lifetime Member

Equipment
L3450DT-GST, Woods FEL, B7100 HSD, FEL, 60" SB, 743 Bobcat with V2203, and more
Jun 9, 2013
30,206
6,378
113
Sandpoint, ID
I would do both sugestions and I'll add one:
Use cap head/ allen head bolts to eliminate the space needed for the head of the bolt.


And my add would be to add in a couple of bolt on reinforcing plates that would go back from the front end frame to the bell housing, that would help eliminate the stress on the bolts. :)
Think sub frame! ;)

EDIT: Just caught your last post, that's a good option but I would still add the sub frame add to help you eliminate future issues!
 
Last edited:

ShaunRH

New member
Lifetime Member

Equipment
L3200
May 14, 2014
1,414
6
0
Atascadero, CA
If you can get it apart far enough, and get it clean enough, you can silicon bronze braze (either a gas or a tig torch) the holes closed or mostly closed, re-drill the minor diameter and tap the bronze. If you can get the threads deep enough (maybe going a bit further into the casting) it should be about as tough as the original setup.

If that doesn't work, I don't see how you can fix it without tear down and welding of the cast iron itself.

You can try the Muggy Weld stuff instead of the Silicon Bronze if you like, some folks report good results with it.

http://muggyweld.com/
 

In Utopia

Active member

Equipment
L175 FEL
Apr 21, 2013
613
113
43
Utopia,Tx/Pasadena,TX
Here's todays report.
Pulling the motor and going to take it back to Houston with me. There is a company there that specializes in engine block repairs. Going to let them do their thing on the bad holes, and remove the the broken studs in the bottom 2 holes.
I'll go with 7/16" bolts again so or socket heads, depending on their recommendation. Guy told me there are many different ways to make a successful repair depending on location of the holes. Good thing about this company is I don't even have to drain the oil out unless the break into a cavity. Every thing except the alternator and starter can stay on.

Now as I'm taking it all apart I'm looking very closely at what cause the first and second failure. When I bought this beast the framework that bolted under the motor and chassis had several bolts missing. This allowed the loader to move around. After shimming and some alignment this problem was solved. This was last year. As I'm disassembling the front end I'm finding that a lot of movement has taken place and the two "tension rods" that run from the plate that bolts to the front of of the axel housing were not keeping holding tension due to past movement and flexing of the whole frame. This plus the bolts that hold the rear vertical posts are at the rear part of foot that bolts to the piece that runs under the tractor. After playing with two different jacking points (one under the gear case and the other on the front plate) I saw what what was allowing the movement that led to the bolt failure. Instead of acting like a vise or clamp, it was letting allowing to much movement both when lifting and back dragging the bucket.
When I reassemble I'll be very careful to have the alignment stress free and will run a weld bead across the front of the vertical post feet since there is no room for bolting.

Now this brings us to today's dilemma.
I've not been able to remove the axle pin from the front housing. I used a rose bud to heat both ends of the casting to orange and beat the crap out of the end of the pin with a 2# hammer only to get a ring instead of movement. Tried turning it with the piece of key stock that's welded on, no go.
I have to remove it so I can take the housing along with the motor for proper bolt alignment.
Any suggestions here?
 

D2Cat

Well-known member
Lifetime Member

Equipment
L305DT, B7100HST, TG1860, TG1860D, L4240
Mar 27, 2014
13,825
5,566
113
40 miles south of Kansas City
Without seeing it, I'd suggest in those 37 years there's a shoulder wore into the pin and you may have to jack up the front of the tractor to free it up.

If worse comes to worse, cut the pin off as close as possible to the housing that holds it. Center punch it and drill it with a smaller dia. drill then the OD of the pin so as to not interfere with the metal so the new pin will fit correctly. Or if you're steady with a gas axe.....burn the center out, cool it with ice, and then try to drive it out.
 

Russell King

Well-known member
Lifetime Member

Equipment
L185F, Modern Ag Competitor 4’ shredder, Rhino tiller, rear dirt scoop
Jun 17, 2012
5,365
1,415
113
Austin, Texas
I looked at the parts diagram and Work shop manual and there is no mention of any cross pin or bolt that would retain that large pin. It is simply held in place by the nuts on both ends. There are supposed to be bushings on both ends and perhaps it is hung up on them.

I assume the front end is off the tractor.

Before too much other work I would take the weight off the front axle, hang the parts above the pin from a point (wheels supporting the axle weight) and see if the pin is movable then. If you use some type of lift, you can remove a little weight at a time and see if pin moves, remove a little more weight and repeat until you get success or frustrated.

I know there is a grease fitting on one side of the tube the pin goes through. On my L185 it is on the left side (sitting in the seat). You may be able to get that out and get some penetrating oil in it. You might even be able to rig up something to force penetrating oil into the zerk fitting. I am thinking something like a rigid tube extension from a grease gun filled with penetrating oil and then a zerk fitting - use grease gun to force oil into fitting on tractor.
 

Lil Foot

Well-known member
Lifetime Member

Equipment
1979 B7100DT Gear, Nissan Hanix N150-2 Excavator
May 19, 2011
7,518
2,548
113
Peoria, AZ
Been following this thread with interest, hope your latest plan works out, it sounds good.
A couple of comments on helicoil failure, if I may. As a retired toolmaker/research technician with the aerospace industry, I've installed/removed/reworked literally tens of thousands of helicoils, rosan inserts, keenserts, & others. The single biggest cause of helicoil repair failure is oversize, bell-mouthed, or egg-shaped holes. This this can be compounded by threads that are hand tapped, because the tap usually wobbles.
Having said that, repairs undertaken on things like a tractor engine block are inherently prone to these problems, because they are usually drilled & tapped by hand. It is virtually impossible to get a completely round, straight, on-size hole when using, say a 1/2" power drill that such jobs usually require. On the other hand, most people don't have the time, equipment or knowledge to remove the item in question (engine block) & set it up on an appropriately sized vertical mill, or rotary head drill, or similar machine to drill & tap precision holes & threads.
What's the answer? There are no easy, "one-solution-fits-all" methods, but there are a couple of things that can help. Minimize movement of the bolted parts as In Utopia has stated. When drilling the holes, go slow, take your time; start small & work your way up to the size. Use sharp drills. It's easier to get a rounder, close tolerance hole when removing a small amount of material. If possible, remove the last .015-.030 of material with a reamer. If you can, use some sort of guide to keep the drill & tap straight & steady.
All these things will help.
Our testing & experience mirrors helicoils' own claims….. properly installed, suitably sized helicoils are usually stronger than the original thread.
Soapbox mode off now.
 

In Utopia

Active member

Equipment
L175 FEL
Apr 21, 2013
613
113
43
Utopia,Tx/Pasadena,TX
I have the assembly off the tractor. The only thing that keeps the pin in place is a pointed set screw which I removed. The only way to remove the pin is to remove the housing from the motor so you can get to the back of the pin.

After applying some heat the first time, I shot grease into the zerk and then heated both the cast iron housing and the tube the pin rides in hoping that when the grease melted it would help with the removal. Of course this didn't work.

Didn't do a good check on the possibility of excess wear, but even if that were the case, the pin should move slightly. Instead, when hit with the punch it has a solid ring to it. I'll attack it again today since it had all night to cool and maybe the grease has done some good.

As far as the coils pulling out, the coil didn't fail, they came out still wrapped around the the bolts pulling the cast iron with them. When I drilled for them, I used a drill smaller than what was called for hoping to get more usable thread contact. Again, the root cause of the failure was to much flex in the loader frame work.

Not sure if the pin is still available, so I'll call today, and if it is, I'll do some major surgery on it, if not well...................
I thought I had a hard time removing the pin from my '56 640 Ford tractor, this one has it beat. That one was a dry fit, no grease, Ford thought greasing would attract and hold dirt. Since the fitting on the Kubota is where it is, I'm sure it never got regular greasing.

Pin is till available, dealer and Messicks, $173, Ebay $23.....WOW!

Lil Foot, before passing, mom and dad lived in Peoria, AZ not far off Grand Ave on Mountain View.
 
Last edited:

Lil Foot

Well-known member
Lifetime Member

Equipment
1979 B7100DT Gear, Nissan Hanix N150-2 Excavator
May 19, 2011
7,518
2,548
113
Peoria, AZ
Lil Foot, before passing, mom and dad lived in Peoria, AZ not far off Grand Ave on Mountain View.
Wow, small world…. I'm just north of Cactus between 67th & 75th.