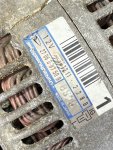
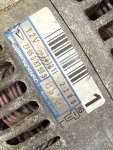
The alternator I am currently using is a Tuff Stuff performance CS121 GM style Part # 7937.
Alternator Link
Current pricing is about 130.00, do you shopping though

Mod's required:
1. Remove existing dynamo and dipstick
2. I slotted the lower mounting hole on the alternator about .200" to lower the alternator and accommodate the previously modified adjustment bracket. This may or may not be required on your unit.
3. The alternator was then mounted with a 5/16 x 18 x 3" ? long bolt. A spacer approximately 1" long was needed to move the alternator and align the pulleys.
4.The adjustment bracket previously modified consisted of cutting off the existing mounting holes. I then cut a piece of 1/8 inch ¾ or 1 " angle about 2 " long and added the holes for mounting it using the two bolts directly below the thermostat (10mm heads) . I did have to notch one side of the angle to clear the T/stat.
5. I removed the LF engine lifting plate and bolt for added clearance.
6. The Alternator was then rotated against the block and the previously cut slotted adjustment matched up to the angle iron piece fabbed in step 3.
I angled the end of the adjusting arm to follow the correct arc/travel for adjustment of the belt. A short 6/16's ? spacer (LOL 3/8) was used between the adj. bracket and alternator with the bolt entering from the back.
7. The two pieces were then welded together.
8. The shortest belt possible was used which required slipping the alternator in at an angle from the rear and then installing the lower mounting bolt and spacer. Don't have the belt number handy but I can provide it if needed. It may be different than your unit though.
9. I ran a 6 ga wire from the alternator to the starter stud.
10. The dipstick was slowly tweaked to clear the alternator etc. and reinstalled with a small amount of sealer and the mounting tab to the same location.
11. Remove the instrument cluster.
12. Disconnect the existing voltage regulator. Remove the charge lamp indicator bulb.
13. I then installed a small digital meter and tied into the main battery feed at the ignition switch
Digital meter
A pretty simple deal if one has basic mechanical skills and fabrictaion abillities. I can provide more pic's but my time is extremely limited so patience will be required. Hiddsight being 20/20 I should have taken measurements and pic's as I did it


