Butch
Active member
Equipment
Kubota 2410, RC60-24B, FL1000- kubota hydrolic front snow blade- plug aerator
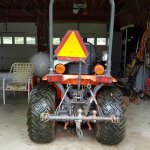
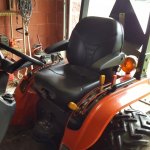
A lot of folks asked me to post what I did to replace our B2410 original seat... As I got older it beat the living crap out of my spine. I replaced it with a MICHIGAN BLACK SEAT, MILSCO V5300 HIGH BACK SUSPENSION SEAT W/LUMBAR from seat warehouse for $359.00 shipping included.
Seat warehouse said in would not fit because it was not a direct bolt on unit. This is what I did to install mine.
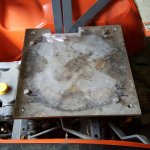
1. Remove the old seat and seat slide rails. This leaves 4 points to bolt on your new improvised seat mounting plate. The seat plate material I chose was a 13" x 13" x 1/4".
2. On the 13 x13 plate draw center lines to measure from to center locate the holes that bolt the plate to the seat. The seat's shop drawing can be acquired from seat warehouse. You use the drawing dimensions to measure from the center lines you just did on the plate to locate the location of the seat to plate mounting holes. Measure a few times, say a little prayer and drill the holes in the plate. Dry fit the plate to the seat and clearly mark the forward upper side of the plate as a major point of reference going forward. Now to configure the plate to the tractor.
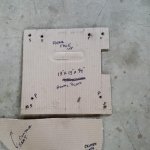
3. Next snag some card board and cut out a 13" x 13" section to make a template. Place the card board on the plate you just configured to the seat studs and transfer the drilled hole locations to the card board. Like on the plate... mark the upper facing forward side for reference.
Locate the rear old slide brackets on the tractor. Try to lay the card board on the old slide mount brackets and you will notice the ya can't. The the left side shift levers are in the way. So the template had to be notched to accommodate the shift levers. To do this align the rear upper side of the template with the edge of the rear mount and move the shift lever back and forth marking the length of travel on the template. Notch the template to accommodate the shift levers. Lay the notched template on the the existing mounting points with the rear of the template being even with the rear mounts and centered on the forward and rear center line of the tractor.... mark the tractor mount holes on to the template. This will get your seat centered front to rear and side to side on the tractor.
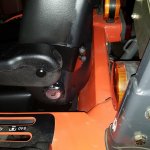
4. The forth and final phase is to locate the the vertical position so the sides of the new seat can clear levers and fender housing.
I made a template for that and found for the seat to clear everything and still maintain a comfortable sitting/operating posture the plate had to be raised 1/2" between the tractor and the mounting plate. I used stacked stainless fender washers under all four mounting bracket locations. I used 8mm x 1.25 bolts and nuts...
With all the drill points transferred to the aluminum plate I drilled the holes. Then mounted the plate to the tractor with the washers for spacers. I then dropped the seat in the 4 seat mounting holes... Done!!
Should have done this years ago! the ride is 85 to 90 percent better...
Attachments
-
87.3 KB Views: 385
-
86.2 KB Views: 351
-
92.1 KB Views: 361
-
93.2 KB Views: 351
-
83.8 KB Views: 427


