Pallet fork grapple

Showmedata

Active member

Equipment
LX3310
May 18, 2022
185
151
43
Boulder CO
With the snow finally finished (fingers crossed), I got to put on my winter fab project: the one-armed pallet fork grapple.

I saw one for sale by a Canadian vendor, but it was pricey and I like makin' stuff.
IMG_6442.JPG


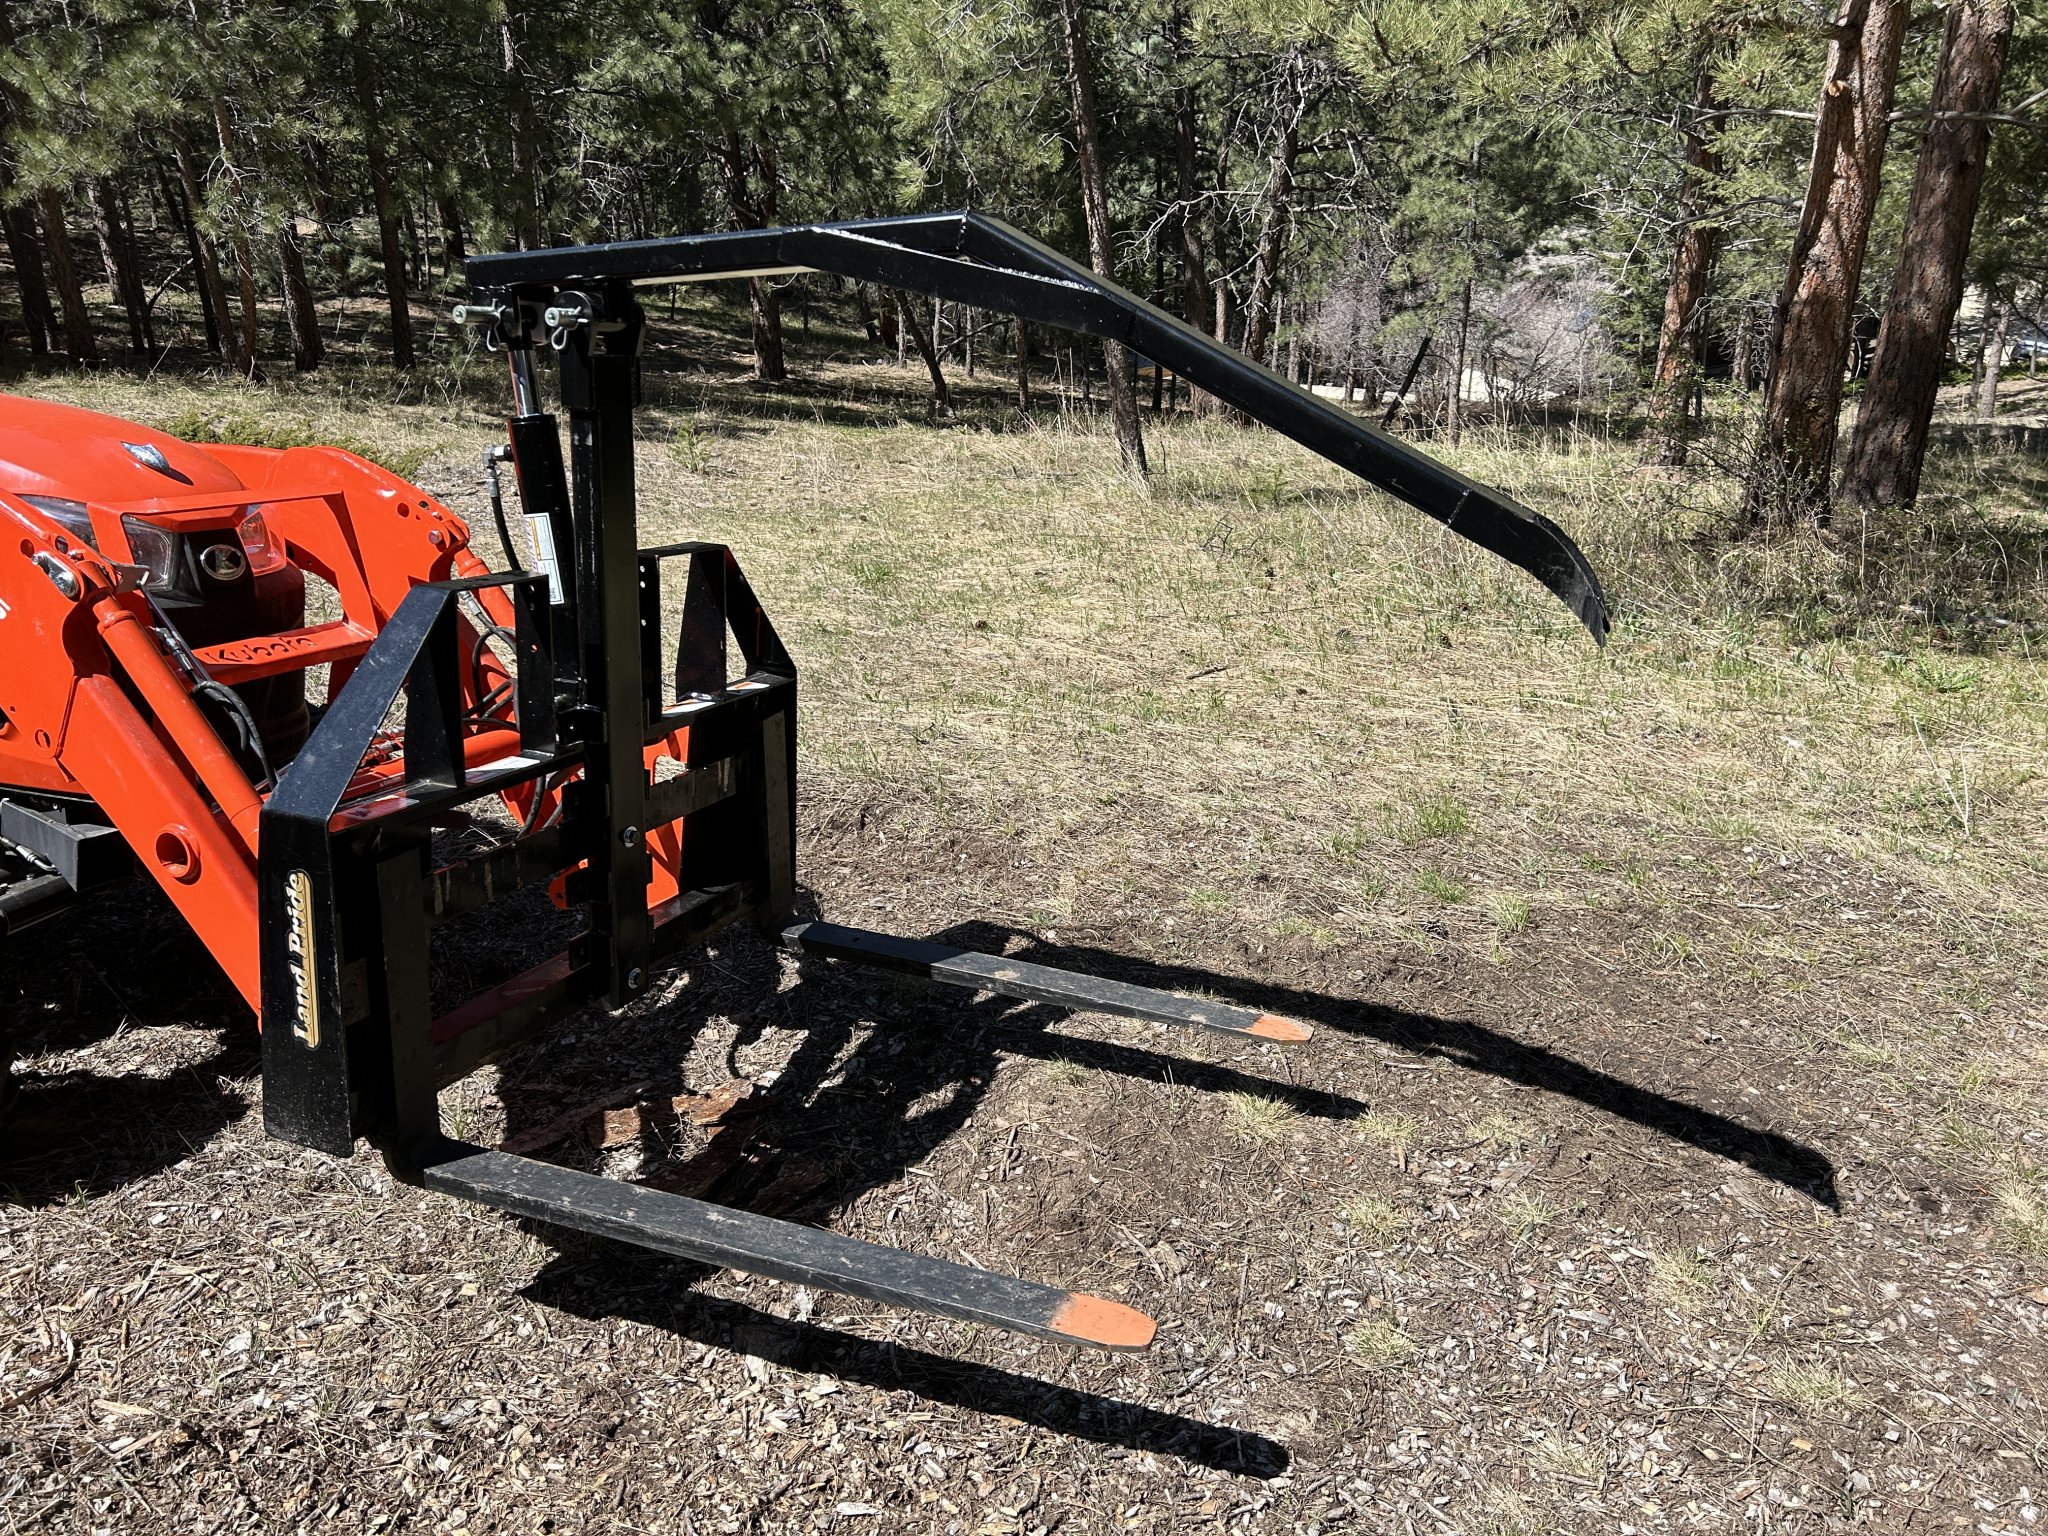
Actuating it here with the tractor at idle, obv. it moves a lot faster when the revs are up:
<iframe width="583" height="1036" src="
" title="" frameborder="0" allow="accelerometer; autoplay; clipboard-write; encrypted-media; gyroscope; picture-in-picture; web-share" referrerpolicy="strict-origin-when-cross-origin" allowfullscreen></iframe>

The primary intent is for handling logs, but it's also handy for stabilizing loads:
IMG_6444.JPG


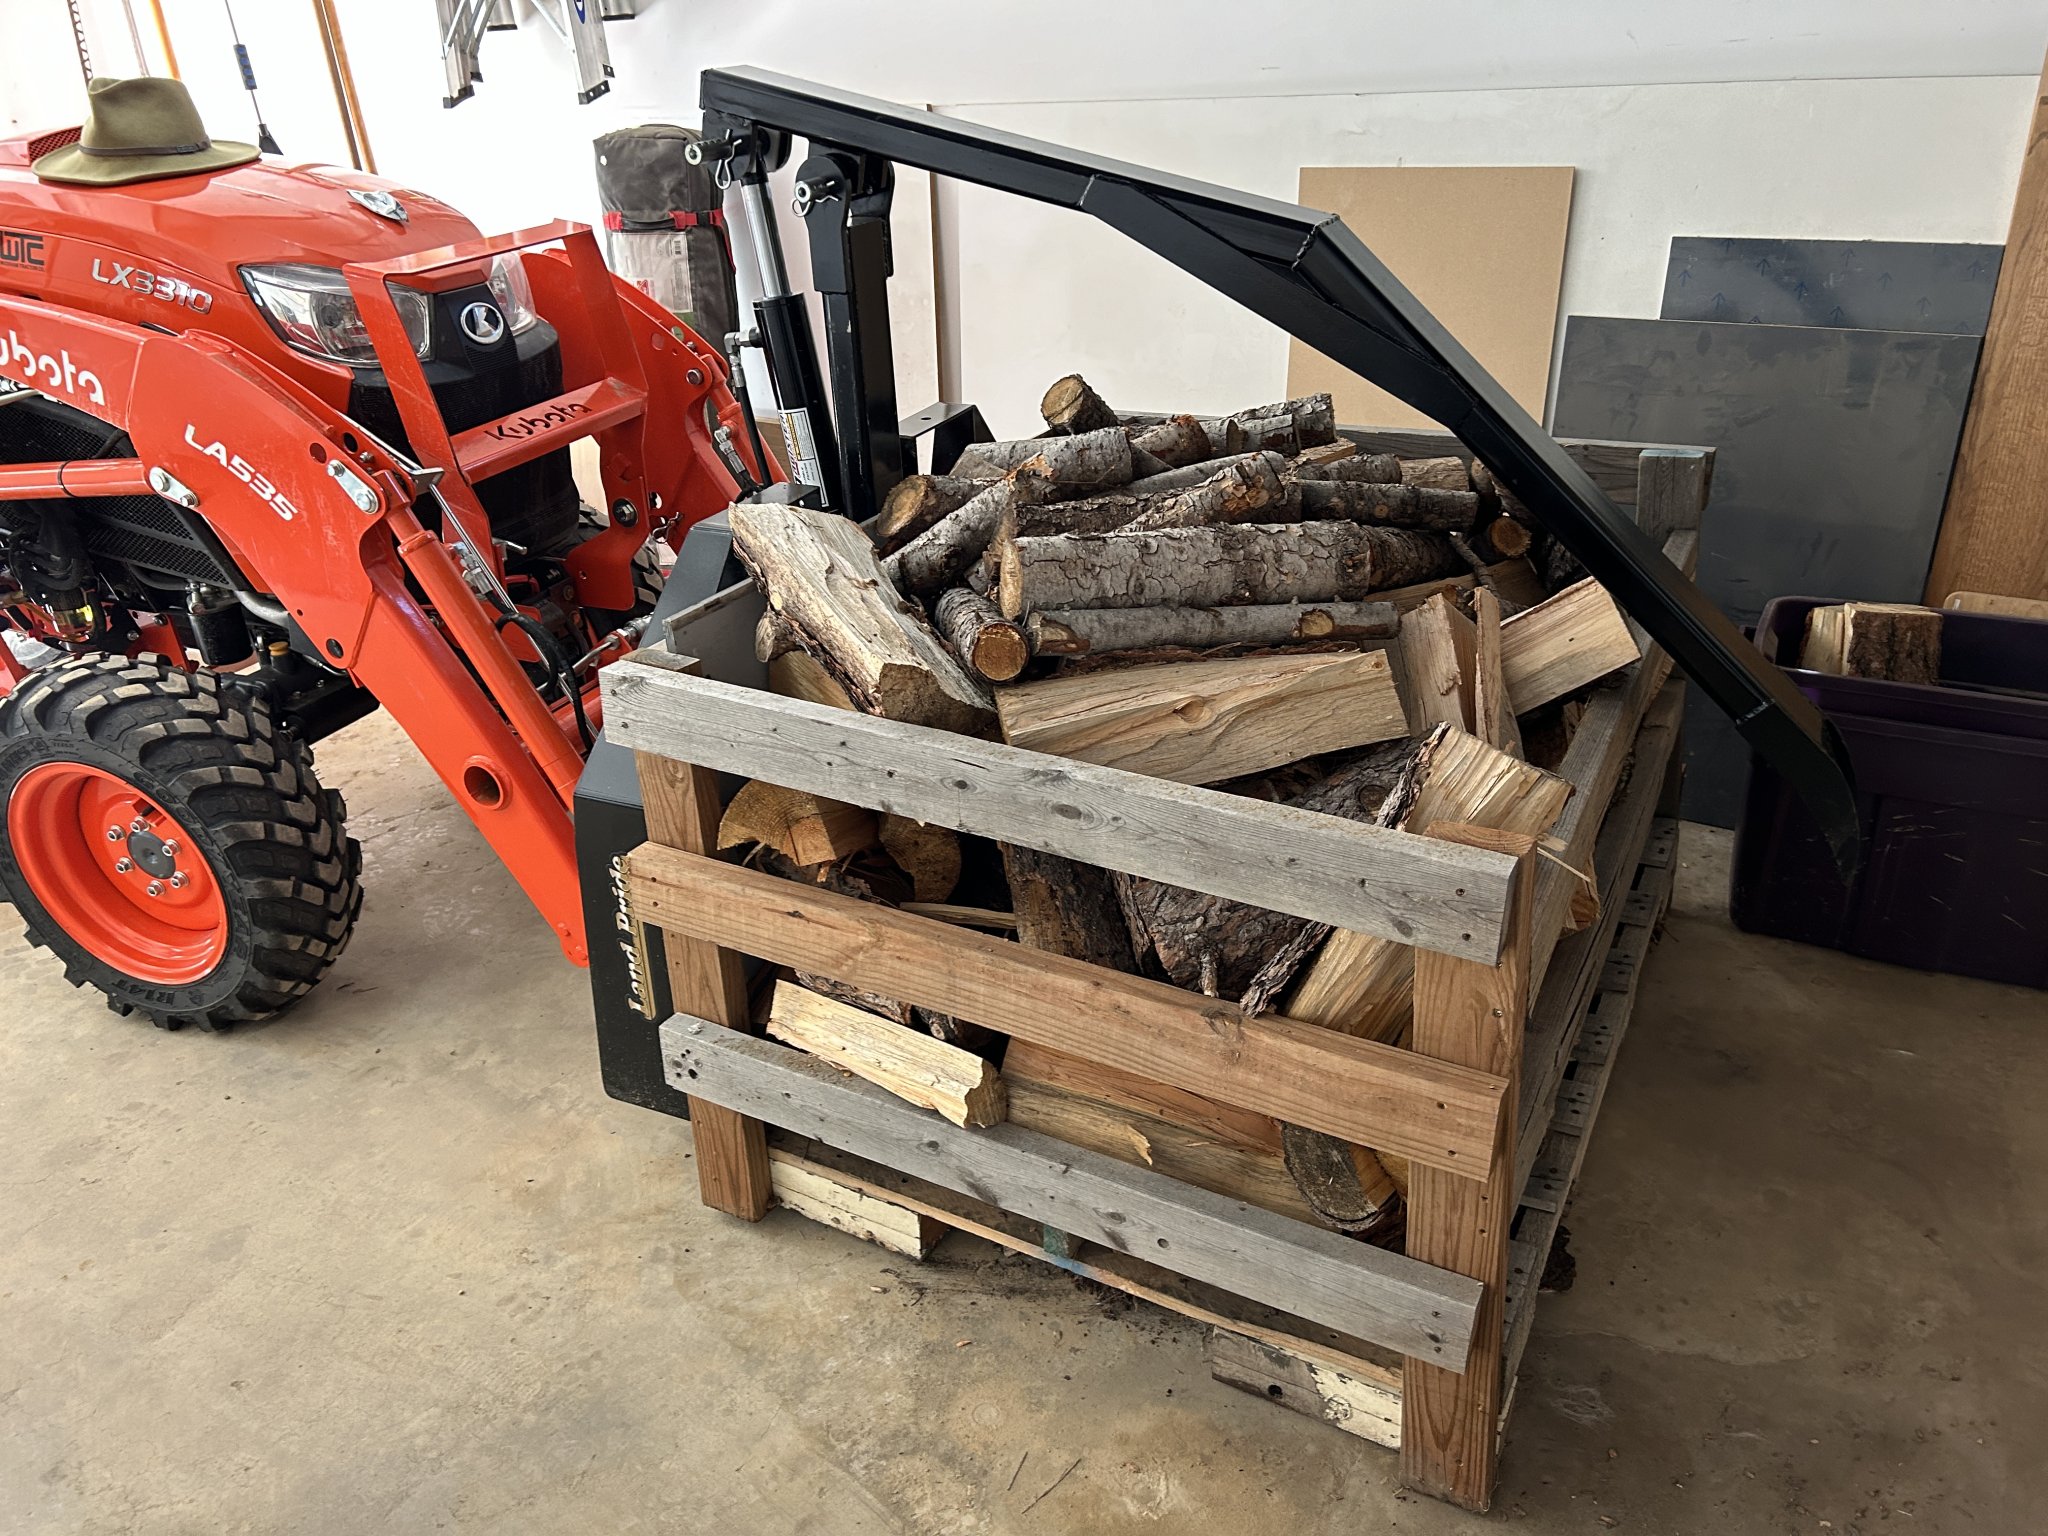
Also really gives you something to bang your head on when it's raised up above the skid full of logs you're stacking...

I ordered the 1/2" plate pieces with round holes from SendCutSend. The main tubes are 2x4x0.25". Installed a zerk in the forward pivot (which I machined from a piece of bar stock), so all the pivots are greasable.

Happy to finally get some use out of the 3rd function kit I had the dealer install when I bought the LX 2 years ago.
 
  • Like
  • Wow
Reactions: 3 users

rc51stierhoff

Well-known member

Equipment
B2650, MX6000, (BX sold)
Sep 13, 2021
2,051
2,272
113
Ohio
That’s awesome. If you lift the loader up and roll the forks all the way forward how does that do plucking rocks and large rounds of wood? Keep the pics coming. That seems like very functional and from pics pretty clean fab job. 👍
 

Showmedata

Active member

Equipment
LX3310
May 18, 2022
185
151
43
Boulder CO
That is way cool man! (y)(y)(y)

Got any pics of the fabbing up?
Parts from SendCutSend - 1/2" thick, no way I wanted to cut those myself.
IMG_6037.JPG


Most of the raw material, all from the drops zone at my local steel yard
IMG_6038.JPG


Welding table = sheet of diamond plate on my table saw
IMG_6057.JPG

Light saber action. Someday maybe I'll learn to get cleaner cuts with this thing...
IMG_6060.JPG


Main pivot housing I turned out of a 2" dia steel bar stock. Boring out the 1" dia hole was an exercise in patience on the lathe.
IMG_6058.JPG


Mocking up the mounting. The tabs on the vertical tube were my original plan to mount it to the pallet fork frame, using a plate on the back side to clamp it in place. I failed to notice that the frame's horizontal beams are different thicknesses. In frustration, and not wanting to go buy longer bolts, I decided to just drill & tap two holes in the frame. Since the arm is mostly pulling against itself (unless I tried to dig with it), the forces trying to rip it off the frame stay pretty small. If I'm wrong and that attachment fails, I can go back to the original plan.
IMG_6063.JPG

That aluminum pivot pin is just for mockup, the steel pins hadn't arrived yet.
I capped off all the tubing to slow down corrosion, since it will live outside. You can see the pivot housing welded to two ear tabs attached to the arm tube. I put a zerk in that pivot housing for greasing.
IMG_6064.JPG


A detail not shown: I made all the pivot pins non-rotating in their outer mounts so that the rotation would only happen in the close-fitting and lubricated inner sleeves (the pivot sleeve I made, plus the
ones on either end of the hydraulic cylinder).
Also not shown: thanks to a boneheaded lapse on my part, the 1" dia holes in those 1/2" thick parts were excessively faceted (polygonal) and not round. I had to buy a cheap adjustable reamer to clean those up. Couldn't use a twist drill because the material removal was too small and it just bound up rather than cut.
 
  • Like
Reactions: 1 users

Runs With Scissors

Well-known member

Equipment
L2501 TLB , Grappel, Brush Hog, Box Blade, Ballast box, Forks, Tiller, PH digger
Jan 25, 2023
1,897
2,020
113
Michigan
Parts from SendCutSend - 1/2" thick, no way I wanted to cut those myself.
View attachment 128813

Most of the raw material, all from the drops zone at my local steel yard View attachment 128814

Welding table = sheet of diamond plate on my table saw
View attachment 128815
Light saber action. Someday maybe I'll learn to get cleaner cuts with this thing...
View attachment 128816

Main pivot housing I turned out of a 2" dia steel bar stock. Boring out the 1" dia hole was an exercise in patience on the lathe.
View attachment 128817

Mocking up the mounting. The tabs on the vertical tube were my original plan to mount it to the pallet fork frame, using a plate on the back side to clamp it in place. I failed to notice that the frame's horizontal beams are different thicknesses. In frustration, and not wanting to go buy longer bolts, I decided to just drill & tap two holes in the frame. Since the arm is mostly pulling against itself (unless I tried to dig with it), the forces trying to rip it off the frame stay pretty small. If I'm wrong and that attachment fails, I can go back to the original plan.
View attachment 128818
That aluminum pivot pin is just for mockup, the steel pins hadn't arrived yet.
I capped off all the tubing to slow down corrosion, since it will live outside. You can see the pivot housing welded to two ear tabs attached to the arm tube. I put a zerk in that pivot housing for greasing.
View attachment 128819

A detail not shown: I made all the pivot pins non-rotating in their outer mounts so that the rotation would only happen in the close-fitting and lubricated inner sleeves (the pivot sleeve I made, plus the
ones on either end of the hydraulic cylinder).
Also not shown: thanks to a boneheaded lapse on my part, the 1" dia holes in those 1/2" thick parts were excessively faceted (polygonal) and not round. I had to buy a cheap adjustable reamer to clean those up. Couldn't use a twist drill because the material removal was too small and it just bound up rather than cut.
Thanks for the write up and the pics.

I love the talent, and ingenuity I regularly see on this site.

You are clearly very talented, thanks for sharing. (y) 🍸
 

GreensvilleJay

Well-known member

Equipment
BX23-S,57 A-C D-14,58 A-C D-14, 57 A-C D-14,tiller,cults,Millcreek 25G spreader,
Apr 2, 2019
10,127
4,182
113
Greensville,Ontario,Canada
NICE.....
FWIW. drill a small hole in the arm end, squirt oil or spray rustcheck or similar, then screw in a selftapping screw. Over time , heat will drag the oil here ,there, everywhere inside the tubing.
 

Russell King

Well-known member

Equipment
L185F, Modern Ag Competitor 4’ shredder, Rhino tiller, rear dirt scoop
Jun 17, 2012
4,741
1,024
113
Austin, Texas

Showmedata

Active member

Equipment
LX3310
May 18, 2022
185
151
43
Boulder CO
For a smoother cut you can figure out the offset from the center of tip to a surface on the cutter (like the white part somewhere). Then you can draw your shape on paper then trace it at the offset onto plywood or something similar and then use that as a guide to follow with your plasma cutter.

Here is an example for circles

Here is a link to tools on Amazon that can help with this:
Thanks. My problem is not so much the guide, it's getting consistent clean cut all the way through the material without the slag reforming on the back side. I suspect it's about getting the current + airflow + torch travel speed balanced correctly; I haven't spent much time really working on this yet.