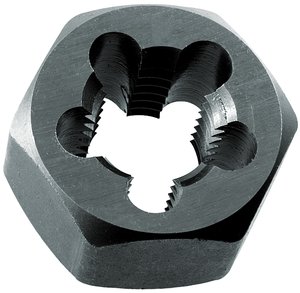
A good tool store, or a hardware store with a decent tool department will match the die to your filter. Either by measuring with a caliper and thread-pitch gauge or trying actual bolts in the filter. Hopefully, they will measure and then confirm with a bolt or hydraulic fitting. You may also get this information by calling your dealer with the filter number. This should get you into the correct size die. Just to pull numbers out of thin air, something like 12-1.5. The first number represents metric diameter and the second one is thread pitch.
Once you have the correct die, note that it says something like 'Start From This Side' on only one side. That will go onto the nipple first. Think of the die as a nut that cuts. Screw the die on by hand to begin. By the look of your threads, it should start EASILY. If not, unscrew it and try again. Once properly started, screw it on until the boogered (technical term) threads result in resistance. Then, screw in a quarter turn further (cutting) then back off a half turn (breaking off cut material). Keep repeating this until the die bottoms out against the face of the filter head. Cut, clean, cut, clean= screw in, back off, screw in, back off. Once you have gone as far as you can, spin the die off of the nipple, flip it over and repeat.
You are cleaning, or chasing the threads. There should not be any great resistance. Use the least amount of leverage possible on the die to give you a better feel of what is going on. Any time it starts to feel tight, back up to clean, then proceed.
You can do this, much harder to explain than do. Unfortunately, this process can only remove offending material. It can't replace what is already missing.


