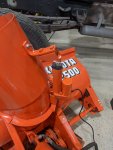
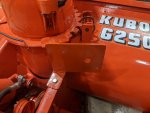
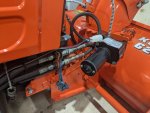
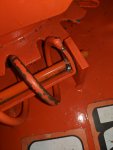
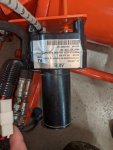
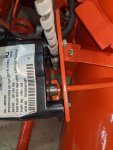
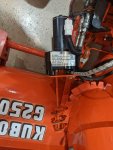
Could you tell me the part number of the chute rotator motor and the size of it's shaft. A picture of how it attaches to the screw drive would be welcomed also.
Snowblower Modification and upgrade.
- Parts used ADTH landing gear motor for RV 12v DC 30amp part number 1RV-200 (Way overkill, I had one left over from my old 5th wheel trailer) ($170-320) Very expensive and not needed, you can easily purchase a windshield wiper motor to do the same thing and only spend about $35 for a new one. Or you can buy a cheaper landing gear motor online for about $80
- 0.348” diameter steel rod about 10.5 inches
- 6x6 3/16” steel plate
- 4 inches 3 1/16” x 1.5” angle iron
- 1” ¼” bar stock
- 2-6”x1/4-20 screws with 4 ¼-40 nuts and lock washers
Process:
- Removed the original spinner rod by removing the cotter pin in the end of the rod.
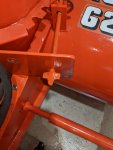
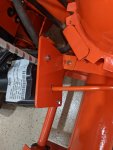
- Held the motor up to the snowblower frame and found the best mounting point so it did not cause interference with my actuator for the chute or the hydraulic lines for the lift mechanism.
- Placed a 12” piece of rod into the screw drive on the chute and measured the angle that the mounting plate needed to be at so the motor would not bind.
- Cut a the 3/16” plate stock to 6x6 , and 4” of the 3/16x1.5 angle iron.
- I then placed grease on the back of the mounting holes on the motor and placed it on the 6x6 plate to mark the mounting holes.
- I then drilled out the mounting hold and bolted the motor to the plate. Next I measured the drive gear placement and drilled a ½” hole for the rod. Once that was done I then
- I used magnets to hold the plate to the angle iron at the desired angle (I do not remember the angle I used) I cut a piece of rod to 10.5” and placed it in the drive gear and the screw drive for the chute. I did this to make sure that my angle was correct and that there would be no binding.
- I used a pare of vice grips to clamp the angle iron onto the blower frame and once the angle was determined to be correct I tack welded the plate to the angle iron.
- I then removed the motor, and took it off the frame and welded the plate to the angle iron fully.
- Next I mounted the motor again and lined up the motor again with the rod and clamped it into place and drilled 2 holes in the angle iron one in front of the plate and one at the rear to mount to the blower frame. . I installed the bolts
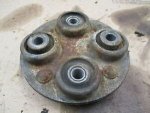
- Once the motor and bracket were mounted I took a final measurement on the rod, it came to 10.5” and I took ¼” flat stock and cut out two ½”X1/2” pieces and welded them onto the end of the rod. This gave me the engagement end for the drive gear on the motor.
- I then mounted the motor with the rod in place and marked the rod where the hole in the end of the screw drive was located. I removed all the parts, placed the rod in a piece of angle iron and on the drill press I drilled a hole through the 90 degree edge on the angle iron to place the hole in the center of the rod.
- Once this was done I remounted everything and hooked everything up and ran alligator clips to the motor and a battery to run it through the cycles. Remember to run the motor in reverse all you do is reverse the leads on the battery, red wire goes to negative and black wire to positive. DC motors will run in both directs by reversing polarity. Once everything worked I disassembled it all again and primed and painted the parts.
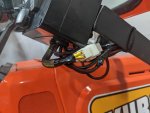
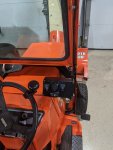
- I then started the build the wiring harness and wire everything into the DTDP momentary rocker switches.
- I hope this was helpful
All in all if I had to buy all the parts. It would have cost
Steel $10 this also gave me extra, our steel yard sells scrap steel by the pound.
Motor if you used a windshield motor $35
Switch- $9.00
Wire- $13 with plenty extra to do another job
Connectors $5
Paint $8.00
Total price $80
My cost since I had most the parts and wire, $9 I had to buy the switch. I had everything else laying around my garage.


