But not before we fixed a couple of small issues.
Last spring, a close friend and former co-worker suffered a serious stroke on his rural 28 acre homesite. It became evident he and his wife wouldn’t be able to continue living there. With their two children living out of state, we’ve helped out as much as we can where/when needed.
Through the summer, a couple of us friends helped haul and store goods and tools, equipment, etc. My locksmith buddy and I re-keyed all the entry doors & dead bolts, shed doors, etc. since the place was now vacant. I had volunteered to service his tractor and get it running. The battery was dead and the charging circuit wasn’t functioning. I told the daughter that should they decide to sell the tractor separately, I’d be very interested in having first shot at buying it. Along with my tractor and the L2550 together, they made short work of the mowing and cleaning up the huge lot before listing the property.
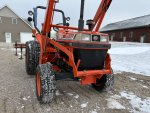
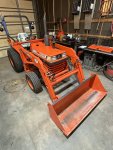
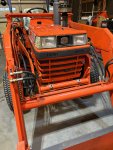
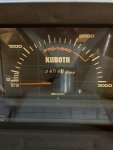
Here's some thumbnail pics of this very nice L2550 tractor:

One of the good friends that helped with the mowing and other tasks asked if I knew what the status of their tractor would be. I told him I already had dibs on it if they decided to sell it separately. He stated he would also be very interested in it.
As nice as this L2550 is…..I really didn’t need another tractor. When the family finally decided to sell the tractor outright, I decided to pass on buying it, knowing it would go to this other good friend of the family. I told the happy buyer if he ever decided to sell it, it had to go to me at that time. LOL! He agreed.
We hauled the L2550 to my place to figure out and fix the charging system issue. The battery wouldn’t hold a charge overnight. With the tractor running, the alternator essentially showed no output voltage. Both the alternator and voltage regulator looked original to the tractor. We suspected either a bad rectifier module in the alternator or possibly a voltage regulator issue being the culprit.
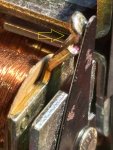
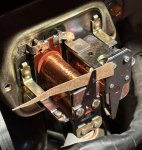
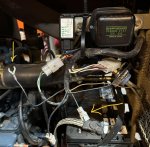
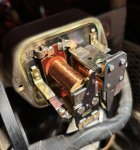
There were also a couple of loose wires hanging from the wire loom right below the voltage regulator. Hmmnn….? The voltage regulator was extremely clean inside. We burnished the contacts, ohmed out the coils & resistor, found no shorts to ground in the wiring, etc. So, it went back together and back onto the tractor.
I disassembled the alternator to thoroughly check the rectifier diodes. They were all good. There were no shorts from the stator coil to ground. Same for the rotor’s coil to ground. However, there was a thick buildup of brush graphite & gunk on the two slip rings from the alternator brushes. The brush holders also needed a good cleaning to allow the brushes to move freely. The brushes also looked well worn to the point where there was very little or no contact pressure on the slip rings from the springs in the brush holders.

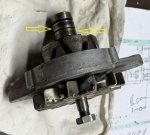
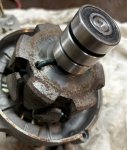
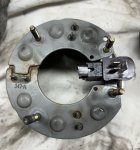
All cleaned up and put back together, we thought it may work again until new parts could be located. But at rated engine rpm, the output voltage was only equal to the battery voltage, or no charging voltage at all… or negligible at best.
A wiring diagram showed one of the two loose wires had to have been for an original battery’s electrolyte level sensor. It’s unclear if the other wire was also associated with that sensor. But they didn’t appear to be associated with the charging circuit.
Since a new rectifier & brush holder assembly was almost as expensive as a new aftermarket alternator, a replacement alternator was ordered. The replacement alternator arrived and was installed with no issues. We crossed our fingers for the live test. Again, no cigar. There was still no apparent charging voltage above battery voltage. All the wiring, connections, and grounds had been checked and found good. We decided to call it a day and regroup again later.
That night I started thinking about the voltage regulator and how they were originally tested and the voltage level set. I remembered helping another buddy do that on his old truck way back when. I have some old truck motor repair books and found the section on regulator setup, testing and repair. Woohoo!! After boning up on the topic again, I was hoping to find an adjusting screw on the voltage regulator relay to re-set the voltage….as in crank it up a little.
Stay tuned for the "Rest of the Story"
Last spring, a close friend and former co-worker suffered a serious stroke on his rural 28 acre homesite. It became evident he and his wife wouldn’t be able to continue living there. With their two children living out of state, we’ve helped out as much as we can where/when needed.
Through the summer, a couple of us friends helped haul and store goods and tools, equipment, etc. My locksmith buddy and I re-keyed all the entry doors & dead bolts, shed doors, etc. since the place was now vacant. I had volunteered to service his tractor and get it running. The battery was dead and the charging circuit wasn’t functioning. I told the daughter that should they decide to sell the tractor separately, I’d be very interested in having first shot at buying it. Along with my tractor and the L2550 together, they made short work of the mowing and cleaning up the huge lot before listing the property.
Here's some thumbnail pics of this very nice L2550 tractor:


One of the good friends that helped with the mowing and other tasks asked if I knew what the status of their tractor would be. I told him I already had dibs on it if they decided to sell it separately. He stated he would also be very interested in it.
As nice as this L2550 is…..I really didn’t need another tractor. When the family finally decided to sell the tractor outright, I decided to pass on buying it, knowing it would go to this other good friend of the family. I told the happy buyer if he ever decided to sell it, it had to go to me at that time. LOL! He agreed.
We hauled the L2550 to my place to figure out and fix the charging system issue. The battery wouldn’t hold a charge overnight. With the tractor running, the alternator essentially showed no output voltage. Both the alternator and voltage regulator looked original to the tractor. We suspected either a bad rectifier module in the alternator or possibly a voltage regulator issue being the culprit.
There were also a couple of loose wires hanging from the wire loom right below the voltage regulator. Hmmnn….? The voltage regulator was extremely clean inside. We burnished the contacts, ohmed out the coils & resistor, found no shorts to ground in the wiring, etc. So, it went back together and back onto the tractor.


I disassembled the alternator to thoroughly check the rectifier diodes. They were all good. There were no shorts from the stator coil to ground. Same for the rotor’s coil to ground. However, there was a thick buildup of brush graphite & gunk on the two slip rings from the alternator brushes. The brush holders also needed a good cleaning to allow the brushes to move freely. The brushes also looked well worn to the point where there was very little or no contact pressure on the slip rings from the springs in the brush holders.


All cleaned up and put back together, we thought it may work again until new parts could be located. But at rated engine rpm, the output voltage was only equal to the battery voltage, or no charging voltage at all… or negligible at best.
A wiring diagram showed one of the two loose wires had to have been for an original battery’s electrolyte level sensor. It’s unclear if the other wire was also associated with that sensor. But they didn’t appear to be associated with the charging circuit.
Since a new rectifier & brush holder assembly was almost as expensive as a new aftermarket alternator, a replacement alternator was ordered. The replacement alternator arrived and was installed with no issues. We crossed our fingers for the live test. Again, no cigar. There was still no apparent charging voltage above battery voltage. All the wiring, connections, and grounds had been checked and found good. We decided to call it a day and regroup again later.
That night I started thinking about the voltage regulator and how they were originally tested and the voltage level set. I remembered helping another buddy do that on his old truck way back when. I have some old truck motor repair books and found the section on regulator setup, testing and repair. Woohoo!! After boning up on the topic again, I was hoping to find an adjusting screw on the voltage regulator relay to re-set the voltage….as in crank it up a little.
Stay tuned for the "Rest of the Story"


