Clutch replacement, was not expecting this

Russell King

Well-known member
Lifetime Member

Equipment
L185F, Modern Ag Competitor 4’ shredder, Rhino tiller, rear dirt scoop
Jun 17, 2012
5,409
1,442
113
Austin, Texas
I was all turned around and was thinking that was rear of engine not front of transmission! I guess I need to stop and look at the picture before answering posts, and maybe get a bigger screen.

Glad you found it.
 

North Idaho Wolfman

Moderator
Staff member
Lifetime Member

Equipment
L3450DT-GST, Woods FEL, B7100 HSD, FEL, 60" SB, 743 Bobcat with V2203, and more
Jun 9, 2013
30,542
6,595
113
Sandpoint, ID
When you reinstall all of it use RTV on all mating surfaces that will help keep the water out.
 

BastropMetal

New member
Lifetime Member

Equipment
L3400
Dec 20, 2022
21
13
3
Texas
Finally have the time to start putting this all back together. Looking over everything closely, the adjustment bolts on the clutch assembly don't look to be adjusted properly.


1000006243.jpg


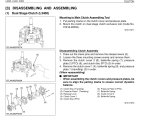
As shown in the manual below the gap between the pressure plate and the head of the bolt should be a 1mm, but as it sits in the picture above its nearly 5mm. Does this distance shift once the assembly gets installed?

clutch1.jpg

Additionally the adjustment bolts on this assembly are different than what I took off the tractor. The end of the OEM bolt has a square head on it. When installed this permits you to loosen the lock nut and then adjust the bolt (its still pretty tedious). But on this replacement it doesnt have this square head., and there is hardly any extra bolt length to adjust. It does not appear to be possible to adjust this once its in the tractor.

clutch2.jpg


The manual contains a number of specs and dimensions to check to put the clutch assembly together. I bought this one as a whole unit hoping all that had been done and I could just install it but now I'm not as sure. From what I've seen on other threads, taking the assembly apart and putting it back together can be pretty tedious.

Thanks in advance for any feedback.
 

Attachments

North Idaho Wolfman

Moderator
Staff member
Lifetime Member

Equipment
L3450DT-GST, Woods FEL, B7100 HSD, FEL, 60" SB, 743 Bobcat with V2203, and more
Jun 9, 2013
30,542
6,595
113
Sandpoint, ID
Finally have the time to start putting this all back together. Looking over everything closely, the adjustment bolts on the clutch assembly don't look to be adjusted properly.


View attachment 144190

As shown in the manual below the gap between the pressure plate and the head of the bolt should be a 1mm, but as it sits in the picture above its nearly 5mm. Does this distance shift once the assembly gets installed?

View attachment 144192
Additionally the adjustment bolts on this assembly are different than what I took off the tractor. The end of the OEM bolt has a square head on it. When installed this permits you to loosen the lock nut and then adjust the bolt (its still pretty tedious). But on this replacement it doesnt have this square head., and there is hardly any extra bolt length to adjust. It does not appear to be possible to adjust this once its in the tractor.

View attachment 144193

The manual contains a number of specs and dimensions to check to put the clutch assembly together. I bought this one as a whole unit hoping all that had been done and I could just install it but now I'm not as sure. From what I've seen on other threads, taking the assembly apart and putting it back together can be pretty tedious.

Thanks in advance for any feedback.
Yes all the adjustment change when it's installed.
On a new clutch assembly they should all be set correctly you shouldn't have to adjust anything on it.

I will also bet your looking at the wrong surface to measure to.
1734208629019.png
 

BastropMetal

New member
Lifetime Member

Equipment
L3400
Dec 20, 2022
21
13
3
Texas
Thank you Mr. Wolfman.

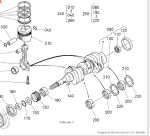
I have a few side questions. I have a L3400D tractor. Looking through the exploded diagrams, its hard to tell which ones I should be looking at some times.

For instance, on kubotausa.com here are the options for flywheel diagram assemblies.

1734285403365.png


1734285582499.png


I dont have an HST. My serial number has no letters. its a little over 59,000. Its not clear to me at all which of these I should be using. And its important because when you click on each of the diagrams you get some different part numbers.
 

North Idaho Wolfman

Moderator
Staff member
Lifetime Member

Equipment
L3450DT-GST, Woods FEL, B7100 HSD, FEL, 60" SB, 743 Bobcat with V2203, and more
Jun 9, 2013
30,542
6,595
113
Sandpoint, ID
That tractor is an oddity in that it was produced with two different engines D1703, and D1803 over it's production.
What is the motor size and serial number.
It's stamped on the block facing up right beside the injection pump.

And really the flywheel and bell Housing have very little to do with the clutch and presure plate.
 

BastropMetal

New member
Lifetime Member

Equipment
L3400
Dec 20, 2022
21
13
3
Texas
My nearly 2 month saga is hopefully approaching its conclusion, here are the two halves:

front.jpg

rear.jpg


I replaced the rear main seal when i had everything apart. That went pretty smooth I think.

I learned the hard way that the 6 flyhweel bolts are not evenly spaced which means that the flywheel mounts to the crank in only one rotational orientation. I eventually got that figured out though.

I had the flywheel resurfaced. Its in a good shape, but while wrangling it into the bell housing I wasnt as careful as I should have been with the cleanliness of my hands. It got some grease and grime on it. Is it safe to spray brake cleaner on it while its in there? If not, how would you clean it up at this point? Hopefully I dont have to take it back out.

Anyone have any last minute advice or suggestion on things I should check or do before putting it back together? I dont want to have to split this thing again.

Thanks to everyone for the help on this. I hope everyone has a Merry Christmas!
 

North Idaho Wolfman

Moderator
Staff member
Lifetime Member

Equipment
L3450DT-GST, Woods FEL, B7100 HSD, FEL, 60" SB, 743 Bobcat with V2203, and more
Jun 9, 2013
30,542
6,595
113
Sandpoint, ID
Yes you can use brake parts cleaner on it.

One thing that I hope doesn't bite you in the backside is turning the flywheel.
Every manual say do not turn the flywheel as it changes critical dimensions.

Remember to seal all the surfaces (this includes the surface from engine to bellhousing) to keep water out.
 

BastropMetal

New member
Lifetime Member

Equipment
L3400
Dec 20, 2022
21
13
3
Texas
Well, thats not good. I did not see that disclaimer in the manual, anyhwere. Just did another search of my soft copy and am not seeing that anywhere. I am not doubting you, but I thought I was being thorough and careful with doing all this work and then this comes out of nowhere, very frustrating.

I googled around and found this thread where you mention that: https://www.orangetractortalks.com/forums/threads/flywheel-resurfacing.33655/

I just looked up a replacement, about $1000. I'd certainly prefer not to spend $1000 if I dont have to, but I'd prefer not to put it together and have to take it back apart again also.

Also, sepereately - I did find my engine serial numer. D1703 HL1406. Based on that I should use one of the top two parts diagram from my 12/15 post, but its still not clear which of them is right for me.
 

whitetiger

Moderator
Staff member

Equipment
Kubota tech..BX2370, RCK60, B7100HST, RTV900 w plow, Ford 1100 FWA
Nov 20, 2011
2,941
1,399
113
Kansas City, KS
Kubota has been back and forth on resurfacing a flywheel. I just checked and this is still the latest information.
 

Attachments

StephenR

Member
Feb 12, 2024
38
20
8
Kentucky
In my younger years I split several tractors and never saw that kind of rust in any of them. Generally, no rust at all. Most were in Kentucky and the last was in central Alabama so there wasn't any heavy salt in the area.

I would take everything out that's possible, wire brush it clean. Then spray it with a spray lube, wipe it dry and replace everything greasing all the moving parts. Brush anti-seize on the splines and throw out bearing sleeve to protect them.

Since you are replacing all the clutch parts, they should be good for years to come.

Good luck with it.
Steve.