I have been wanting to remove the ridiculous hand crank that turns the auger and toss it in a lake ever since I bought the tractor. But, I will not pay over $1000 for the hydraulic rotator, even though I already have the valve. Kubota should be ashamed that they do not include some kind of motorized rotator for the price of the blower, but I guess that it is their version of undercoating used to soak customers for a few extra bucks.
So, I have kicked the idea around for building a cheapo electric one from Amazon parts. Here is what I came up with and it seems to work very well so far.
Parts Used:
I used an electric seat motor. Even if you don't use this motor, the 190 rpm is almost bang on for the speed:
Amazon.com: 190 Rpm 12Vdc Right Angle Drive Electric Motor From Car Seats
A winch relay to control the back and forth:
Amazon.com: Triumilynn 12V Winch Solenoid Relay Contactor & Winch Rocker Thumb Switch Combo for ATV UTV 1500lb-5000lb Polaris, Warn # 63070 62135 74900 70715 2875714 : Automotive
And an excavator Joystick to control it:
Amazon.com: TRIPPER 3 Buttons Excavator Joystick Assy Handle with Dust Cover for Doosan DX150 215 225 300 370-9C : Video Games
You will also need some additional wiring to supply power to the solenoid and run from the solenoid to the motor. 12 gauge should be adequate. You will also need an inline fuse holder and a 20 amp fuse.
Step 1: Mount the motor. I cut about half of the shaft off of the motor so that it fit in the worm gear on the blower. Then I drilled a hole through the shaft so that I could us a hitch pin to mate the motor to the worm gear. I then removed the chute spacer closest to the motor and used a piece of 1/4" aluminum as a bracket. I made a cardboard template first because it is easier to work with, then transferred the pattern to the aluminum and cut it to shape. The spacer went into the parts bin.


Step 2: Mount Solenoid: Mount the winch solenoid next to the battery with a couple of small bolts.

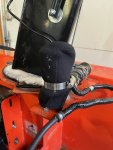
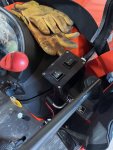
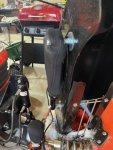
Step 3: Mount the Joystick. I mounted the joystick on top of the factory kubota valve. Pull the factory knob off, just a friction fit. Then unscrew the metal part from the joystick and drill out the threads with a 1/2" drill bit. Then slide the joystick onto the valve shaft.

Step 4: Wire it all up. M+ and M- go to the seat motor, doesn't really matter which is positive or negative. B+ and B- are pretty self explanatory, however I used an inline fuse holder to put a 20 amp fuse on the B+. There are 3 wires that go up to the joystick. One is a positive 12v from B+ to one side of each micro switch, and the other two connect the other side of the micro switches in the joystick to the yellow and green from the solenoid for rotate right and rotate left. You will need to play with these two a bit to make sure that you get the rotation in the right direction.

I have been using this for a couple of weeks and it is working well. I was worried that the motor may not have enough torque, but so far it has been good. If it turns out to be the weak link, I will just source a new motor with more torque and fab a new bracket. The bonus to using the winch relay is that I could almost put a starter motor there if torque does become an issue.
So, I have kicked the idea around for building a cheapo electric one from Amazon parts. Here is what I came up with and it seems to work very well so far.
Parts Used:
I used an electric seat motor. Even if you don't use this motor, the 190 rpm is almost bang on for the speed:
Amazon.com: 190 Rpm 12Vdc Right Angle Drive Electric Motor From Car Seats
A winch relay to control the back and forth:
Amazon.com: Triumilynn 12V Winch Solenoid Relay Contactor & Winch Rocker Thumb Switch Combo for ATV UTV 1500lb-5000lb Polaris, Warn # 63070 62135 74900 70715 2875714 : Automotive
And an excavator Joystick to control it:
Amazon.com: TRIPPER 3 Buttons Excavator Joystick Assy Handle with Dust Cover for Doosan DX150 215 225 300 370-9C : Video Games
You will also need some additional wiring to supply power to the solenoid and run from the solenoid to the motor. 12 gauge should be adequate. You will also need an inline fuse holder and a 20 amp fuse.
Step 1: Mount the motor. I cut about half of the shaft off of the motor so that it fit in the worm gear on the blower. Then I drilled a hole through the shaft so that I could us a hitch pin to mate the motor to the worm gear. I then removed the chute spacer closest to the motor and used a piece of 1/4" aluminum as a bracket. I made a cardboard template first because it is easier to work with, then transferred the pattern to the aluminum and cut it to shape. The spacer went into the parts bin.
Step 2: Mount Solenoid: Mount the winch solenoid next to the battery with a couple of small bolts.
Step 3: Mount the Joystick. I mounted the joystick on top of the factory kubota valve. Pull the factory knob off, just a friction fit. Then unscrew the metal part from the joystick and drill out the threads with a 1/2" drill bit. Then slide the joystick onto the valve shaft.
Step 4: Wire it all up. M+ and M- go to the seat motor, doesn't really matter which is positive or negative. B+ and B- are pretty self explanatory, however I used an inline fuse holder to put a 20 amp fuse on the B+. There are 3 wires that go up to the joystick. One is a positive 12v from B+ to one side of each micro switch, and the other two connect the other side of the micro switches in the joystick to the yellow and green from the solenoid for rotate right and rotate left. You will need to play with these two a bit to make sure that you get the rotation in the right direction.
I have been using this for a couple of weeks and it is working well. I was worried that the motor may not have enough torque, but so far it has been good. If it turns out to be the weak link, I will just source a new motor with more torque and fab a new bracket. The bonus to using the winch relay is that I could almost put a starter motor there if torque does become an issue.
Last edited:


