Farmall H restoration

Yooper

Well-known member
Lifetime Member

Equipment
3901 LA525
May 31, 2015
1,743
922
113
NE Wisconsin
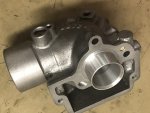
After machining the upper end I machined a fixture to hold it so I could finish the bottom end. Two more angles on this end. Blended the angles in the bore with Scotchbrite and test fitted the new venturi in the carb bores. If it works I will add this to my resume.

IMG_1979.JPG IMG_1980.JPG IMG_1981.JPG
IMG_1982.JPG
 
  • Like
Reactions: 1 users

leveraddict

Well-known member

Equipment
2017 BX23S 60" LP BoxBlade 54" mower 60" BackBlade EA 12" 1 bottom plow & Forks
Apr 1, 2019
905
594
93
NEPA
You sir have very impressive skills! I cant wait to see the tractor all finished!
 
  • Like
Reactions: 2 users

Yooper

Well-known member
Lifetime Member

Equipment
3901 LA525
May 31, 2015
1,743
922
113
NE Wisconsin
Carburetor is all buttoned up and ready to go. Next part to rebuild is the throttle shaft connector between the carb and the governor. This gave me trouble back in the eighties when I used it to clear snow so I gave it somewhat of a bush fix. The end that controls the throttle butterfly was rusted to almost nothing so I cut it off and threaded the rod for and adapter with a roll pin to work the butterfly. Present date the roll pin had rusted and fell off so nothing was working the throttle. So I machined a new adapter out of stainless and put a new bushing in the housing end. Shaft was in good shape as far as wear.

IMG_1991.JPG IMG_1992.JPG IMG_1993.JPG
IMG_1995.JPG IMG_1996.JPG IMG_1997.JPG
 
  • Like
Reactions: 2 users

Yooper

Well-known member
Lifetime Member

Equipment
3901 LA525
May 31, 2015
1,743
922
113
NE Wisconsin
Does any body know what the purpose is for these thin metal plates on these magneto pawls are for. Hard to believe they are weights because they are so thin.

123.jpg
 

Yooper

Well-known member
Lifetime Member

Equipment
3901 LA525
May 31, 2015
1,743
922
113
NE Wisconsin
Restoring it back to the original magneto. I didn't have the coil core so I thought no problem, just turn one out on the lathe. Wrong! After researching, magneto cores are not just metal round stock, but they are laminated silicon steel strips to make the magnetic field stronger by retarding eddy currents and hysteresis. So, I ordered an original for parts off of ebay. Also brought the armature to a local guy to have the magnets charged up. He told me to leave the metal strip between the two magnets on until assembly.

IMG_2027.JPG IMG_2028.JPG IMG_2019.JPG
 
  • Like
Reactions: 1 user

Yooper

Well-known member
Lifetime Member

Equipment
3901 LA525
May 31, 2015
1,743
922
113
NE Wisconsin
Working on rebuilding the impulse drive plate. Ground down and drove out the worn pawl pins and machined new ones. Pressed and soldered them in place and on to assembly. IMG_2024.JPG IMG_2029.JPG IMG_2030.JPG
 
  • Like
Reactions: 2 users

Yooper

Well-known member
Lifetime Member

Equipment
3901 LA525
May 31, 2015
1,743
922
113
NE Wisconsin
Well, I got to the point in the engine assembly where I could pressure check the cooling system. Boy, am I glad I did! Everything leaked! So off comes the water pump and thermostat housing and the water manifold plate. Did my best to sand the engine surfaces with a sanding block to get them cleaned up and flat.
IMG_2060.JPG IMG_2061.JPG
Then I went after the loose parts surfaces with either a sanding block, surface plate sanding and milling the surfaces to the point where I THINK they will hold.
IMG_2064.JPG IMG_2072.JPG
I ordered OEM gaskets and on the advice from a friend some sealant called Threebond.
IMG_2065.JPG
The original system was not a pressurized system. Somewhere in the production run of these tractors they switched to the pressurized system. I will be ordering a new radiator and this will be for a pressurized system so I have my fingers crossed this sealer will work. The water manifold plate is my biggest concern because of all the surface area the pressure will work against. Stay tuned.

 
  • Like
Reactions: 2 users

BAP

Well-known member
Lifetime Member

Equipment
2012 Kubota 2920, 60MMM, FEL, BH65 48" Bush Hog, 60"Backblade, B2782B Snowblower
Dec 31, 2012
3,179
1,296
113
New Hampshire
Well, I got to the point in the engine assembly where I could pressure check the cooling system. Boy, am I glad I did! Everything leaked! So off comes the water pump and thermostat housing and the water manifold plate. Did my best to sand the engine surfaces with a sanding block to get them cleaned up and flat.
View attachment 119462 View attachment 119463
Then I went after the loose parts surfaces with either a sanding block, surface plate sanding and milling the surfaces to the point where I THINK they will hold.
View attachment 119464 View attachment 119465
I ordered OEM gaskets and on the advice from a friend some sealant called Threebond.
View attachment 119466
The original system was not a pressurized system. Somewhere in the production run of these tractors they switched to the pressurized system. I will be ordering a new radiator and this will be for a pressurized system so I have my fingers crossed this sealer will work. The water manifold plate is my biggest concern because of all the surface area the pressure will work against. Stay tuned.

I would consider getting your taking your radiator to a radiator shop and getting it recored if it’s leaking or plugged up versus a new one if you can. Many of the so called new ones out there are of low quality and don’t necessarily fit and perform well.
 
  • Like
Reactions: 1 user

Yooper

Well-known member
Lifetime Member

Equipment
3901 LA525
May 31, 2015
1,743
922
113
NE Wisconsin
I would consider getting your taking your radiator to a radiator shop and getting it recored if it’s leaking or plugged up versus a new one if you can. Many of the so called new ones out there are of low quality and don’t necessarily fit and perform well.
I will absolutely consider this. Thanks!
 

Yooper

Well-known member
Lifetime Member

Equipment
3901 LA525
May 31, 2015
1,743
922
113
NE Wisconsin
As you can see from the pictures, the news is not good.

IMG_2073.JPG IMG_2074.JPG
IMG_2075.JPG
Add in a frost plug leaking and some small bubbles from the head gasket in a couple of spots. Got a few small projects to work on while I think this through. If I had a horizontal boring mill it would be torn down and all surfaces machined. But I don't. And the idea of tearing it down again is a bummer. I know there are some sealants that work for a while but eventually I will be right back here again. ARRRGH!!!
 
  • Wow
Reactions: 1 user

Yooper

Well-known member
Lifetime Member

Equipment
3901 LA525
May 31, 2015
1,743
922
113
NE Wisconsin
Threw a couple of hail mary's at the leakage issue and it looks like I won. Made a gasket for the side plate out of 1/8" rubberized cork and made my own freeze plug out of some bronze and hammered it in with some silicone sealer for insurance. I am going to stay with the original radiator and non pressurized system.
IMG_2111.JPG IMG_2112.JPG IMG_2113.JPG
 
  • Like
Reactions: 3 users

Yooper

Well-known member
Lifetime Member

Equipment
3901 LA525
May 31, 2015
1,743
922
113
NE Wisconsin
Throttle bell crank is up next. Bored the holes out for bearing inserts and made the main pivot hole larger. Because the linkage was so worn, I decided to make my own linkage using rod ends and round stock. Worked perfect!

Ordered a new manifold (Taiwan casting) and painted it high heat silver. Also took some time to bake it in my heat treat oven to give it a good set. Installed it and the carb and that should be a wrap for the engine!
IMG_2118.JPG IMG_2125.JPG
IMG_2126.JPG IMG_2127.JPG
 
  • Like
Reactions: 3 users

Yooper

Well-known member
Lifetime Member

Equipment
3901 LA525
May 31, 2015
1,743
922
113
NE Wisconsin
You going to have it ready for the parades this summer?
I really haven’t set a timeline for it. I did tell the granddaughters that they can throw candy during the Christmas parade which I can actually drive the tractor and trailer to because it starts only about a mile from my house. Now they keep talking about it so I guess I’m on the hook for that. But I can say this is making the winter days fly by!
 
  • Like
Reactions: 3 users

Yooper

Well-known member
Lifetime Member

Equipment
3901 LA525
May 31, 2015
1,743
922
113
NE Wisconsin
Made some new pins for the steering U joint and welded them in. Machined the end of the shaft for the new steering wheel.

IMG_2139.JPG IMG_2148.JPG IMG_2138.JPG
 
  • Like
Reactions: 3 users

Yooper

Well-known member
Lifetime Member

Equipment
3901 LA525
May 31, 2015
1,743
922
113
NE Wisconsin
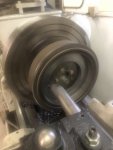
I am going to reface the flywheel on my big lathe. Started making the journal to mount the flywheel. .200 depth of cut with an .011" per rev feed rate and the lathe doesn't grunt one bit! You lathe guys know what I'm talking about here. It never gets old!\

IMG_2149.JPG IMG_2146.JPG IMG_2147.JPG
 
  • Like
Reactions: 1 users

bird dogger

Well-known member
Lifetime Member

Equipment
Kubota B2650 and lots of other equipment
Feb 24, 2019
1,800
1,772
113
North Dakota
  • Like
Reactions: 1 user

Yooper

Well-known member
Lifetime Member

Equipment
3901 LA525
May 31, 2015
1,743
922
113
NE Wisconsin
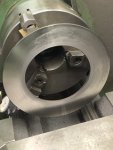
Mounted the flywheel on my turned journal and cleaned up the face. About .015" got the job done. Next I chucked up the pressure plate and got that resurfaced. .020" for that. Made a pilot shaft for clutch disc line up for assembly.
IMG_2151.JPG IMG_2150.JPG IMG_2152.JPG

IMG_2156.JPG IMG_2158.JPG IMG_2157.JPG
 
  • Like
Reactions: 3 users