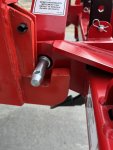
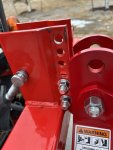
Hi, I have a new Speeco Quick Hitch ... and ... I can't seem to get my new Woods GBC48 Box Scraper (quick hitch compatible) to hook up ... it won't 'drop into' position .. always just halfway (see pictures) ... I've had other attachments connected just fine to the Speeco quick hitch (e.g. like my LP rotary tiller ... )
I have verified that the bushing on the top of the box scraper does indeed fit into the hook of the quick hitch.
The box blade seems to be getting hung up on the two bolts that hold the quick hitch 'hook' in place on the quick hitch ?
Do I need an adapter or ? Thank you!
The particular model of Speeco hitch you have isn't a lot different from the HaulMaster I have. Regardless of brand, one thing you need to keep in mind is that most QH's are normally designed for cross category compatibility. There's a lot of difference in Cat 0, Cat 1, and Cat 2 equipment, but most QH's for Cat 1 'compatibility' are actually designed with Cat 2 dimensions, particularly pin sizes. My HaulMaster and your Speeco, however have Cat 3 hooks. The lift pins on your BB look like 7/8" diameter Cat 1 pins. The hooks on the QH are sorta like using a 20-pound sledgehammer for a flyswat, but they also eliminate a lot of production cost if they're cross-platform. "Compatible" doesn't mean your implement will be compatible with every QH, just some of them. What implement manufacturers and QH manufactures call QH "Compatible" is a totally different ball of string. Is there a "wrong" QH to get? Not really, just a wrong application of a QH based on on your implements. Not to worry, though, your problems can be solved with what you have, and certainly improve the convenience of your hitch. It will also reduce the number of mods you need to make to your "QH Compatible" implements in the future.
1. You
DEFINITELY need bushings on the lifting pins, especially if you want the best performance from a box blade. You need to make sure that the lift pins cannot move around in those hooks, especially front to back. A little vertical clearance will be necessary for the latches to work, but not much. If they can move around, you cannot keep the box blade leveled where you intended. When you drag with it, the BB will tilt forward and dig in more than you want it to. When you doze with it (push in reverse), it will tilt backward and dig in more than you want. You'll be constantly adjusting the top link to stop that 'rocking' motion of the blade from affecting your work. I speak from experience. If the pins can move around in those hooks, you're probably going to get as much as 4-5 inches of slop in the back edge of the box blade and it will not stay accurately positioned as intended with the tractor. It needs to fit that QH just as tightly as it would with a direct pinned connection to the 3PH, or very close to it. Loose implements are frustrating, at best.
2. The top hook on your QH looks like it isn't low enough for the vertical spacing of the BB, and that the top hook would actually be carrying vertical load before the bottom hooks engaged. It isn't intended to, and this happens because the lift arms are causing the top hook to bottom out before the bottom hooks do. No amount of adjustment on the top link is going to fix that. It is NOT intended to lift at all. The top pin of the BB should be deep enough in the notch so that when the lift pins are fully bottomed and latched in the bottom hooks that there is still some clearance between the bottom of the top hook and the BB top pin. This keeps the implement from tilting on the QH. Because the BB is "QH Compatible", you cannot use the top hole in the BB frame with the QH. (The frame bolt is in the way). It is only intended for a pinned connection on the top link of a standard 3PH hitch set up, which is a lot more flexible than a QH, yet a lot less convenient. The hole diameter should be 15/16" for a 7/8" diameter Cat 1 pin, same as the lift pins.
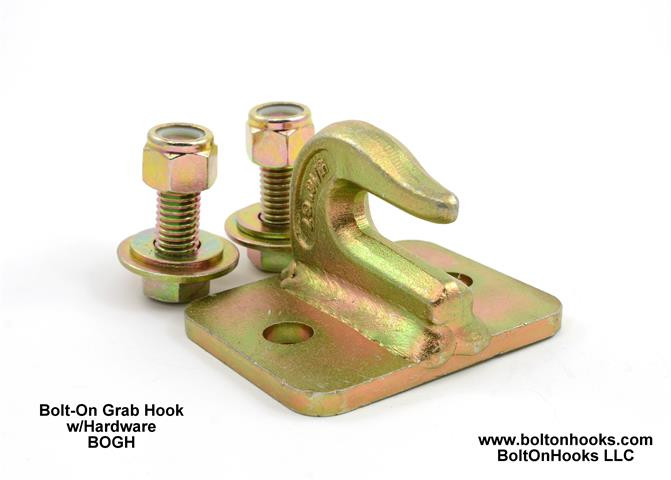
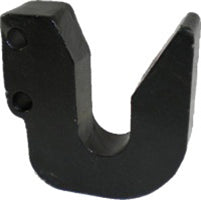
There are replacement hook options for that Speeco hitch (and the cheap HaulMaster I have). Those replacements push the hook a little farther forward as well as allow it to be adjusted about an inch lower.
@North Idaho Wolfman suggested replacing the single bolt and bushing with two carriage bolts, but I'd probably use taper heads (after countersinking the holes in the braces from the inside) if I were going to go that route. Carriage bolts are a PITA unless the hole they're being used in is broached square. However, I think you'd have a bigger problem with the vertical dimension of the QH "Standard". It could probably be remedied by moving the hook up, but then, you're going to have do that same modification to EVERY "QH Compatible" implement you have. The whole point of a QH is to avoid having to get off the tractor to change un-driven implements/attachments, but don't expect it to make swapping all your implements as easy as you would like to hope. Anything with a PTO driveshaft on it is going to still require you to get off the tractor or get someone to help you. To my knowledge, there is NO QH system that will allow connecting a PTO driveshaft from the seat. There are some that make it a little less aggravating, but none that let you just back in, lift, and take off. HINT: ALWAYS connect the driveshaft first if you have a QH. You'll be glad you did.
The top hook SHOULD be deep/long enough to engage the BB top frame bolt/bushing
before the bottom hooks engage in order to make it work best, and should only serve to keep the top of the BB aligned and properly angled with the plane of the tractor. The bottom radius of the hook slot really doesn't matter and isn't a load bearing surface. If you back in with the top hook centered with the top pocket, you're going to be very close to aligned with the equipment if it's still sitting where you left it on a flat surface. You may have to tweak the top link and adjustable lift link to align it. Top-N-Tilt is a wonderful option when combined with a QH, especially if you change implements often. If not, it's a very expensive add-on that gives you some bragging rights. If you have hydrostatic drive, when changing implements, low range selected for slowest movement makes small adjustments easy. It's best to set the vertical plane and rotation of the QH very close to that of the BB status, and they usually connect pretty easily. I raise my QH all the way up empty to change the top link setting from the seat and can actually adjust the leveling link too. But the smartest thing to do is make sure you're placing the implement on a flat/level surface when you disconnect it. Then, it's in the same place every time, and if you have the QH in the same place it was in when you took the BB off, it has no choice but to line back up.
Note the hooks all have square surfaces and edges as well as do the latch guides. Those tend to hang on the square edges of the pockets/slots on my LandPride BB. I had the same problems you're describing and saw some things I could do to improve a relatively good design. I'm a retired engineer, so I like solving problems that no one else knows exist with solutions that make absolutely no sense nor are they intuitively obvious to innocent lookers-on. In this case, the changes I made to my QH made PERFECT sense. The quality of the craftsmanship on the HaulMaster probably isn't quite as good as the Speeco, but a few tweaks and adjustments maed it a darn good QH. There are some photos
HERE to show what I did to my HaulMaster QH, as well as the marks on my BB where the QH was binding on it. Tapering/rounding the sharp edges helps the QH center itself a lot better and doesn't really harm the strength of the hooks significantly to worry about it. Certainly not with my little LX. I have NOT replaced the top hook on mine. Adding the bushings to the lift pins also helped considerably. They sort of act like rollers so that the pin doesn't have quite so much friction on the hook. With Cat 3 bushing size, the bottom pins are bottomed out in the hooks, and it leaves about 1/8" clearance in the bottom of the top hook. The BB does NOT tilt when I use it. Just make sure to take the bushings off and coat them good with grease once in a while. Or graphite if you prefer something dirt/dust won't stick to. If your BB sits outside while unattached, you may be ahead of the game if you just remove the bushings and lynch pins if you're not using it for a while to keep them from corroding and rust welding together. I just keep all my pins and bushings in the original little storage box behind the seat. Only one place to look for them then.


