Mounting a pump and making a adjustable link.

Ironman2

Member

Equipment
L185 or L1501, tiller, brush mower
Aug 28, 2018
38
0
6
Warburg, AB, Canada
Recently, I was given a hydraulic log splitter on a trailer. Ancient Wisconsin 12 horse engine that was on it had died. I decided that it was better to run the splitter off the tractor, and as the hydraulics are too small to do this, I would need a pump.

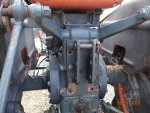
First thing I had to do was to raise up the top link bracket to a new set of holes and drill two new ones. This allowed clearance for the pump to sit in slug to the case.
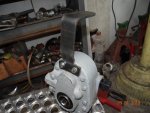
Then I made an anti rotation bracket for the pump.
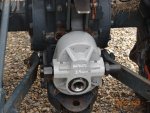
Third picture is the pump on the machine.
 

Attachments

Last edited:

Ironman2

Member

Equipment
L185 or L1501, tiller, brush mower
Aug 28, 2018
38
0
6
Warburg, AB, Canada
The adjustable side link was another problem. It had stripped threads, and I did not know this till I was using the brush hog.
So I tried at the farm dealers and they seemed to think a side link and top link were the same. One of them said check the dealer.
So I called Kubota for a side link for a L185. They came back with a price of $313, so I went to Princess Auto to see what I could find.
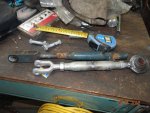
I found a large turnbuckle with 5/8 thread that they call a "rigging adjuster".
So here is what I did with it.

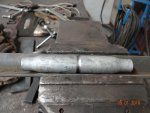
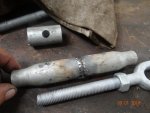
First I had to remove 2 inches from the center of it to get the body to the same dimensions as original, then weld it back together.
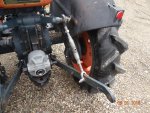
Last picture shows me test fitting it before I welded on the bottom clevis cut from the original link.
So my cost for this adjustable link was $23 and an hour's time.

Hope this give someone an option outside the dealer.
 

Attachments

SDT

Well-known member

Equipment
multiple and various
Apr 15, 2018
3,256
1,042
113
SE, IN
The adjustable side link was another problem. It had stripped threads, and I did not know this till I was using the brush hog.
So I tried at the farm dealers and they seemed to think a side link and top link were the same. One of them said check the dealer.
So I called Kubota for a side link for a L185. They came back with a price of $313, so I went to Princess Auto to see what I could find.
I found a large turnbuckle with 5/8 thread that they call a "rigging adjuster".
So here is what I did with it.

First I had to remove 2 inches from the center of it to get the body to the same dimensions as original, then weld it back together.
Last picture shows me test fitting it before I welded on the bottom clevis cut from the original link.
So my cost for this adjustable link was $23 and an hour's time.

Hope this give someone an option outside the dealer.
I have never seen one of those stripped out. One wonders how it happened.

Nice work on your work around.

SDT
 

North Idaho Wolfman

Moderator
Staff member
Lifetime Member

Equipment
L3450DT-GST, Woods FEL, B7100 HSD, FEL, 60" SB, 743 Bobcat with V2203, and more
Jun 9, 2013
30,289
6,447
113
Sandpoint, ID
I suspect that your three point will not lower fully as the clevis on the bottom of your new link looks like it might bind (not enough clearance)?
 

Ironman2

Member

Equipment
L185 or L1501, tiller, brush mower
Aug 28, 2018
38
0
6
Warburg, AB, Canada
I suspect that your three point will not lower fully as the clevis on the bottom of your new link looks like it might bind (not enough clearance)?
You would be right if that was the finished product. I mentioned it was a test fit before I put the bottom clevis on. I wanted to see that I was in the level position with it and that the screws had room to shorten or lengthen it from that point.
I have no pic of the unit with the factory clevis welded on, as the shot I took was blurred.
I used the top and bottom of the original side link and rejected the bolt I had used on the arm for a 9/16 bolt, because that gave a nice fit.
 
Last edited:

North Idaho Wolfman

Moderator
Staff member
Lifetime Member

Equipment
L3450DT-GST, Woods FEL, B7100 HSD, FEL, 60" SB, 743 Bobcat with V2203, and more
Jun 9, 2013
30,289
6,447
113
Sandpoint, ID
You would be right if that was the finished product. I mentioned it was a test fit before I put the bottom clevis on. I wanted to see that I was in the level position with it and that the screws had room to shorten or lengthen it from that point.
I have no pic of the unit with the factory clevis welded on, as the shot I took was blurred.
I used the top and bottom of the original side link and rejected the bolt I had used on the arm for a 9/16 bolt, because that gave a nice fit.
Sounds good! ;)