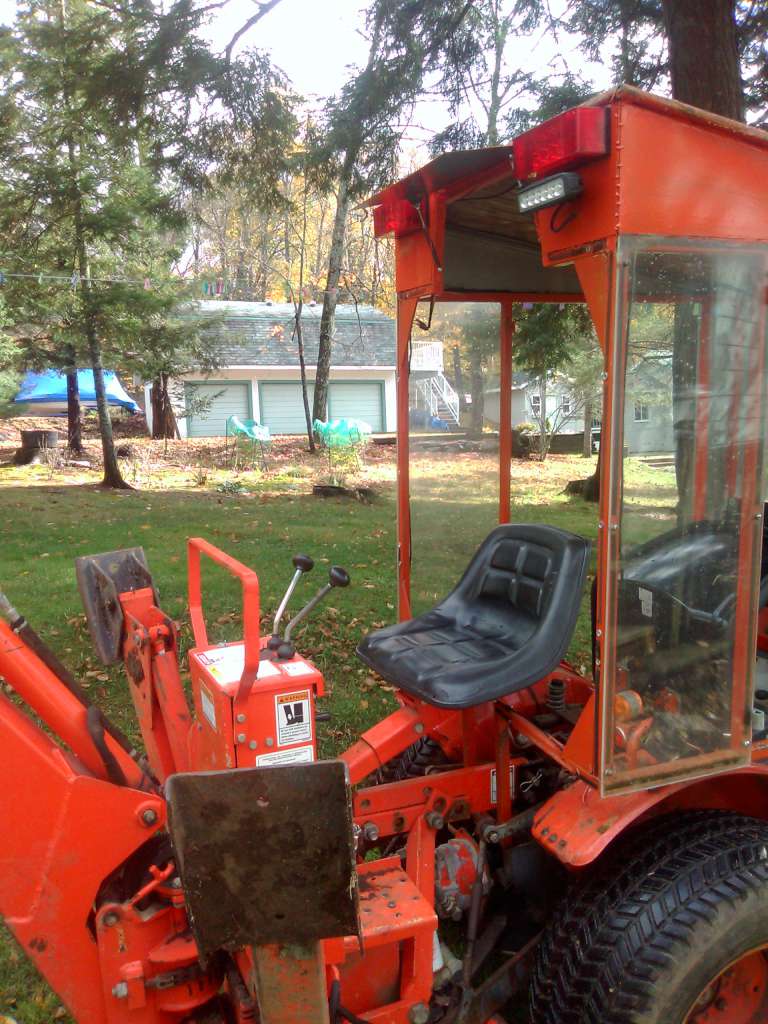
B7100 CAB build

Tooljunkie

Well-known member
Lifetime Member

Equipment
L1501,home built carry all, mini plow blade.
May 13, 2014
4,150
33
48
60
Lac Du Bonnet, Manitoba,Canada
Looking better all the time.
Keeping track of your time to build it? I would be,just for curiosity sake.

I live a stone's throw from the Winnipeg River,but its all residential and cottages. Didnt really notice much of that through your half fogged window.
 

torch

Well-known member

Equipment
B7100HSD, B2789, B2550, B4672, 48" cultivator, homemade FEL and Cab
Jun 10, 2016
2,621
871
113
Muskoka, Ont.
Looks great and very familiar! Your frame is almost exactly the same as the one I built. Nice job so far, you're going to love it even more than you think you will. It's by far the best investment for a tractor in a cold climate. Keep the updates coming.
I suspect there must be some differences considering our tractors are completely different models ;) but yeah, there's only so many ways to build a tractor cab. Do you have pics of your build somewhere?

The old green GT that this is replacing was an open station tractor. The kids used to wear a snowmobile helmet when it was their turn to blow out the drive. I later added a soft cab, which made a heck of a difference when it was windy.

Looking better all the time.
Keeping track of your time to build it? I would be,just for curiosity sake.

I live a stone's throw from the Winnipeg River,but its all residential and cottages. Didnt really notice much of that through your half fogged window.
I haven't kept close track. It's a project that keeps getting interrupted by other things, like putting the snow tires on all the various cars or baby sitting grandkids. But, including polishing plexiglass, I would guess around 15 - 20 hours so far?

There's lots of cottages around here, and a few other year-round residents. Pretty quiet at this time of year though.
 

torch

Well-known member

Equipment
B7100HSD, B2789, B2550, B4672, 48" cultivator, homemade FEL and Cab
Jun 10, 2016
2,621
871
113
Muskoka, Ont.
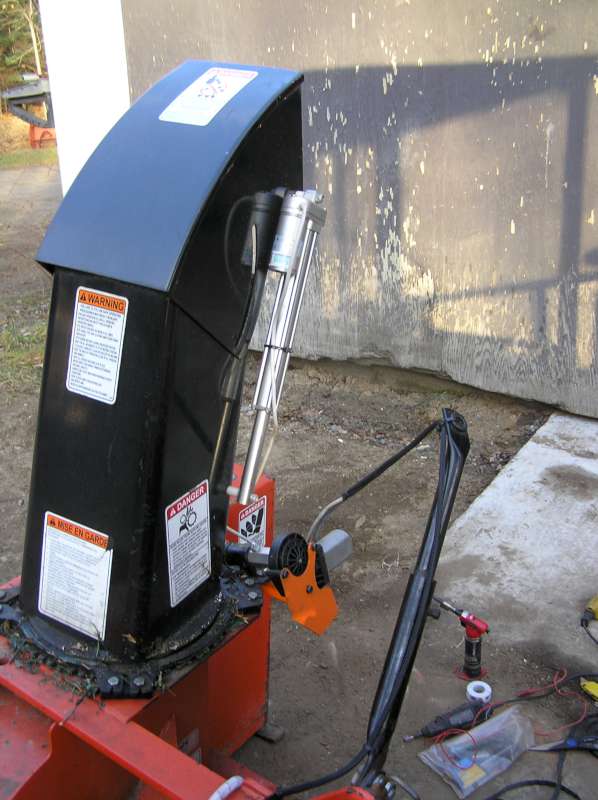
Today I decided to change it up a bit. Technically this isn't part of the cab itself, but the cab is going to necessitate replacing the hand crank with remote chute rotation. And as long as I'm at it, I may as well add remote deflector control too, right? :cool:

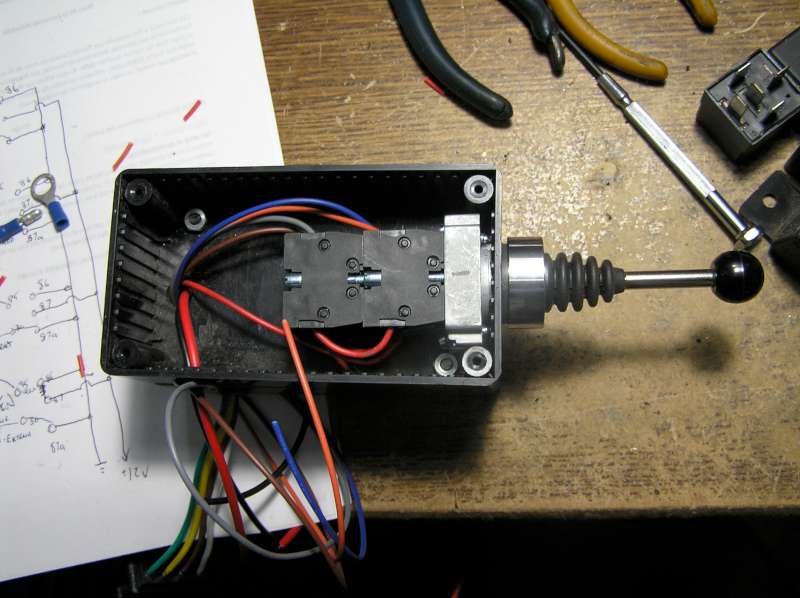
I guess I could go with a pair of DPDT centre-off switches, but where's the fun in that? I want joystick control! So I found the IP67 rated joystick switch pack online and mounted it in a project box.


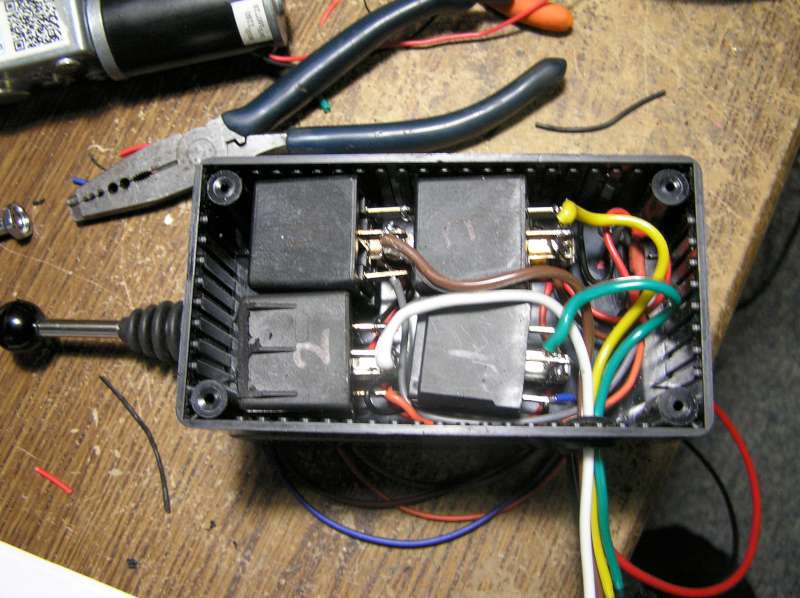
Unfortunately I could not find a similar item with double pole switches. So I mounted another project box back-to-back to house 4 relays. Which I then wired in classic dead-bug configuration worthy of a 1950's era test instrument:


Every NC terminal (ie: 87a) is wired to ground. Every NO (87) is wired to +12v. Each common (30) is brought out to the motor wires. And each relay is activated by one joystick switch. So all motor wires are grounded until the joystick turns one wire positive. Since either wire can be connected to positive, each motor can run in forward or reverse.

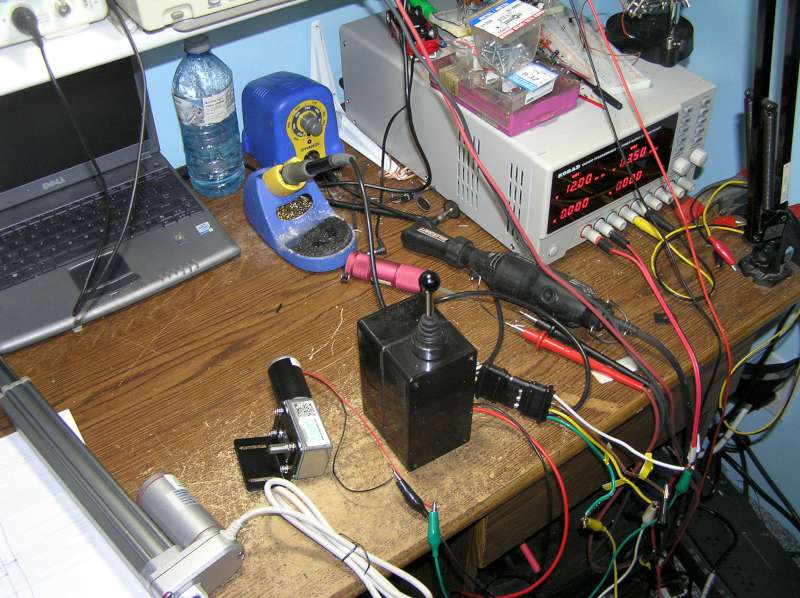
The final result being tested:


I haven't decided exactly where I'm going to mount it yet. Probably beside the seat for now. Eventually, if I get the front-mount blower running, it'll probably live next to the FEL joystick.
 

torch

Well-known member

Equipment
B7100HSD, B2789, B2550, B4672, 48" cultivator, homemade FEL and Cab
Jun 10, 2016
2,621
871
113
Muskoka, Ont.
Looks great and very familiar! Your frame is almost exactly the same as the one I built.
Now that I've gone through your build thread I can see there are certainly some similarities with mine in design concepts. I don't have sturdy frame support that high up, just fender sheet metal (the B7100 ROPS replaces the PTO cover, because there is no support high on the tractor). So the top-link issue was obvious right from the start for me! ;)

The B7100 does not have that nice homogeneous seat/fender/floor pan either. It is a lot closer to a traditional farm tractor in design, all wide open underneath with link rods, levers and pipes running willy-nilly everywhere. Very difficult to seal!

Even so, I'm envious of your heater. Despite the lack of sealing, it might be useful for defrosting the windows, since warm air rises. Unfortunately, there's no easy way to tap into the B7100 coolant system. There's no thermostat or bypass hose or even a water pump. I was hoping to find some accessible plugged passages, but nothing obvious has jumped out and hit me on the nose yet.

I might be able to cut the upper line and squeeze in a tee for use with an electric pump, but the lower hose has an inline block-heater installed already so there is absolutely no room left in that hose. It would be easier to duct the engine fan airflow to the cab, but I am reluctant to pump possible fumes into an enclosed space :)

I read where one fellow actually tapped the side of the hoses themselves, which just seems so wrong. Maybe if I had a set of spare hoses...
 

tcrote5516

New member

Equipment
BX1860, FEL, 50" Front Blower, Heated Cab, 6' blade, 3pt carry all, 3pt hitch
Sep 2, 2014
482
3
0
Southern New Hampshire
Today I decided to change it up a bit. Technically this isn't part of the cab itself, but the cab is going to necessitate replacing the hand crank with remote chute rotation. And as long as I'm at it, I may as well add remote deflector control too, right? :cool:

I guess I could go with a pair of DPDT centre-off switches, but where's the fun in that? I want joystick control! So I found the IP67 rated joystick switch pack online and mounted it in a project box.


Unfortunately I could not find a similar item with double pole switches. So I mounted another project box back-to-back to house 4 relays. Which I then wired in classic dead-bug configuration worthy of a 1950's era test instrument:


Every NC terminal (ie: 87a) is wired to ground. Every NO (87) is wired to +12v. Each common (30) is brought out to the motor wires. And each relay is activated by one joystick switch. So all motor wires are grounded until the joystick turns one wire positive. Since either wire can be connected to positive, each motor can run in forward or reverse.

The final result being tested:


I haven't decided exactly where I'm going to mount it yet. Probably beside the seat for now. Eventually, if I get the front-mount blower running, it'll probably live next to the FEL joystick.
My cab build is here: http://www.orangetractortalks.com/forums/showthread.php?t=16065

And yes they are different models but the framing proportions are VERY similar!

I ran into the same issue a few weeks ago when automating my chute control. I wanted to use the same joystick control but not being able to find a DPDTx2 joystick meant having to use relays so I opted to go with the 2 DPDT switch route for simplicity. I did find you could stack switches but that would require a crazy deep project box. Nice to see you wen't full on joystick and put the work into making the relay box. That will be awesome to operate/nice job!

My snowblower automation thread is here: http://www.orangetractortalks.com/forums/showthread.php?t=27261
 
Last edited:

torch

Well-known member

Equipment
B7100HSD, B2789, B2550, B4672, 48" cultivator, homemade FEL and Cab
Jun 10, 2016
2,621
871
113
Muskoka, Ont.

Tooljunkie

Well-known member
Lifetime Member

Equipment
L1501,home built carry all, mini plow blade.
May 13, 2014
4,150
33
48
60
Lac Du Bonnet, Manitoba,Canada
I mounted the hardware to the chute today. The linear actuator works the deflector quite nicely, but chute rotation was a miserable failure. "High torque" my @$$. Oh well, off to the auto wreckers in search of a power window motor like you, I guess.
My train of thought is the larger the glass, the more powerful the motor. Like the motor from rear window of a station wagon.
If i think of a more powerful motor i will check in again.
Another is the shift motor used in a two speed rear axle like an old chevy 3 ton.
There will be something else, atv wiinch is overkill i bet. Some arent so great for moisture resistance.
 

OldeEnglish

New member

Equipment
B7100D, MMM, B205 Dozer Blade, woods m48, b2910
Jul 13, 2014
768
7
0
Western, MA
Cab looks awesome! I built a hydraulic chute rotator for my 7100, electricity is not my specialty. It works great and I couldn't imagine trying to turn around and crank by hand trying to throw the snow to a certain area. In my research of building one I have seen a bunch of people build them the way you are doing it so it is possible, but I am no help with an electric one.

All I can suggest is using something that is moisture proof. I had a similar setup on a Ariens snowblower, moisture got in it and it crapped the bed.
 

tcrote5516

New member

Equipment
BX1860, FEL, 50" Front Blower, Heated Cab, 6' blade, 3pt carry all, 3pt hitch
Sep 2, 2014
482
3
0
Southern New Hampshire
I mounted the hardware to the chute today. The linear actuator works the deflector quite nicely, but chute rotation was a miserable failure. "High torque" my @$$. Oh well, off to the auto wreckers in search of a power window motor like you, I guess.
Well that stinks. Based on your pictures the motor you bought seems pretty robust...just not enough gear reduction I would assume. The Crown Vic motor works great, plenty of torque and decent speed. The method to the madness was sourcing a replacement should never be an issue if the need arises.
 

torch

Well-known member

Equipment
B7100HSD, B2789, B2550, B4672, 48" cultivator, homemade FEL and Cab
Jun 10, 2016
2,621
871
113
Muskoka, Ont.
Since the Crown Vic motor is known to work, I'm sourcing one of those. Thanks for the tip.

In the meantime, back to the welder. Fabbed up a door today. Half the time was spent sorting through and cleaning up some "previously enjoyed" 1" square tube -- another freebee :D. The other door should go together pretty quick now though. I think I'm going to turn a knurled knob for the outside of the latch. The forecast says it will be warm enough to paint tomorrow, but if it's not, the doors just lift right off and I can take them inside the shop for painting.


tcrote5516

New member

Equipment
BX1860, FEL, 50" Front Blower, Heated Cab, 6' blade, 3pt carry all, 3pt hitch
Sep 2, 2014
482
3
0
Southern New Hampshire
Went above and beyond with the mitered joints and a cross bar for side impact protection:D Looks good man.

I think you'll be happy with the crown vic motors. Between the workout they get in police cruisers and then their asked to live on for another 500,000 miles in taxi's I think it will hold up well on chute duty.
 

torch

Well-known member

Equipment
B7100HSD, B2789, B2550, B4672, 48" cultivator, homemade FEL and Cab
Jun 10, 2016
2,621
871
113
Muskoka, Ont.
I think mitered corners are stronger joints for the same reason that chamfering the edges makes for a stronger weldment: More base metal exposed to the filler. Besides, they close the tube to keep water out so it doesn't rust from the inside out.

I have one of the ubiquitous Chinese 4x6" bandsaws, so cutting the angles accurately is easy (well, once one tunes up the hardware in the first place. When buying Asian metal working equipment, one is not buying a finished product so much as buying a kit... :rolleyes:). A chop-saw would also work well. Mitered joints are more time consuming and less accurate if one is trying to cut the tube by hand.

It's also important to make sure the joints are mitered in the right direction. Don't Ask Me How I Know This™. I find it helpful to mark the miter direction as I layout each piece so I don't inadvertently put it in the saw the wrong way round. Again. :eek:
 

torch

Well-known member

Equipment
B7100HSD, B2789, B2550, B4672, 48" cultivator, homemade FEL and Cab
Jun 10, 2016
2,621
871
113
Muskoka, Ont.
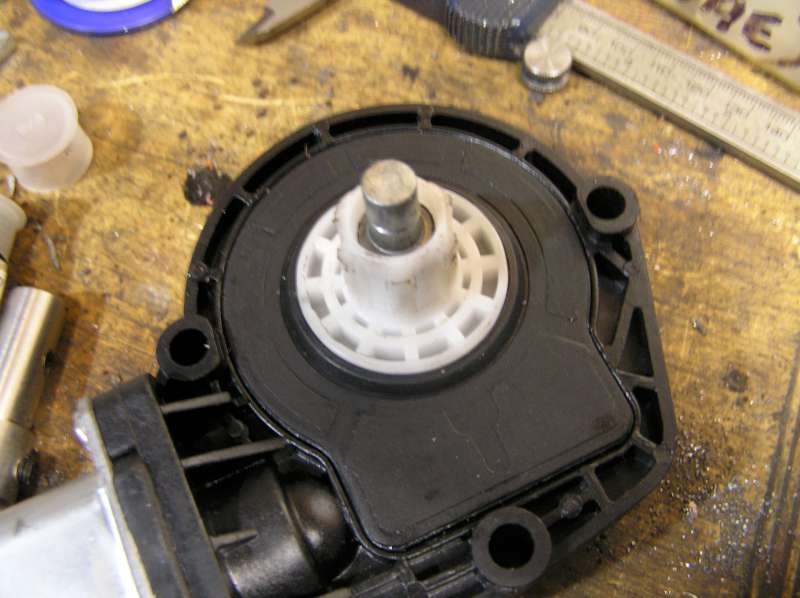
I got my Crown Vic window motor. But mine came with a plastic drive gear:


tcrote used a 19mm socket to couple his to the chute shaft, but his motor had a metal drive gear. While a 6 point 19mm engaged mine, a 12 point version spun around the splines. I felt that indicates sooner or later a plastic spline would round off and start slipping.

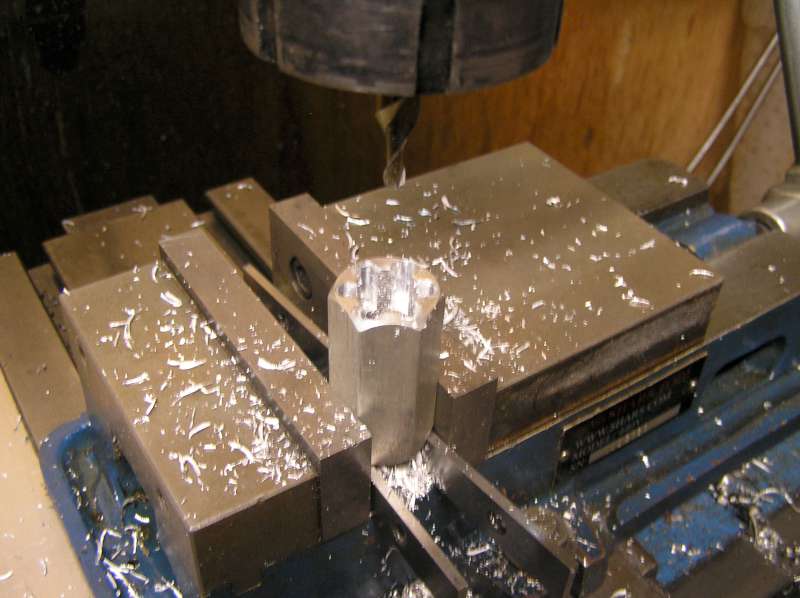
So I decided to machine something that would fit the spline:


There's 6 splines, so aluminium hex bar stock acts as it's own indexer. A drill press could be used if one did not have access to a milling machine. Drill 0.160" diameter holes on the major diameter of the splines, then bore out the centre with a 5/8" bit and square the edges with a file.

My particular blower needed a 3/4" bit to bore out the opposite side.

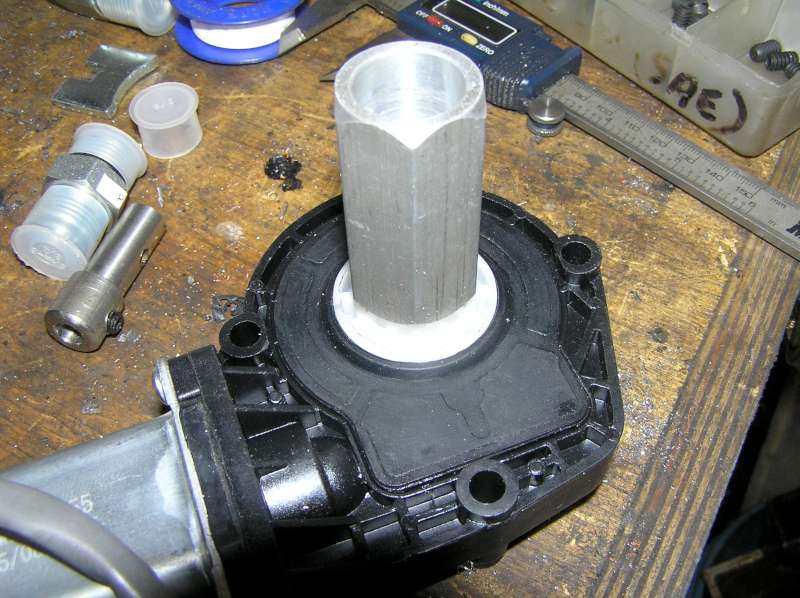
Anyway, it made a nice snug secure fit:


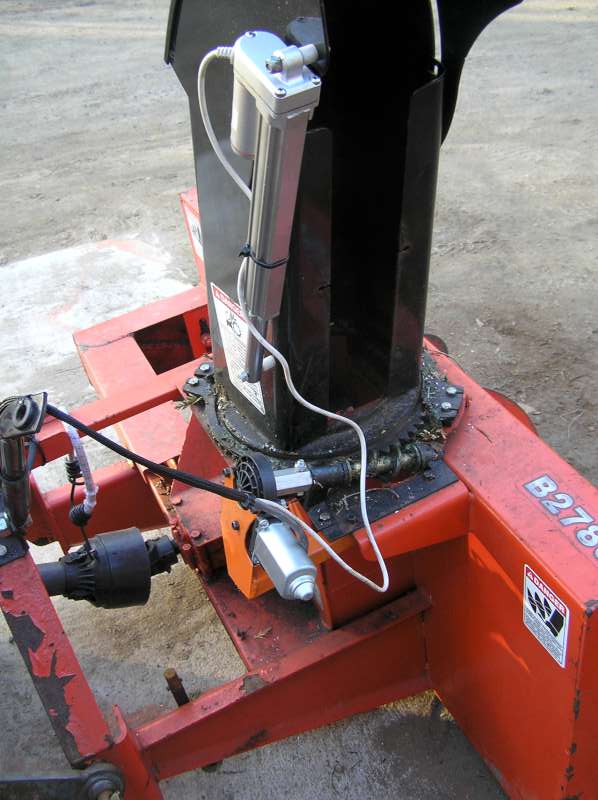
After that, it was a comparatively simple matter to fab up a bracket and wire the thing:


I'm not sure how to embed a video in a post on this board, so if you want to judge speed you have to follow the link to see the video:

https://picturehosting.verhey.org/Kubota/cab/remote_chute.webm
 

Tooljunkie

Well-known member
Lifetime Member

Equipment
L1501,home built carry all, mini plow blade.
May 13, 2014
4,150
33
48
60
Lac Du Bonnet, Manitoba,Canada
Nice. Looks well thought out.
Machine work is a little too fancy for me. I prefer a little more redneck in my modifications/builds.
Do wish i had a small mill to park besid the lathe.
 

tcrote5516

New member

Equipment
BX1860, FEL, 50" Front Blower, Heated Cab, 6' blade, 3pt carry all, 3pt hitch
Sep 2, 2014
482
3
0
Southern New Hampshire
I should have mentioned I looked specifically for an older crown vic replacement motor and used ebay pictures to make sure it had the metal gear. Looks like you overcame the plastic gear in style with that machined piece. Nice to see it all up and running.
 

torch

Well-known member

Equipment
B7100HSD, B2789, B2550, B4672, 48" cultivator, homemade FEL and Cab
Jun 10, 2016
2,621
871
113
Muskoka, Ont.
Live and learn. When one was not available at the local wrecking yard, I ordered one from an auto parts supplier -- without benefit of pictures. I don't know if it's different because of year or model, but strongly suspect it's a design or supplier change. I know AC Delco makes very little themselves these days, and suspect the same is true of Motocraft.

So yeah, the lesson for those stumbling on this discussion in the future is to make sure you get one with a metal gear or be prepared to make a splined coupler. Speaking of others that try to follow your lead, I should probably cross-post the photo of the plastic one in your original thread too.
 

torch

Well-known member

Equipment
B7100HSD, B2789, B2550, B4672, 48" cultivator, homemade FEL and Cab
Jun 10, 2016
2,621
871
113
Muskoka, Ont.
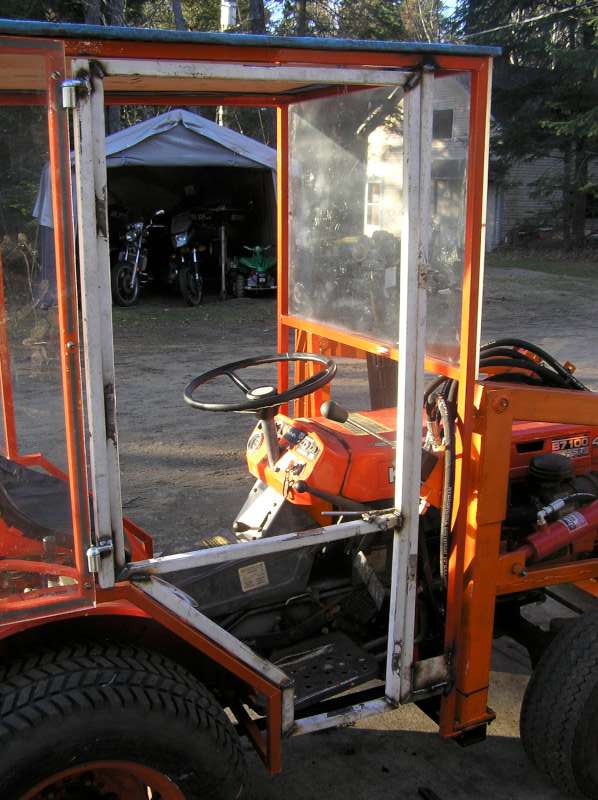
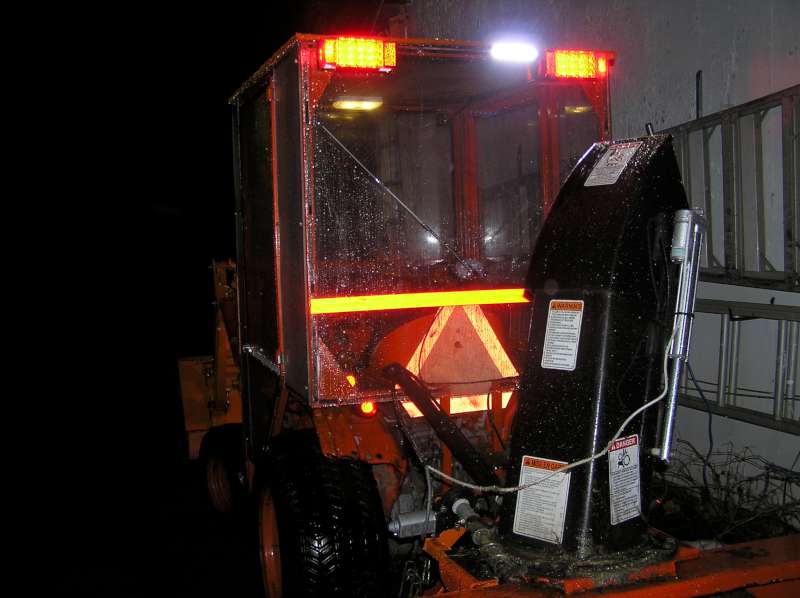
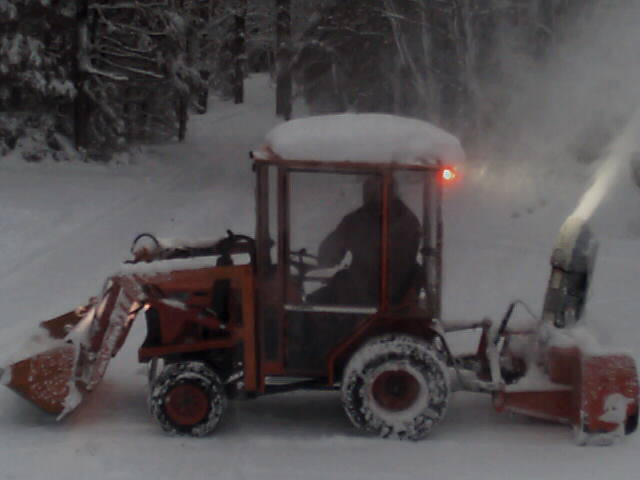
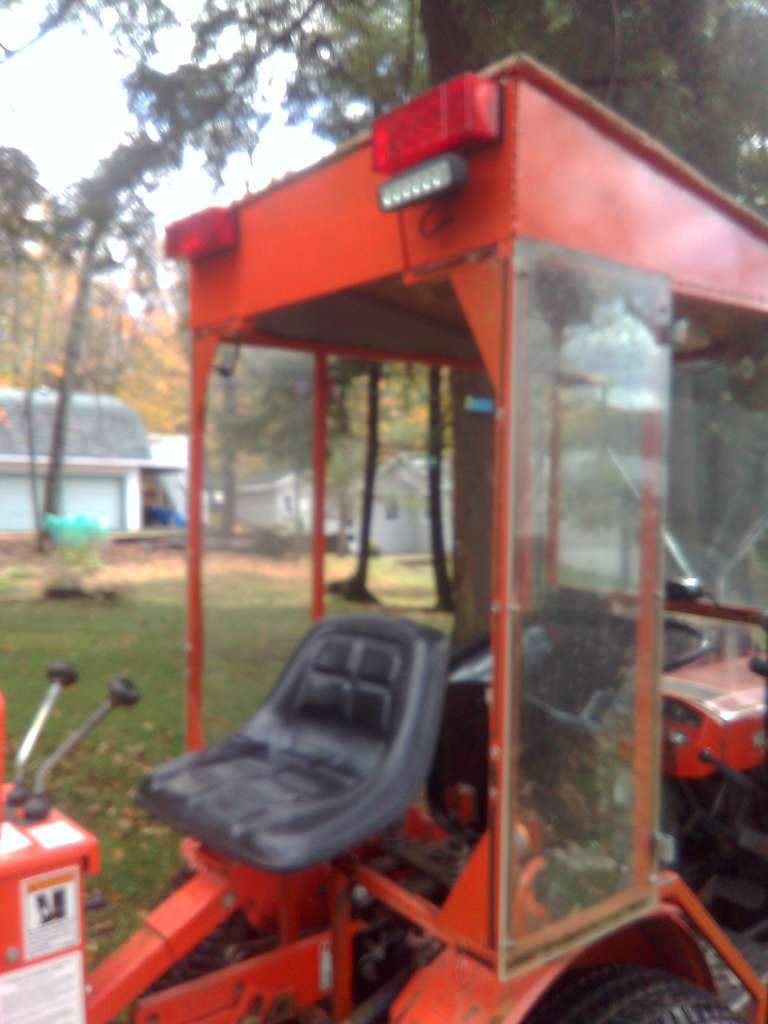
I just realized I never did post pictures of the final result. So here you go:


torch

Well-known member

Equipment
B7100HSD, B2789, B2550, B4672, 48" cultivator, homemade FEL and Cab
Jun 10, 2016
2,621
871
113
Muskoka, Ont.
So the cab was great -- until I bought a backhoe. The backhoe seat is an interference fit with the tractor seat and the rear window was in the way. No problem, don't need it in winter and it's just a few machine screws to pop out the rear window.

But the backhoe seat is also higher than the tractor seat. I'm normally leaning forward to see what I'm doing, but once in a while...

So here's my modification: