King Kutter Re-Design & Repair

High Octane

New member

Equipment
B6100E
May 20, 2014
4
0
0
61
Belleville, Il.
www.DIY-LASERS.com
King Kutter Re-design & Repair

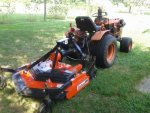
Purchased new, This 5 foot King Kutter finishing mower has done O.K. for many years. The wet environment has taken its toll and rust has eaten many areas away.
Besides the rust repairs, the design is very poor resulting in poor cutting results, more like a UN-Finishing mower.
The mower would easily clog in deep and/or wet grass, forcing me to re cut areas several times, so a redesign is a must while I repair the rust damage.​

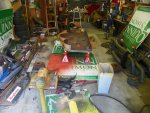
Re-Designing & Repairing this mower without spending little if any money will take all the scrap metal I have.

I"ll have to use all my ingenuity to take this pile of crap scrap metal and make it into a usable piece's that have form & function.
100_1572.jpg

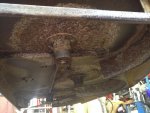
All the rust has to be removed so several wire wheels for my grinder had to be purchased.

After removing all the rust possible I coated the area with a rust inhibitor to stop & prevent further rusting as well as to make it paint-able.
IMG_1901.jpg

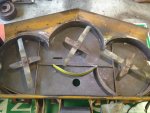
Once that was dry I brushed on a graphite type of paint that will help prevent any grass wet or not, from sticking and causing clogging and clumping.

The support beams really screw up a nice flow, However removing them would compromise structural support. so they will stay for now.
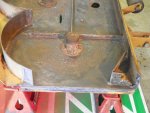
100_1573.jpg

Both metal sides, one of which is the discharge are both rusted through and will need to be replaced.

I actually plan on making both sides discharge in order to prevent clumping, clogging & tracking, due to the current design overwhelming the blades because of the amount of grass its trying to handle.
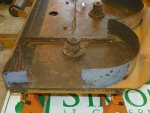
100_1575.jpg

As you can see, this is a feeble attempt at some sort of tunneling. While this design might be ok for a rear discharge mower, as you can see this is a single side discharge mower. this is a must fix issue, if the performance of this mower will ever be at its full potential.

There is about a 4" gap between this retarded partial tunnel design and the blade making it almost useless!
IMG_1903.jpg

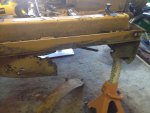
The beginning of the tunnel making, by cutting bending & hammering into shape some scrap metal, in order to form the bottom or back side of my tunnel design.
You can see my first piece in the center bottom above the round hole.

In case you haven"t noticed, the blades have already been modified. This was not easy due to the opposite rotation of the blades compared to the rest of the world, so going to the store and purchasing blades was out of the question.

After many months of searching, I happened across a set of 3 small blades from my old 50s simplicity lawn tractor and to my surprise they also rotate backwards!

As my tunnel design comes together, you can see that I cut the original portion loose and re-welded it a thumbs distance closer to the blade, then began to make the pieces for the bottom side of the tunnel.

Besides the mowers poor condition & performance needing addressing, the method used to pick up my mower also needed redesigning.

With my mower, a single chain & steel strap was bolted to the center rear and to the 3 point hitch, which caused or allowed the mower to fall to one side or the other when lifted.

Not only was this dangerous it was annoying, so I removed the chain & strap crap and made my own double contact lift that lifts the deck in a secure & stable manor. The idea came from this picture I found while surfing Google.

See more pics here
https://www.facebook.com/DIYLASERS/media_set?set=a.10201782981528020.1073741829.1586118119&type=3
 
Last edited:

ShaunRH

New member
Lifetime Member

Equipment
L3200
May 14, 2014
1,414
6
0
Atascadero, CA
The factory air director for this would indicate it's designed for only light duty cutting, small trimmings, likely less than two inches of trim height before losing efficiency.

I agree with you, the airflows are all wrong. Also, you'll need to get rid of those supports, they screw up whatever flow you have. You'd be better served with 1" angle iron welded with the open angle up toward the deck and closed at the ends making a tent shape that is far easier for the trimmings to negotiate. It's also stronger than just the single stringer.

Some additional ideas if you are open to them... :cool:

If you aren't trying to collect the trimmings, you'd be better served closing up the entire rig and putting some kind of mulching blades on it and raising the air skirts around the blades (not around the perimeter) about .5" - 1". This would spread the trimmings around and they'd be reduced to small bits.

If you are trying to collect them, I'd still enclose it and build a vacuum assist either atop or towed behind it. You could have 3 vacuum leads right out the top at 45° output just behind the 90° point off the cells shaft so the blades could assist in lift. This would be cheaper than a new finish cutter but not as pretty or as nice.

Nice thing about what you have going is you have a nearly blank slate to play with. Drawback is all the work from here on out is labor. Whether it is a labor of love or hate depending on how much you like sheet metal work! LOL! :D
 

Kubota Newbie

Active member

Equipment
M4500, New Idea Cut-Ditioner, JD 14T Baler, IH "Plow Chief" plows, Oliver Rake
Dec 28, 2010
533
81
28
Mount Vernon, Ohio
Just one question... Does Mr. Simon know you snagged all his campaign signs???
 

High Octane

New member

Equipment
B6100E
May 20, 2014
4
0
0
61
Belleville, Il.
www.DIY-LASERS.com
The factory air director for this would indicate it's designed for only light duty cutting, small trimmings, likely less than two inches of trim height before losing efficiency.
I often use it to cut wet grass that's up to my knees!

I agree with you, the airflows are all wrong. Also, you'll need to get rid of those supports, they screw up whatever flow you have. You'd be better served with 1" angle iron welded with the open angle up toward the deck and closed at the ends making a tent shape that is far easier for the trimmings to negotiate. It's also stronger than just the single stringer.
Great Idea, I might have enough angle iron to make the changes.

Some additional ideas if you are open to them... :cool:

If you aren't trying to collect the trimmings, you'd be better served closing up the entire rig and putting some kind of mulching blades on it and raising the air skirts around the blades (not around the perimeter) about .5" - 1". This would spread the trimmings around and they'd be reduced to small bits.

If you are trying to collect them, I'd still enclose it and build a vacuum assist either atop or towed behind it. You could have 3 vacuum leads right out the top at 45° output just behind the 90° point off the cells shaft so the blades could assist in lift. This would be cheaper than a new finish cutter but not as pretty or as nice.
IMG_1917.jpg

I ran out of room for the rest of the pictures. But as you can see, I added smaller blades to the existing blades Plus with my tunnel design not only mulches it, it also helps create a vortex that lifts the grass much better than the single blade ever could. and the duel side discharge prevents clogging as well.

I'll have to take a pic of my finished design. I've cut the grass (1.1acres) 3 times now without any issues like it had in the past.

Nice thing about what you have going is you have a nearly blank slate to play with. Drawback is all the work from here on out is labor. Whether it is a labor of love or hate depending on how much you like sheet metal work! LOL! :D
I love designing or re-designing things like my car (a 400+hp Dodge Neon), My Harley, my lasers, bathroom & my home built computer++.

7156_4859876386541_1927019887_n.jpg

Now that you are that far along
have you thought about rear discharge ?
I have a 48 inch KK rear discharge on a B6100
tall grass , wet grass no problem
i also use MO DECK and the grass won't stick

Pop Pop
I thought about a rear discharge, However I have more control over air flow with the discharge going out both sides. With the addition of the second blades (see above pic) It mulches now just great preventing clumping & clogging.

Just one question... Does Mr. Simon know you snagged all his campaign signs???
LOL, The wife brought those home, They don't work well when welding around them. They catch fire!
 

ShaunRH

New member
Lifetime Member

Equipment
L3200
May 14, 2014
1,414
6
0
Atascadero, CA
Well, I did say reduce efficiency, not that it isn't able to do it!

Most finish mowers don't like massive cuts. You either take multiple cuts or cut with a rough cut mower then switch to finish for the best results. However, that's traditional thinking...

I figured you might be best served with a mulching design. It looks good!

With those holes, side discharge would be easiest! Kudos for KISS philosophy being applied.

Looks good, glad you got it all worked out!