Fixing hole in side of block

North Idaho Wolfman

Moderator
Staff member
Lifetime Member

Equipment
L3450DT-GST, Woods FEL, B7100 HSD, FEL, 60" SB, 743 Bobcat with V2203, and more
Jun 9, 2013
29,246
5,541
113
Sandpoint, ID
View attachment 131552

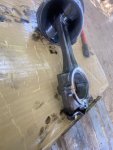
reassembled front axle from tractor with the hole in block and moved it, preparing to get take that block off as well


View attachment 131553

Built 2 more tables out of pallets to organize parts for teardown of engine with hole in it

View attachment 131554

Engine with 600 hours, gearcase removed

View attachment 131555

More table space to get ready to reassembly the good block

View attachment 131556

All of the parts ready for the reassembly (of the engine without the hole in it)

View attachment 131557

Bolts for all the gears, ran them through diesel, then parts cleaner

View attachment 131558

More bolts for engine block cleaned

View attachment 131559

All of the parts hit with cleaners, pressurized air, brushes, etc, ready for reassembly

View attachment 131560

More bolts, assortment

View attachment 131561

Head gasket from engine with 600 hours (with the hole in the block): hit it with wire wheel, nylon stripping disc on drill, pressurized parts cleaner, decided to save it and use it on the other engine, head gasket for that engine was damaged, discarded

other tasks I had to do: raking the shop floor leveling it, going through all the bolts, assessing if I forgot to order small parts, worried about small adjustments but I'll figure them out once the time comes

next steps: once the liners arrive, sharpen a flathead or chisel, hammer down the two bad liners (did not hammer them out yet in case liners did not make it), put the new liners in the freezer for a duration, try to put the liners in then figure out the machine shop task, start to reassemble the crankshaft with the bearings, I am not getting new crankshaft bolts, there might be a gasket on one of the main bearing cases, I have been hitting one with wire wheel attempting to clean it well(i'll look into the diagram), clean the area where the crankshaft connects to tractor, the bell housing, wire wheel, and grease that fitting on the clutch

basically: put in the new liners and hone them to spec, reassemble the crankshaft properly, dont forget that bearing 210, install block back onto tractor

Any parts I forgot to get, I will pull them from the 600 hour engine and use them for the 2500 hour engine, including: connecting rod bolts, and any other parts for later in the build
You CAN NOT reuse a head gasket!
 
  • Love
  • Like
Reactions: 1 users

joesmith123

Active member

Equipment
L295DT, BX1500
Mar 18, 2023
365
32
28
earth
IMG_1376.jpeg


this was a very stubborn stuck gasket, it it with hard wire wheel on drill

IMG_1378.jpeg


Cleaned all the parts while waiting for new parts to arrive

IMG_1380.jpeg


There was a ton of sludge caked onto the inside of this part, solution: small T shaped hard wire wheel on drill, dip in diesel, use clamps to hold it down, hit it real hard both sides

IMG_1382.jpeg


Hit the crankshaft bearings again hard with small T shaped wire wheel, hit with parts cleaners

IMG_1384.jpeg


Japanese parts showed up: 2 new liners, 3 new crank bearings, 3 new connecting rod bearings, 2 sets of piston rings, one set of piston hardware, one new piston

Got nothing from messick, if yall care about it, I can elaborate

Before unboxing any of it, went to kubota website and made sure all the part numbers match for this engine

(I already messed up and got one wrong liner because one number was off in the part number)

IMG_1387.jpeg


Comparing new vs old japanese main bearings: top = 40 year old bearings, bottom = new bearings

IMG_1393.jpeg


New piston sitting on new liner

IMG_1397.jpeg


This is that part 210 from the diagram, the front crankshaft bearing, the one that had to be chiseled out

IMG_1396.jpeg


Thrust bearing: top is old one, bottom is new one

IMG_1394.jpeg


A liner on top of the liner that is slightly shifted down

Ok yes, now that parts are here: 1. sharpen a chisel or flathead, and hammer down the 2 liners that need replaced, 2. put together the crankshaft with the new bearings, 3. make appointment with the machine shop to have them install and hone the 2 bad liners (I am only replacing the 2 liners that had broken pistons, the other liner is perfect to the touch and piston was not broken)

I go figure it out
 
Last edited:

Ktrim

Active member

Equipment
B2400, lA352 loader,3pth quick hitch/z122r zero turn/restored 52 farmall super a
Dec 23, 2020
273
147
43
Nazareth Pa
View attachment 131597

this was a very stubborn stuck gasket, it it with hard wire wheel on drill

View attachment 131598

Cleaned all the parts while waiting for new parts to arrive

View attachment 131599

There was a ton of sludge caked onto the inside of this part, solution: small T shaped hard wire wheel on drill, dip in diesel, use clamps to hold it down, hit it real hard both sides

View attachment 131600

Hit the crankshaft bearings again hard with small T shaped wire wheel, hit with parts cleaners

View attachment 131601

Japanese parts showed up: 2 new liners, 3 new crank bearings, 3 new connecting rod bearings, 2 sets of piston rings, one set of piston hardware, one new piston

Got nothing from messick, if yall care about it, I can elaborate

Before unboxing any of it, went to kubota website and made sure all the part numbers match for this engine

(I already messed up and got one wrong liner because one number was off in the part number)

View attachment 131602

Comparing new vs old japanese main bearings: top = 40 year old bearings, bottom = new bearings

View attachment 131603

New piston sitting on new liner

View attachment 131604

This is that part 210 from the diagram, the front crankshaft bearing, the one that had to be chiseled out

View attachment 131605

Thrust bearing: top is old one, bottom is new one

View attachment 131606

A liner on top of the liner that is slightly shifted down

Ok yes, now that parts are here: 1. sharpen a chisel or flathead, and hammer down the 2 liners that need replaced, 2. put together the crankshaft with the new bearings, 3. make appointment with the machine shop to have them install and hone the 2 bad liners (I am only replacing the 2 liners that had broken pistons, the other liner is perfect to the touch and piston was not broken)

I go figure it out
Wish I was born with micrometers on my finger tips.
 
  • Haha
  • Love
  • Like
Reactions: 2 users

joesmith123

Active member

Equipment
L295DT, BX1500
Mar 18, 2023
365
32
28
earth
Face the A and B which way?

IMG_1405.jpeg


This is how it was put together from when it was removed, with the A and B facing left (if front of crankshaft is the spindle)

The last crank bearing faces the back of the crankshaft because there are bolts that go into it

IMG_1406.jpeg


Serial number markings: Do I face them left or right?

IMG_1407.jpeg


The last serial number marking facing right of crankshaft

I looked at the diagram, it does not say which way to orient them

Were they installed properly when I removed them?
 

Ktrim

Active member

Equipment
B2400, lA352 loader,3pth quick hitch/z122r zero turn/restored 52 farmall super a
Dec 23, 2020
273
147
43
Nazareth Pa
Face the A and B which way?

View attachment 131619

This is how it was put together from when it was removed, with the A and B facing left (if front of crankshaft is the spindle)

The last crank bearing faces the back of the crankshaft because there are bolts that go into it

View attachment 131620

Serial number markings: Do I face them left or right?

View attachment 131621

The last serial number marking facing right of crankshaft

I looked at the diagram, it does not say which way to orient them

Were they installed properly when I removed them?
As bad as those journals look I wouldn't waste time putting bearings on them.
 
  • Like
Reactions: 1 user

joesmith123

Active member

Equipment
L295DT, BX1500
Mar 18, 2023
365
32
28
earth
Yes I googled which way they are meant to face, cannot figure it out

IMG_1409.jpeg


hit the bell housing with wire wheels, greased the clutch bearing

I’ll keep trying to figure out which way they face
 

North Idaho Wolfman

Moderator
Staff member
Lifetime Member

Equipment
L3450DT-GST, Woods FEL, B7100 HSD, FEL, 60" SB, 743 Bobcat with V2203, and more
Jun 9, 2013
29,246
5,541
113
Sandpoint, ID
Yes I googled which way they are meant to face, cannot figure it out

View attachment 131626

hit the bell housing with wire wheels, greased the clutch bearing

I’ll keep trying to figure out which way they face
I told you to mark all the parts before removal as there orientation matters greatly.
I know on the rods have the numbers facing the injection pump side, I do not know about the mains, I'll see if I can find anything on them.
 
  • Like
Reactions: 1 users

joesmith123

Active member

Equipment
L295DT, BX1500
Mar 18, 2023
365
32
28
earth
I told you to mark all the parts before removal as there orientation matters greatly.
yes I did mark them, here’s a picture of before I took them apart

IMG_1241.jpeg


last person that put it together had the letters facing LEFT, and serial number numbers left for A and B, but serial number RIGHT for last main bearing

mainbearings.jpg


Here is how it was when I took it apart

When I took out the pistons, I do see kubota will put the 1 on the left, and the serial on the right

It could be correct the way it was, I am just making sure

I do not have the WSM, maybe I need to get that and look through it

IMG_1202.jpeg


I know on the rods have the numbers facing the injection pump side,
this is a picture of when i took out the first piston, number "1" facing left of tractor, piston serial facing right of tractor

I had piston SERIAL, not piston number (1, 2 or 3) facing injection pump (which is right)

I had all piston numbers (1, 2 or 3) facing LEFT

More clues I notice that help: they will put writing on connecting rod facing FRONT for all the pistons

If A and B are on the left as pictured, there is writing facing FRONT on the main bearing case

I'll take a picture of what I mean,

Also I just remembered: everything is still factory inside the 600 hour engine with the whole in it, next chance I get, I can get under it with flashlight, trace how they have everything oriented using japanese writing on the bearing cases...

I'll show yall what I mean next chance i get..

it'll get figured out
 

Attachments

Last edited:

joesmith123

Active member

Equipment
L295DT, BX1500
Mar 18, 2023
365
32
28
earth
Solved

went under factory engine with hole in it , pictures

IMG_1411.jpeg


I'm pointing to serial facing the back of the tractor for "A" and "B", hole is on LEFT side of tractor

IMG_1414.jpeg


In this one, we can confirm: SERIAL number of PISTON facing right (like wolf said)

IMG_1418.jpeg


Here is the piston that put a hole in the block, oriented exactly how it come out, serial facing injection pump/right of tractor

IMG_1420.jpeg

IMG_1419.jpeg


This is the rear bearing case serial facing FRONT of tractor, meaning

It is correct the way I had it labeled, the way it was taken apart

The thing I notice different about these two tractors with the stamps on the pistons:

Tractor with 2500 hours: has BOTH serial and piston #

Tractor with 600 hours: has ONLY serial number (facing right)

BOTH have serial numbers facing injection pump

In the mean time, I’ll go figure out how to remove the liners

IMG_1421.jpeg

Looking through the hole in the block, main bearing (A or B) serial facing REAR of tractor
 
Last edited:

DustyRusty

Well-known member

Equipment
2020 BX23S, BX2822 Snowblower, Curtis Deluxe Cab,
Nov 8, 2015
5,570
4,196
113
North East CT
The liners should be pressed out and pressed in using a hydraulic press. If you try hammering them out and hammering them back in, you are running a greater risk of wasting the money spent on new parts than what a machine shop would charge you to do it properly with the correct equipment and experience doing this type of work.
The other thing that I noted was the excess grease on the throwout bearing. That grease will be thrown off and your new clutch disk and pressure plate will be the recipients of the grease. A new throw-out bearing is factory-greased with the proper grease and quantity.
 
  • Like
Reactions: 1 users

joesmith123

Active member

Equipment
L295DT, BX1500
Mar 18, 2023
365
32
28
earth
The liners should be pressed out and pressed in using a hydraulic press. If you try hammering them out and hammering them back in, you are running a greater risk of wasting the money spent on new parts than what a machine shop would charge you to do it properly with the correct equipment and experience doing this type of work.
yes I am listening, was fixing to sharpen a chisel and hammer down and split the liner

those people in the videos do it like it is not that difficult

I won’t put the liners in fear of damaging them, I will take the block to machine shop with liners removed, and new liners in hand

IMG_1425.jpeg

Separated it using small flathead

IMG_1427.jpeg


chisel and sledgehammer, hitting it at an angle, rotating the entire block working downward slowly

IMG_1429.jpeg


almost done. There’s no way it was possible to hydraulic press out this liner

it is fully seized to the block, it was one hour of chiseling just to get this far
 
Last edited:

MountainMeadows

Well-known member

Equipment
L2501, JD 655, Ford 841, JD 6x4 Gator, Gravely 432.
Jun 6, 2022
210
278
63
Poconos, PA
You're doing a nice job but you might reconsider reusing that head gasket. It's never a good idea to try to reuse a head gasket.
 
  • Like
Reactions: 1 user

jaxs

Well-known member

Equipment
B1750HST
Jun 22, 2023
542
286
63
Texas
yes I am listening, was fixing to sharpen a chisel and hammer down and split the liner

those people in the videos do it like it is not that difficult

I won’t put the liners in fear of damaging them, I will take the block to machine shop with liners removed, and new liners in hand

View attachment 131669
Separated it using small flathead

View attachment 131671

chisel and sledgehammer, hitting it at an angle, rotating the entire block working downward slowly

View attachment 131672

almost done. There’s no way it was possible to hydraulic press out this liner

it is fully seized to the block, it was one hour of chiseling just to get this far
Are those dents,scratches and divots left in block from chiseling liner out? 😲
 
  • Like
Reactions: 1 user

Ktrim

Active member

Equipment
B2400, lA352 loader,3pth quick hitch/z122r zero turn/restored 52 farmall super a
Dec 23, 2020
273
147
43
Nazareth Pa
You do realize that a hydraulic press, properly used, distributes equal pressure all the way around. It would actually push out easier with a press. Now you have done quite a bit of possible irreparable damage to the block.
I'm really beginning to wonder if we aren't all being led on to a bad joke here.
Do you actually expect this engine to run again. Or at the least run for any amount of time.
 
  • Like
Reactions: 2 users

joesmith123

Active member

Equipment
L295DT, BX1500
Mar 18, 2023
365
32
28
earth
Got the liners out

View attachment 131693

Should have sharpened the chisel

IMG_1430.jpeg


Got the liner out way easier after I sharpened chisel with grinding wheel

IMG_1433.jpeg


Going into the next liner, way easier with sharpened chisel

IMG_1434.jpeg


Look at how nice it went down in one stride

IMG_1435.jpeg


Liner after I learned suffered much less damage, more damage to the liner before I sharpened chisel, mistake

IMG_1437.jpeg


Old liner out of block

Next time: I need to follow all steps and not skimp out on the basics even if I dont believe it will make a difference, it obviously did in this case

I'm thinking hit it with metal file that would level the surface of the bore, I'll look into a file set

next steps: Hit those bores with strong wire wheels trying to level them and get them ready for machine shop to put new liners and hone them 82 mm, make appointment with machine shop,

In the meantime, put together crankshaft assembly now that I checked the orientation of all serial numbers on the untouched/unassembled engine with the hole in it

I'm fixing to put thrust/main bearings and put together crankshaft assembly and see how she spins
 
Last edited:

sitric

Member

Equipment
L2850DT Ferguson TO35
Jan 13, 2023
70
51
18
Michigan
I guess I'll never understand why someone would "chisel out" the liners, when they are taking the block into the machine shop to have new liners pressed in. The shop has to set up on each cylinder, and would be little effort to press out the old ones at that time.
 
  • Like
Reactions: 4 users

Shadetree605

Active member

Equipment
kubota b2100
May 1, 2022
205
95
28
north little rock, ar
I guess I'll never understand why someone would "chisel out" the liners, when they are taking the block into the machine shop to have new liners pressed in. The shop has to set up on each cylinder, and would be little effort to press out the old ones at that time.
they think they are saving time and money would be my guess ?. but what they are going to find out is, once this machine shop see's the damage in the cylinder from the chisel marks ?. they are going to tell them they can't back up their work because of it.
 
  • Like
Reactions: 2 users

ken erickson

Well-known member

Equipment
B7100 hst, 2650 front mount snowblower, L2501 hst qa loader
Nov 21, 2010
1,034
1,623
113
Waupaca Wisconsin
they think they are saving time and money would be my guess ?. but what they are going to find out is, once this machine shop see's the damage in the cylinder from the chisel marks ?. they are going to tell them they can't back up their work because of it.
I was surprised also to see the results of removing the liners in that fashion with the OP being ok with it.

And for my own knowledge. The old liners should have been PULLED with a liner puller and can not be pressed out thru the bottom of the block , correct ? , due to interference with the block casting ?
 
Last edited:
  • Like
Reactions: 1 user

Ktrim

Active member

Equipment
B2400, lA352 loader,3pth quick hitch/z122r zero turn/restored 52 farmall super a
Dec 23, 2020
273
147
43
Nazareth Pa
I was surprised also to see the results of removing the liners in that fashion with the OP being ok with it.

And for my own knowledge. The old liners should have been PULLED with a liner puller and can not be pressed out thru the bottom of the block , correct ? , due to interference with the block casting ?
Not sure on clearance on that block. But yes, proper tools for the job. Thousands will make the difference if the new liner will even not spin in the block🤷
 
  • Like
Reactions: 1 user