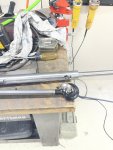
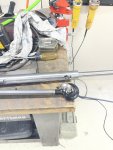
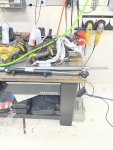
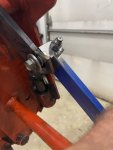
Too fat/lazy/old to unlock your SSQA?????……..Then follow me ;)

Chanceywd

Well-known member
Lifetime Member

Equipment
Kubota L2501DT BH77 VIRNIG URG60-CT 1950 8N WC-68
Mar 26, 2021
852
848
93
central ny
Coach Scissors,
An update, I have been doing a bunch of switching between bucket and forks doing my wood shed project from the comfort of the seat.
Glad You let me on your hydraulic team for the win.
I have it connected to the 3rd function and have to remember to keep that switched off.
I was planting some trees yesterday and wanted to use the thumb which uses the 3rd function and stopped my self from turning that on.
So I finally got that valve ordered and looking up a list of fittings and short hoses on surplus center.
I will wait until I have the valve in hand to finalize that.
I did stick the ball valves I had on hand in both lines to the front 3rd function vale and have them throttled so the speed is at a nice level. Still need to get a flow restricter too.

It is a beautiful thing this project!
Thanks for the motivation with this thread.

Bill
 
  • Like
Reactions: 1 users

Chanceywd

Well-known member
Lifetime Member

Equipment
Kubota L2501DT BH77 VIRNIG URG60-CT 1950 8N WC-68
Mar 26, 2021
852
848
93
central ny
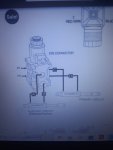
I got my diverter valve yesterday and it came with no documentation for the ports so I went looking.
Just thought I would share what I found.
P1 & P2 seemed obvious, then in the static position ports C&D go to the grapple, then energized position ports A&B go to my SSQA cylinder.
That cleared up in my mind how you would stack them.
I'm sure this is obvious to many but to some like me it might be helpful.

Bill
 

Attachments

Runs With Scissors

Well-known member

Equipment
L2501 TLB , Grappel, Brush Hog, Box Blade, Ballast box, Forks, Tiller, PH digger
Jan 25, 2023
4,004
5,416
113
Michigan
I got my diverter valve yesterday and it came with no documentation for the ports so I went looking.
Just thought I would share what I found.
P1 & P2 seemed obvious, then in the static position ports C&D go to the grapple, then energized position ports A&B go to my SSQA cylinder.
That cleared up in my mind how you would stack them.
I'm sure this is obvious to many but to some like me it might be helpful.

Bill
Thanks Bill, I could not find that for some reason.

I did it the “old fashioned way”.

I put my lips to the valve and blew through the P1 and P2 ports and it came out the C and D ports. So I surmised that when energized the fluid would come out the A and B ports... :ROFLMAO: 🤷‍♂️……But now I have “clarification”.

Been crazy busy the last few days, so tomorrow I am setting aside for “tractor mod work”.
 
  • Like
Reactions: 1 user

Chanceywd

Well-known member
Lifetime Member

Equipment
Kubota L2501DT BH77 VIRNIG URG60-CT 1950 8N WC-68
Mar 26, 2021
852
848
93
central ny
Thanks Bill, I could not find that for some reason.

I did it the “old fashioned way”.

I put my lips to the valve and blew through the P1 and P2 ports and it came out the C and D ports. So I surmised that when energized the fluid would come out the A and B ports... :ROFLMAO: 🤷‍♂️……But now I have “clarification”.

Been crazy busy the last few days, so tomorrow I am setting aside for “tractor mod work”.
Well I took all day trying to install mine, because,,,,,,,,, I took them at their word at 10 sae
I should of payed attention to the 3/4 on the red plugs because it is 8 sae.
I ordered fittings from Surplus center and was screwed on them working.
I had it tore apart and mounted when I found out. so I had a bunch of spare fittings and made it work until new sae 8 to sae 6 come to my rescue.
I about emptied my parts drawer and it looks like crap but the concept works. No pictures until it is tidied up.
Bill
 

Killer Bee

Active member
May 15, 2026
104
151
43
Show-Me State
Well I took all day trying to install mine, because,,,,,,,,, I took them at their word at 10 sae
I should of payed attention to the 3/4 on the red plugs because it is 8 sae.
I ordered fittings from Surplus center and was screwed on them working.
I had it tore apart and mounted when I found out. so I had a bunch of spare fittings and made it work until new sae 8 to sae 6 come to my rescue.
I about emptied my parts drawer and it looks like crap but the concept works. No pictures until it is tidied up.
Bill
that's a bummer on the setback, but there's no shame in sharing your fitting tree. 😀

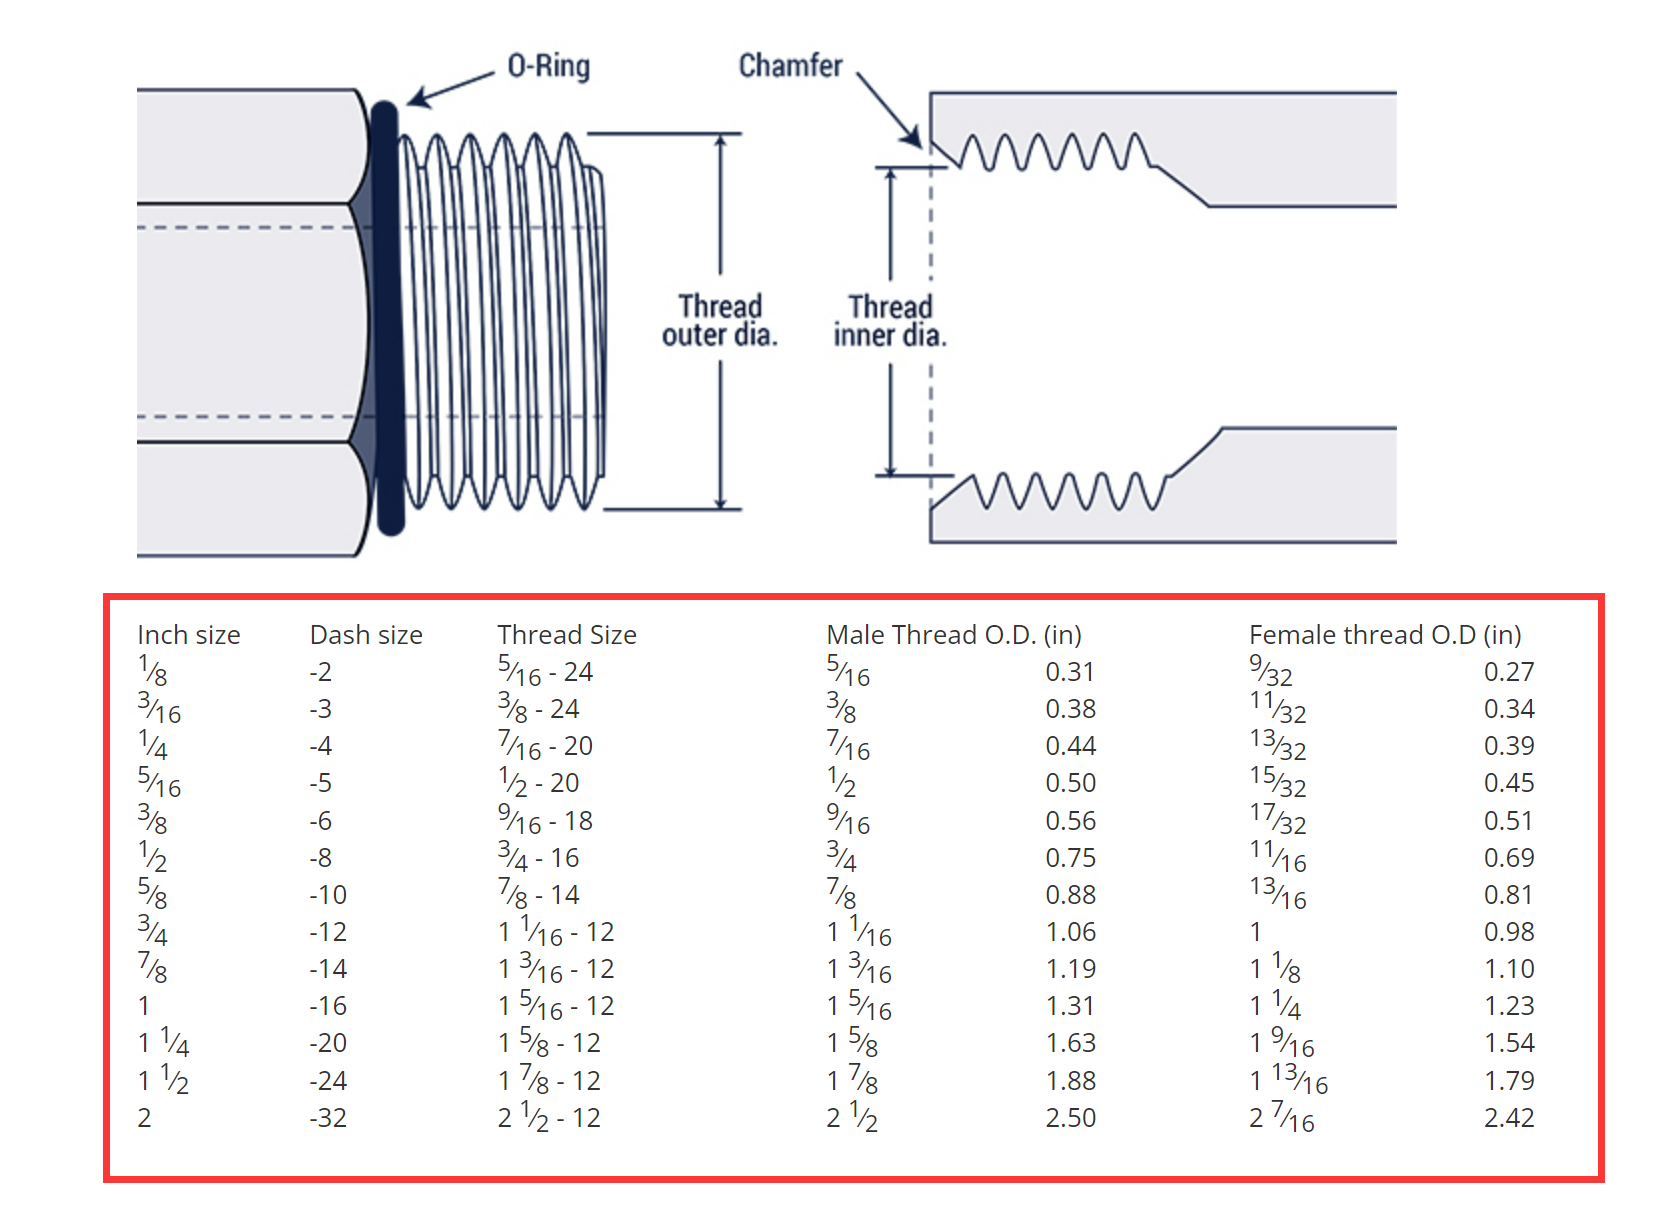
btw, the thread size of a -8 orb is 3/4" 🙃


I highly recommend printing a handy little chart like this or whatever fittings you're working on and slip it inside a plastic page protector or laminate for the shop wall. 🍻

I made those for all the guys in shops I supervised to help minimize mistakes and wasted time and materials. also gave one of these to all my mechanics, very handy! ;)

Parker MIK-1 Thread Identification Kit


AEROQUIP Thread Identification Kit
 
  • Like
Reactions: 1 users

Chanceywd

Well-known member
Lifetime Member

Equipment
Kubota L2501DT BH77 VIRNIG URG60-CT 1950 8N WC-68
Mar 26, 2021
852
848
93
central ny
that's a bummer on the setback, but there's no shame in sharing your fitting tree. 😀

btw, the thread size of a -8 orb is 3/4" 🙃


I highly recommend printing a handy little chart like this or whatever fittings you're working on and slip it inside a plastic page protector or laminate for the shop wall. 🍻

I made those for all the guys in shops I supervised to help minimize mistakes and wasted time and materials. also gave one of these to all my mechanics, very handy! ;)

Parker MIK-1 Thread Identification Kit


AEROQUIP Thread Identification Kit
Very nice kits there. My mistake,,, was taking the valve posting size and breaking my promise to myself and waiting until I had the valve in hand, dumb, move but yesterday I got out the calipers and thread gauge and ordered what I needed in SAE 8.
You and the Old Machinist brought out a lot of good info in this thread and I referred to that yesterday in my search to identify.
The added frustration was just my usual USPS merry go round here in NY.
Stuff gets to Syracuse and then sits for several days. Then sometimes it goes to Buffalo and Rochester before coming back to Syracuse and then to our local levels. it was supposed to be here last week, finally showed on Monday. My planned Saturday install became Tuesday!
I thought I was set with everything and a couple hr install but spent a total of 7 juggling fittings!
I have one of those metal carry parts drawers with a bunch of fittings and some hoses to get me back and running just because of this kind mishap after breaking a hose on a late saturday.

Again thanks for your good info!

Bill
 

Runs With Scissors

Well-known member

Equipment
L2501 TLB , Grappel, Brush Hog, Box Blade, Ballast box, Forks, Tiller, PH digger
Jan 25, 2023
4,004
5,416
113
Michigan
OK fellas, just an “update”.

I was down in the shop yesterday, looking through the "scrap pile” and found an old “shot out” barrel from my days shooting “High Power” match’s.

Since my idea has a "sliding component” to it, this old barrel fits the bill nicely….AND it scratches the “I’m a tight wad” itch….. ;)

So here is the outer tube, and my new "AR-15” sliding tube…..(Nancy Pelosi would be glad to see it does not have a “deadly flash supressor” on it:ROFLMAO:)

IMG_6541.JPG


IMG_6542.JPG


Now due to the countouring of the barrel, it wont fit into that outer tube, so it’s off tot he lathe.

I am having a hell of a time making “long cuts” for some reason…..

If you look closeley the cutter is does fine for a while, then it “magically” starts cutting “differently”????

It stills cuts, but it is leaving “transition lines” in the barrel, making it look like crap…..


IMG_6544.JPG

IMG_6546.JPG


So even though it is not making a difference “functionally”, it’s bugging me.

So I sit there for another 20 minutes “polishing my shaft";)


IMG_6548.JPG

Now I cut off the "chamber area” using my “new, insert, cut off tool"

IMG_6551.JPG

Then I commence to threading the “business end” to the required 1/4- 20

IMG_6553.JPG


IMG_6554.JPG


The tapping goes well, (y)(y)

IMG_6555.JPG

And although I kinds F’d up the barrel wth my “transition lines”, for this purpose it will work fine.

IMG_6556.JPG
 
  • Like
Reactions: 2 users

Chanceywd

Well-known member
Lifetime Member

Equipment
Kubota L2501DT BH77 VIRNIG URG60-CT 1950 8N WC-68
Mar 26, 2021
852
848
93
central ny
OK fellas, just an “update”.

I was down in the shop yesterday, looking through the "scrap pile” and found an old “shot out” barrel from my days shooting “High Power” match’s.

Since my idea has a "sliding component” to it, this old barrel fits the bill nicely….AND it scratches the “I’m a tight wad” itch….. ;)

So here is the outer tube, and my new "AR-15” sliding tube…..(Nancy Pelosi would be glad to see it does not have a “deadly flash supressor” on it:ROFLMAO:)

View attachment 178323


View attachment 178324


Now due to the countouring of the barrel, it wont fit into that outer tube, so it’s off tot he lathe.

I am having a hell of a time making “long cuts” for some reason…..

If you look closeley the cutter is does fine for a while, then it “magically” starts cutting “differently”????

It stills cuts, but it is leaving “transition lines” in the barrel, making it look like crap…..


View attachment 178325

View attachment 178326


So even though it is not making a difference “functionally”, it’s bugging me.

So I sit there for another 20 minutes “polishing my shaft";)


View attachment 178327

Now I cut off the "chamber area” using my “new, insert, cut off tool"

View attachment 178328

Then I commence to threading the “business end” to the required 1/4- 20

View attachment 178329


View attachment 178330


The tapping goes well, (y)(y)

View attachment 178331

And although I kinds F’d up the barrel wth my “transition lines”, for this purpose it will work fine.

View attachment 178332
Progress!
 

Chanceywd

Well-known member
Lifetime Member

Equipment
Kubota L2501DT BH77 VIRNIG URG60-CT 1950 8N WC-68
Mar 26, 2021
852
848
93
central ny
Progress!
So are you going to reduce the over stroke I solved with the shaft collars with this sliding amount of around an inch?
If I am on the same page that is a great idea.
Either way you got me thinking again!

Bill
 

Runs With Scissors

Well-known member

Equipment
L2501 TLB , Grappel, Brush Hog, Box Blade, Ballast box, Forks, Tiller, PH digger
Jan 25, 2023
4,004
5,416
113
Michigan
Ok, it’s “Time”…...

I lay out my idea on the outer tube.

I am gonna make a "long cut” in the outer tube, and then attach the hydraulic cylinder to it. This should give it the ability to slide the “inner tube” laterally….

Sort of like a “trombone"
1787214924905.png


I lay the tape measure on the side of it and start making some marks of where the cuts should be.


IMG_6557.JPG
The best i can tell, the "center to center” max length shoud be 34 5/8 inchs, but as per @Chanceywd , I too have incorporated the “ball ends” to allow for some “slop” in my design.

IMG_6558.JPG

IMG_6560.JPG


Now its time to "clean up’ the outer tube.

But of course, i make the “rookie mistake” of cutting it to the final length too soon.

MO________KER!!!!!!!

Ahhh welll……

I suppose it wouldn’t have mattered anywhoo, cause the piece is a “wee bit long” for my little lathe.

IMG_6561.JPG

I will have to "flip it” cause this portion needs to be cleaned up as well.

IMG_6562.JPG


It takes a while, but I take a “skim cut” to get all the rust off….

IMG_6563.JPG

After “a while” I get a “nice’ish” outer tube to start working with.


IMG_6566.JPG


Luckily, over the years, I have become very good at “polishing my shaft” ;)👏:ROFLMAO:


IMG_6568.JPG
 

Attachments

  • Like
Reactions: 2 users

Runs With Scissors

Well-known member

Equipment
L2501 TLB , Grappel, Brush Hog, Box Blade, Ballast box, Forks, Tiller, PH digger
Jan 25, 2023
4,004
5,416
113
Michigan
Now I have to cut that slot.

It is at this time, I “remember” that I have do not have a good method of holding a tube whilst trying to machine it.

ASIDE: It is also at this time, I reflect on how many MF’ing tools I have, how many of them I have no idea how to use, and begin to curse myself for not organizing my tools better. Its sort of a crazy love affair with some insane broad, that you know you need to “fix” but you have no idea how to “fix it”…..crazy….:ROFLMAO:;)

So I don’t want to “crush” the tube, hence pinching the end-mill, so I devise the following “Janky-ass” set up.

I put the tube in the vise with some V blocks that I find.

Then use my “new to me” machinist jacks to hold the bottom of the tube.

IMG_6569.JPG

But I don’t like it

i still have this “eery feeling” that I am crushing that tube, even though I have the “inner tube” in there to prevent it from crushing….

But sometimes when I get a “bad feeling” it just won’t get out of my head. (damn demons🤬)

During the “Test-skim cut” soemting is “way wrong"

I can’t "put my finger on it” but I someting is wrong….I just feel it.

I just "know it in my bones….."

But I start to take deeper cuts anyhow…..

It is at this time that the part "appears to move” and the cut is starting to look like sh1t, so I get really nervous.

Then “IT” happens….I visibly see the head of the machine “move"

I am like WTF???????


Turns out that in my haste, I forgot to tighen these “big ass bolts” for the head of my “new to me” Bridgeport…...

IMG_6571.JPG

All 4 of them were “loose as a goose” (I have no idea what that phrase is supposed to mean😝😝)

Well, yes…..I feel like the “worlds biggest dumbass”, but in my defense, this is the “shake down” run for my mill.

I grab some wrenchs, and tighen things up.

So in the mean time, I have revised my holding set up a little bit.

I decide that I don’t want to “pinch” the tube, instead I put pressure on the ‘inner tube” hence “sammiching” the outer tubes bottom part. "In my mind” (at least) it’s better thand pinching the tube….I dunno🤔🤔


I’t similar to the following pic, but the machinist jack was under the outer tube..(forgot to take a pic)

IMG_6578 2.JPG


Well, it goes fairly well after that.

But I do have to “move” the assembly to be able to drill the “main connecting bolt”…again using my “Janky-ass” set up.


IMG_6580.JPG

The other F-up is where I drille the “inner tube” connecting bolt.

i have no idea how I F’d it up, but If I want to use my new inner rod, I am going to have to “flip it”……I think?????

That was yesterday, and now that I look at it with “fresh eyes” I amy not have F’d up as bad as I thought….

Here is what I have so far. (the “eye bolt” is only there casue I dont have the proper 1/2-20 bolt to test with)
IMG_6583.JPG

IMG_6584.JPG
IMG_6585.JPG

Ok, gotta run for the day…The “Demons" are starting to “act up” so I gotta get back to the shop for the day…….More tomorrow.
 

Attachments

  • Like
Reactions: 1 users

Runs With Scissors

Well-known member

Equipment
L2501 TLB , Grappel, Brush Hog, Box Blade, Ballast box, Forks, Tiller, PH digger
Jan 25, 2023
4,004
5,416
113
Michigan
Now I have to cut that slot.

It is at this time, I “remember” that I have do not have a good method of holding a tube whilst trying to machine it.

ASIDE: It is also at this time, I reflect on how many MF’ing tools I have, how many of them I have no idea how to use, and begin to curse myself for not organizing my tools better. Its sort of a crazy love affair with some insane broad, that you know you need to “fix” but you have no idea how to “fix it”…..crazy….:ROFLMAO:;)

So I don’t want to “crush” the tube, hence pinching the end-mill, so I devise the following “Janky-ass” set up.

I put the tube in the vise with some V blocks that I find.

Then use my “new to me” machinist jacks to hold the bottom of the tube.


But I don’t like it

i still have this “eery feeling” that I am crushing that tube, even though I have the “inner tube” in there to prevent it from crushing….

But sometimes when I get a “bad feeling” it just won’t get out of my head. (damn demons🤬)

During the “Test-skim cut” soemting is “way wrong"

I can’t "put my finger on it” but I someting is wrong….I just feel it.

I just "know it in my bones….."

But I start to take deeper cuts anyhow…..

It is at this time that the part "appears to move” and the cut is starting to look like sh1t, so I get really nervous.

Then “IT” happens….I visibly see the head of the machine “move"

I am like WTF???????


Turns out that in my haste, I forgot to tighen these “big ass bolts” for the head of my “new to me” Bridgeport…...

View attachment 178344

All 4 of them were “loose as a goose” (I have no idea what that phrase is supposed to mean😝😝)

Well, yes…..I feel like the “worlds biggest dumbass”, but in my defense, this is the “shake down” run for my mill.

I grab some wrenchs, and tighen things up.

So in the mean time, I have revised my holding set up a little bit.

I decide that I don’t want to “pinch” the tube, instead I put pressure on the ‘inner tube” hence “sammiching” the outer tubes bottom part. "In my mind” (at least) it’s better thand pinching the tube….I dunno🤔🤔


I’t similar to the following pic, but the machinist jack was under the outer tube..(forgot to take a pic)

View attachment 178345


Well, it goes fairly well after that.

But I do have to “move” the assembly to be able to drill the “main connecting bolt”…again using my “Janky-ass” set up.


View attachment 178346

The other F-up is where I drille the “inner tube” connecting bolt.

i have no idea how I F’d it up, but If I want to use my new inner rod, I am going to have to “flip it”……I think?????

That was yesterday, and now that I look at it with “fresh eyes” I amy not have F’d up as bad as I thought….
 

Runs With Scissors

Well-known member

Equipment
L2501 TLB , Grappel, Brush Hog, Box Blade, Ballast box, Forks, Tiller, PH digger
Jan 25, 2023
4,004
5,416
113
Michigan
I have no idea how my posts got mixed up, but I will have to try and fix the order of them tomorrow….sorry
 

Runs With Scissors

Well-known member

Equipment
L2501 TLB , Grappel, Brush Hog, Box Blade, Ballast box, Forks, Tiller, PH digger
Jan 25, 2023
4,004
5,416
113
Michigan
So are you going to reduce the over stroke I solved with the shaft collars with this sliding amount of around an inch?
If I am on the same page that is a great idea.
Either way you got me thinking again!

Bill
No sir.

As of "right now” I am going to make some “custom handles” that have a “slop hole”.

Essentially it will be a “wallered out hole" that will account for the extra inch of stroke. (thats the “theory" anyway 🤔 🤔)

Here are some pics of my “test hole"


IMG_6587 2.JPG

IMG_6588 2.JPG

IMG_6589 2.JPG
 
  • Like
Reactions: 1 users

Chanceywd

Well-known member
Lifetime Member

Equipment
Kubota L2501DT BH77 VIRNIG URG60-CT 1950 8N WC-68
Mar 26, 2021
852
848
93
central ny
No sir.

As of "right now” I am going to make some “custom handles” that have a “slop hole”.

Essentially it will be a “wallered out hole" that will account for the extra inch of stroke. (thats the “theory" anyway 🤔 🤔)

Here are some pics of my “test hole"


View attachment 178353

View attachment 178354

View attachment 178355
Another interesting concept.
What i envisioned this morning with your tube within a tube was that on one end of the cylinder and the inner tube would have an approximately 1" long slot and a thru pin that contained it and limited its travel. that and like an engine valve spring on the end so the stroke was kept tight and wouldn't rattle.

Sorry no drawing concept here!

I may head down that road myself in a redo to get the large swivel ends of the cylinder away from the pivot point on the rod end now..

Is there a connection of RWS and your name may being AL?
I see a reference in a comic yesterday about Weird Al and his album by your name that I never heard of.

Bill
 

Sidekick

Well-known member

Equipment
Kioti CK2620SE cab, RTV-X, BX2360, Z726XKW-3-60
Jul 29, 2023
1,262
1,813
113
N.Y,
Have you thought about dirt in that area. Dirt, sliding fits, and slots like that usually don't end well. Maybe a bellows to keep critical areas clean and lubricated withoutattracting dirt. I use a simple collet block for holding rounds on a vice. My little R8 one was cheap and handy for smaller diameters as you already have the collets. the 6 sided block is great for making accurate hexes on a mill. Thanks for taking us along on your projects.
 

Paul Allwood

Well-known member
Lifetime Member

Equipment
Kubota B7200HSTD, RC60-72H MMM, homemade FEL, forks & ballast box, rotary hoe
Jul 8, 2025
709
1,281
93
Baranduda, Victoria, Australia
Now I have to cut that slot.

It is at this time, I “remember” that I have do not have a good method of holding a tube whilst trying to machine it.

ASIDE: It is also at this time, I reflect on how many MF’ing tools I have, how many of them I have no idea how to use, and begin to curse myself for not organizing my tools better. Its sort of a crazy love affair with some insane broad, that you know you need to “fix” but you have no idea how to “fix it”…..crazy….:ROFLMAO:;)

So I don’t want to “crush” the tube, hence pinching the end-mill, so I devise the following “Janky-ass” set up.

I put the tube in the vise with some V blocks that I find.

Then use my “new to me” machinist jacks to hold the bottom of the tube.

View attachment 178343

But I don’t like it

i still have this “eery feeling” that I am crushing that tube, even though I have the “inner tube” in there to prevent it from crushing….

But sometimes when I get a “bad feeling” it just won’t get out of my head. (damn demons🤬)

During the “Test-skim cut” soemting is “way wrong"

I can’t "put my finger on it” but I someting is wrong….I just feel it.

I just "know it in my bones….."

But I start to take deeper cuts anyhow…..

It is at this time that the part "appears to move” and the cut is starting to look like sh1t, so I get really nervous.

Then “IT” happens….I visibly see the head of the machine “move"

I am like WTF???????


Turns out that in my haste, I forgot to tighen these “big ass bolts” for the head of my “new to me” Bridgeport…...

View attachment 178344

All 4 of them were “loose as a goose” (I have no idea what that phrase is supposed to mean😝😝)

Well, yes…..I feel like the “worlds biggest dumbass”, but in my defense, this is the “shake down” run for my mill.

I grab some wrenchs, and tighen things up.

So in the mean time, I have revised my holding set up a little bit.

I decide that I don’t want to “pinch” the tube, instead I put pressure on the ‘inner tube” hence “sammiching” the outer tubes bottom part. "In my mind” (at least) it’s better thand pinching the tube….I dunno🤔🤔


I’t similar to the following pic, but the machinist jack was under the outer tube..(forgot to take a pic)

View attachment 178345


Well, it goes fairly well after that.

But I do have to “move” the assembly to be able to drill the “main connecting bolt”…again using my “Janky-ass” set up.


View attachment 178346

The other F-up is where I drille the “inner tube” connecting bolt.

i have no idea how I F’d it up, but If I want to use my new inner rod, I am going to have to “flip it”……I think?????

That was yesterday, and now that I look at it with “fresh eyes” I amy not have F’d up as bad as I thought….

Here is what I have so far. (the “eye bolt” is only there casue I dont have the proper 1/2-20 bolt to test with)
View attachment 178349

View attachment 178350
View attachment 178351

Ok, gotta run for the day…The “Demons" are starting to “act up” so I gotta get back to the shop for the day…….More tomorrow.
Loose as a goose - it means relaxed. Libby Lenton, an Aussie Olympic swimmer, used to say "loose as a goose" to herself over and over when she was standing on the blocks pre-race to keep herself calm and relaxed.
 
  • Love
  • Like
Reactions: 1 users

Runs With Scissors

Well-known member

Equipment
L2501 TLB , Grappel, Brush Hog, Box Blade, Ballast box, Forks, Tiller, PH digger
Jan 25, 2023
4,004
5,416
113
Michigan
Another interesting concept.
What i envisioned this morning with your tube within a tube was that on one end of the cylinder and the inner tube would have an approximately 1" long slot and a thru pin that contained it and limited its travel. that and like an engine valve spring on the end so the stroke was kept tight and wouldn't rattle.

Sorry no drawing concept here!

I may head down that road myself in a redo to get the large swivel ends of the cylinder away from the pivot point on the rod end now..

Is there a connection of RWS and your name may being AL?
I see a reference in a comic yesterday about Weird Al and his album by your name that I never heard of.

Bill
EDIT: No connection to Al that I know of…. 🤷‍♂️

"There are none so blind as those who will not see"

I was completely looking at this wrongly sir. It took me all of yesterday to understand that I was looking at the problem "180 degrees out of phase”….

I feel like a complete nincompoop….

When I saw your “Collers” solution, in MY head, it appeared to be limiting the “retraction length”.

I was so focused on solving that problem, I was not even paying attention to the actual problem.

HOWEVER NOW, after many hours of banging my head against a wall, I see that those collers actaully limit the extension to ~7 inchs, by taking up 1 inch of space.


So here is a short comedy for y’all.

All yesterday I was chasing a problem that did not exist. This is probably the reason I don’t post until I have finished a project….But now that “The cat is out of the bag” that I am not 100% perfect( 😝 ) lets move on…….

Oh I almost forgot…..a little Public Service Announcement.

For all y’all that have this little green shelving unit.

IMG_6590.JPG

The maximum allowed amount of metal is "this much"🤬🤬

IMG_6592.JPG


Now back to our regularly scheduled program.


So yesterday thought I needed to “plug” the other end.

so I turn a piece, threaded it, and (Luckily) I just tacked it into place.

IMG_6593.JPG


IMG_6594.JPG


And yes, to add insult to injury, ……"When it rains, it F’ing pours”…….I F’ing tacked it to the wrong end…...


IMG_6595.JPG


So it took me a few minutes to "Un F— it” and get it on the correct end.

Now here is where I begin to understand that I am as “F’d up as a football bat"……..

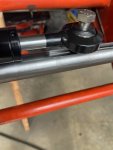
No matter what I do, I can’t get the extension and retraction lengths to work out….No matter what combination I try, one length is always about an inch off???????

like this
IMG_6604 2.JPG


I notice that my “wallered out hole” idea don’t mean “Jack Sh1t” ?????

I even went so far as to cut out a “nice test handle” on the CNC plasma machine…..

But NOPE!!!!!!! NO DICE!!!!!!!

I don’t recall why, or what happened, but it hit me like a “sack of hammers”….

I, quite literally said outloud, “ You F———g dumbass…….” as I realized what the problem really is/was.


I just need to make it so that the “EXTENSION” is 7 inchs, and to do this, all I need to do is make the one end “slide” about an inch, to account for the 8 inch stroke.


So Bill you “hit the nail, on the head”.

Bravo sir!!!!! 👏 Bravo!!!!!!👏

IMG_6609.JPG

Here it is at full retraction

IMG_6610.JPG


and here she is at full extension

Note: the “homemade nut” I was going to weld in place, is now going to be a “sliding nut” inside the outer tube.


IMG_6612.JPG


SO……..The plan for the day is to figure out a few things.

I need to address whether or not I need Bills “spring idea”?

(BTW a "valve spring” is an awesome idea that I might steal;))

OR

do I actually need it?

In my head, if I “cap the end", and have that nut just sliding inside the outer tube, it should lock up nicely at both extremes…..?????????


Have you thought about dirt in that area. Dirt, sliding fits, and slots like that usually don't end well. Maybe a bellows to keep critical areas clean and lubricated withoutattracting dirt. I use a simple collet block for holding rounds on a vice. My little R8 one was cheap and handy for smaller diameters as you already have the collets. the 6 sided block is great for making accurate hexes on a mill. Thanks for taking us along on your projects.
Yes sir, this has crossed my mind…..I was thinking/hoping that if I installed the whole assembly “up-side down” it would keep it clean…but now that you mention it, I am reconsidering my position…….

(BTW the reason I have it oriented this way is for pics, and so I don't have to constantly bend over to look at it when I manually extend and retract the arms)

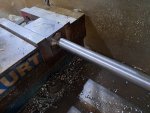
Lastly, did/do you mean you use one of these to hold round pieces for milling?

IMG_6613.JPG
 
Last edited:
  • Like
Reactions: 1 users

Chanceywd

Well-known member
Lifetime Member

Equipment
Kubota L2501DT BH77 VIRNIG URG60-CT 1950 8N WC-68
Mar 26, 2021
852
848
93
central ny
Mine works pretty nice.
I ordered the fittings to improve my fitting horror show.
I also ordered 2 flow restricters that should make it here next week.
I started my hydraulic adventures on my 8N when I added hydraulics and a snow plow to that. I used the standard 1/4" npt fittings used on fisher and meyers plows and never looked back.
For my bigger hoses I go with JIC etc.
So for these low flow circuits I still do. I made a temporary set of flow restricters using two male to male fittings, tapped them for 5/16 thread and made two orfices from 5/16 brass bolts drilled thru 1/16 as that is twice the 0.031 ordered but the smallest drill I had. That slows it down quite a bit.
So if you zoom in on my valve and mess you will see many fittings that looks like a guy pawed thru what he had on hand like he was on Apollo 13 and just wanting to make it home.
Hoses are bumping the bucket level indicator but I hope the re-due eliminates that too.
I looked at switching that to the other side but the upper pin isn't reversible and as a creature of habit that might not work.

Despite your setbacks I admire your perseverance and progress along with your novel approach.

Bill
 

Attachments

  • Like
Reactions: 1 user

Sidekick

Well-known member

Equipment
Kioti CK2620SE cab, RTV-X, BX2360, Z726XKW-3-60
Jul 29, 2023
1,262
1,813
113
N.Y,
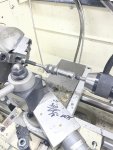
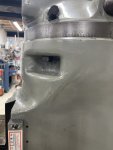
Similar but just little blocks. Easy to clamp in the vice and rotate on center. Up to 3/4 you can feed through the center of one. 7/8 and 1" collets require 2 blocks for long parts clamped to the table. Also tapers can be accurately located using a different collet on each end with 2 blocks. I have made many bolt heads with the hex one quickly.
20260821_100527.jpg 20260821_101420.jpg 20260821_101522.jpg