I always enjoy this forum and have learned a lot from experienced tractor users here. I hope my first posting attempt is enjoyable and could possibly help somebody.
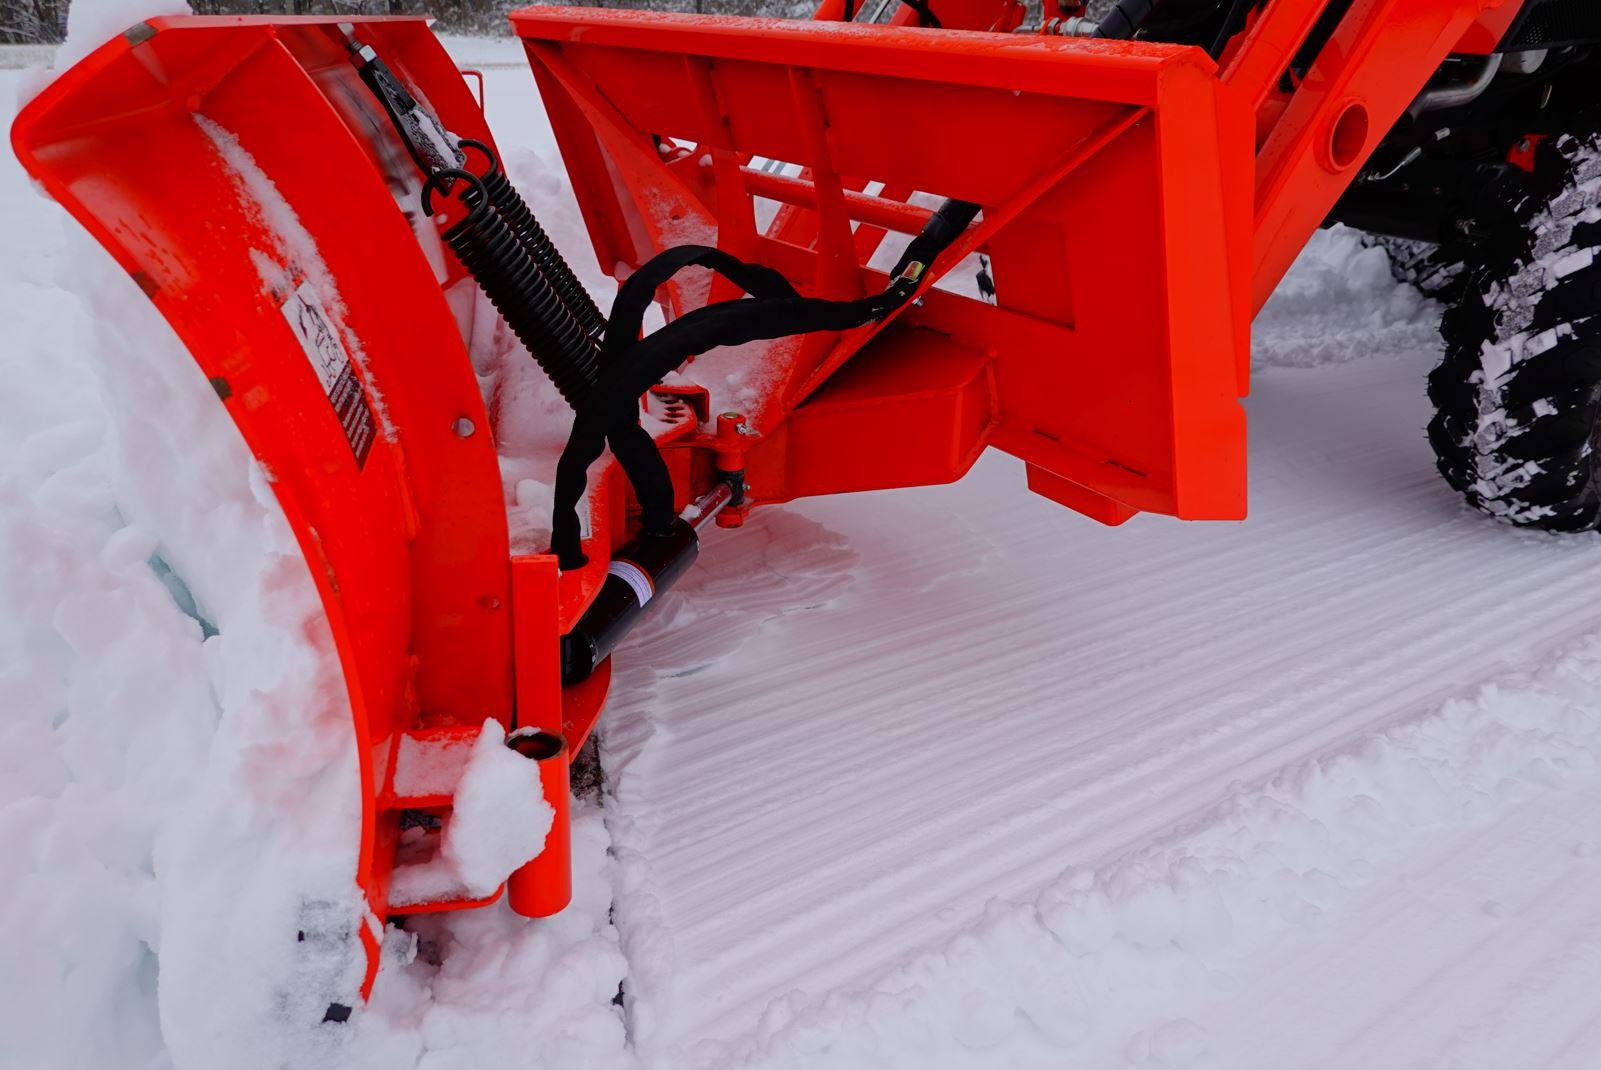
I have a 1/2 mile gravel driveway to plow during winter and had hard time using a FEL mounted snowplow (Kubota B2672 front blade) initially on BX23S and currently on LX2610. Especially when the ground is not completely frozen, the snowplow keeps digging into the gravel and creates a huge mess. Skid shoes didn’t really help and a technique of raising the loader a bit from the ground was not suitable to my situation since I wanted to plow with FEL in float mode to follow the undulation of the ground. I knew frame mounted snowplows work better than the FEL mounted ones due to less down pressure but didn't want to buy a quick hitch just for a snowplow.
With that been said, below is my several years of try and error history. The best one (in my opinion) is the option "E" explained at the bottom, so please feel free to skip other options if you are not interested.
A. Rubber cutting edge
Replace factory steel cutting edge with an optional rubber one.
Pros
- None (from a gravel protection perspective).
Cons
- Digs into the gravel just like a steel cutting edge.
B. Rubber stall mat ver.1
Couldn’t find the original post but I learned from this forum. Cut a 3/4-in rubber horse stall mat to the width of the moldboard. Drill holes on the mat and set between the cutting edge and moldboard. Keep the other side free. Drag the mat and let the blade (and skid shoes) ride on top of the mat.
*I recommend using a utility knife to cut the rubber. Place something underneath the mat and cut it while the mat is in a convex shape to prevent the rubber from grabbing the knife. I found this method is faster than power tools and cuts very clean.
Pros
- Snowplow leaves a thin layer of snow.
- Makes much less damage to the gravel.
- As long as you use it on snow, the stall mat wears very little. Should last several seasons.
Cons
- Tractor needs to be in forward motion when lowering the snowplow.
- Lose an ability to back drag.
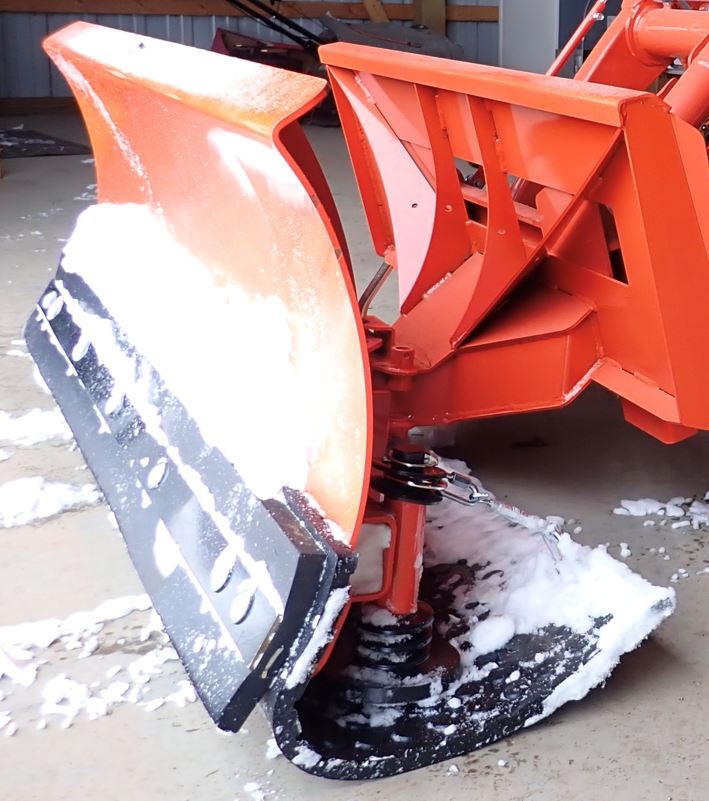
C. Rubber stall mat ver.2
Add chain / cable to the free side of the stall mat to keep it from hanging down when snowplow is raised on the air.
Pros
- The same as ver.1.
- Can lower the plow while the tractor is stopped or moving reverse.
- Can back drag.
Cons
- None from functional stand point, but it looks too many components.
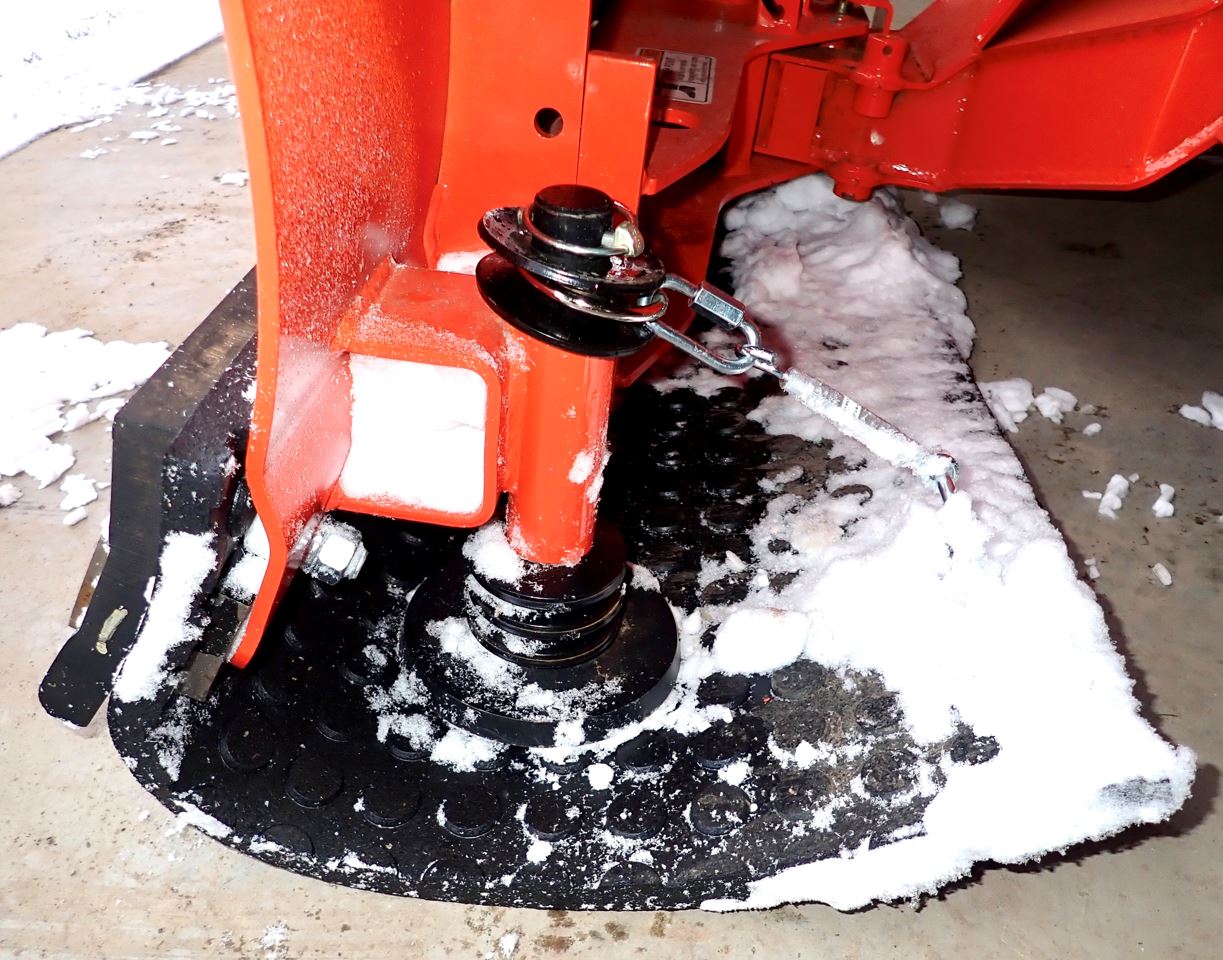
D. Rubber stall mat ver.3
Use the stall mat in “U” shape as shown in the picture.
*It is very hard to bend the thick & hard rubber mat like this. A couple of ratchet straps and long bolts would help.
Pros
- The same as ver.2.
- The least aggressive to the gravel in all the mods I listed here.
- For me, it looks simple and clean comparing to ver.1 & 2.
Cons
- The small bend radius applies huge stress to the stall mat. I had no problem using it for a whole winter but rubber tore by the fatigue during summer storage.
*Recommend to remove the weight of the snowplow from the stall mat or remove the mat from the blade before long-term storage.
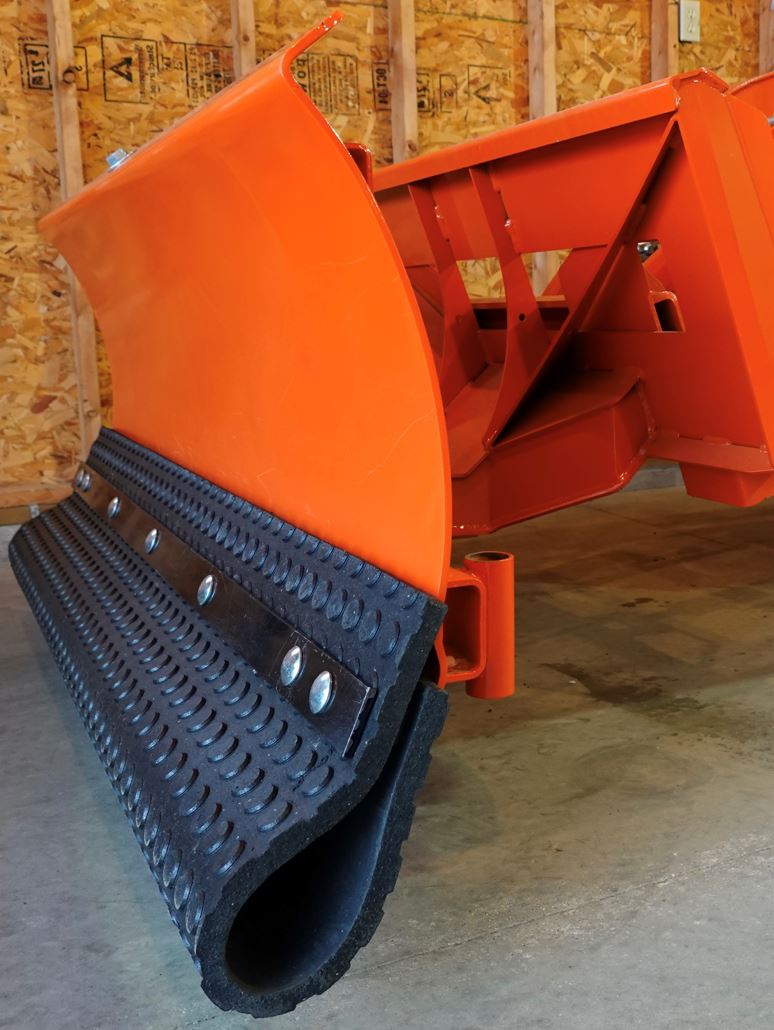
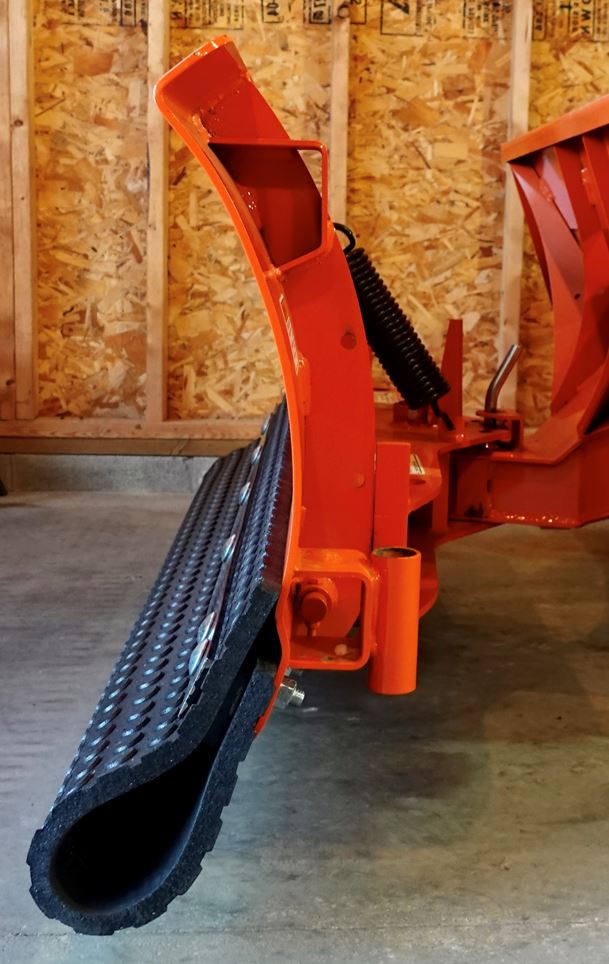
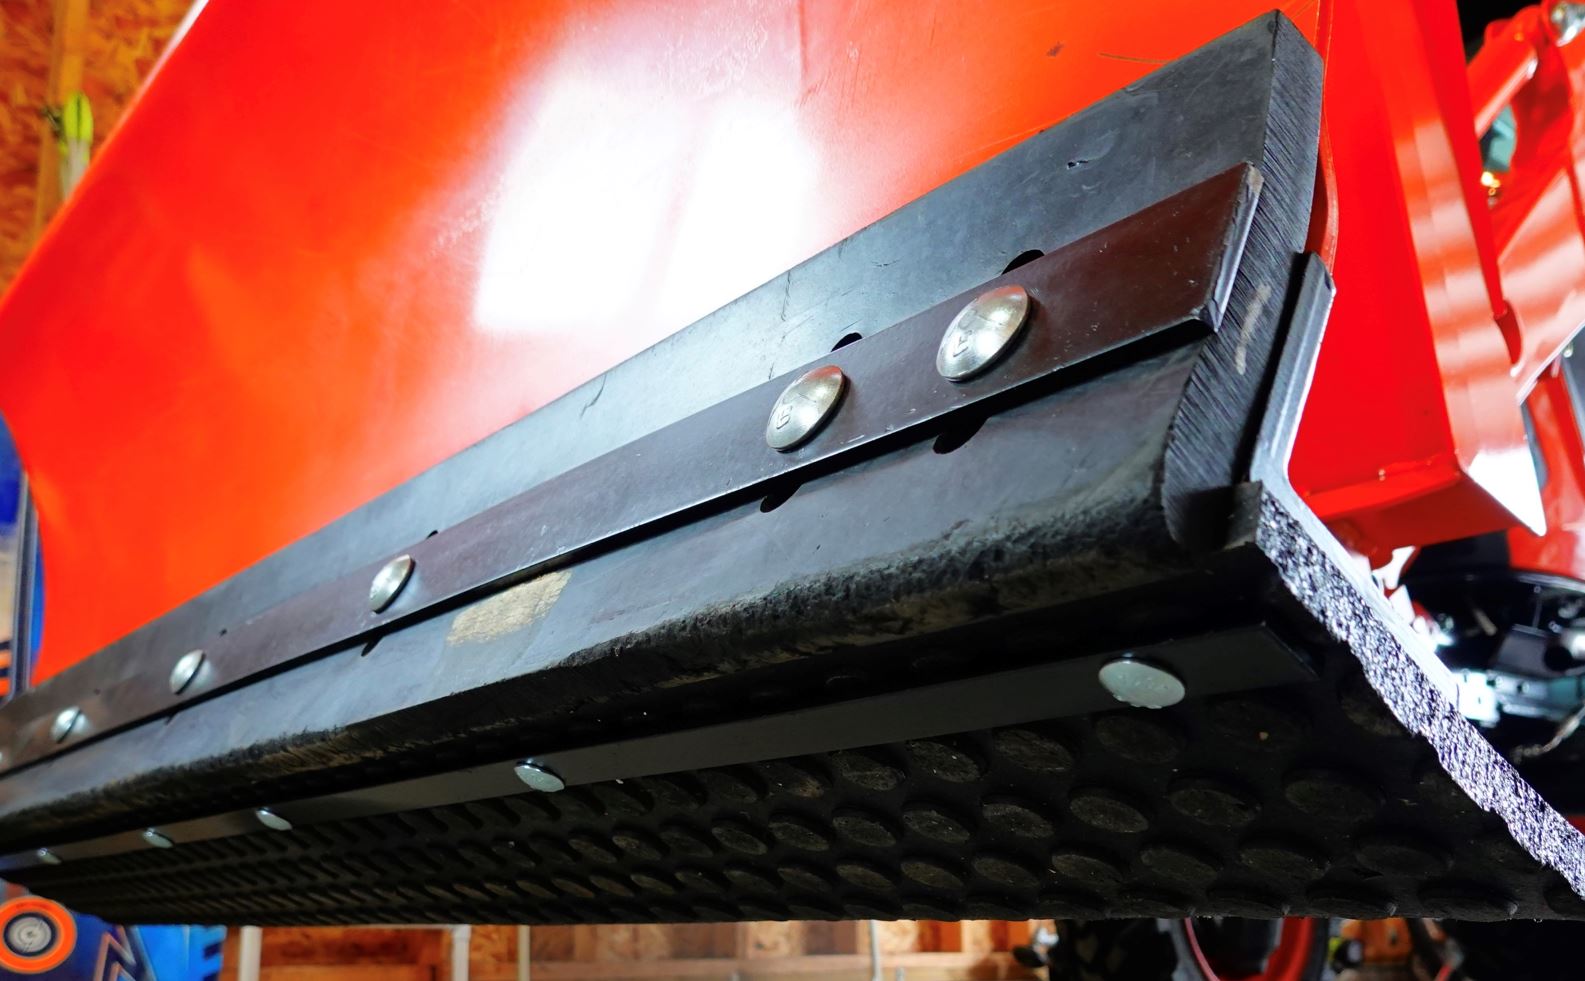
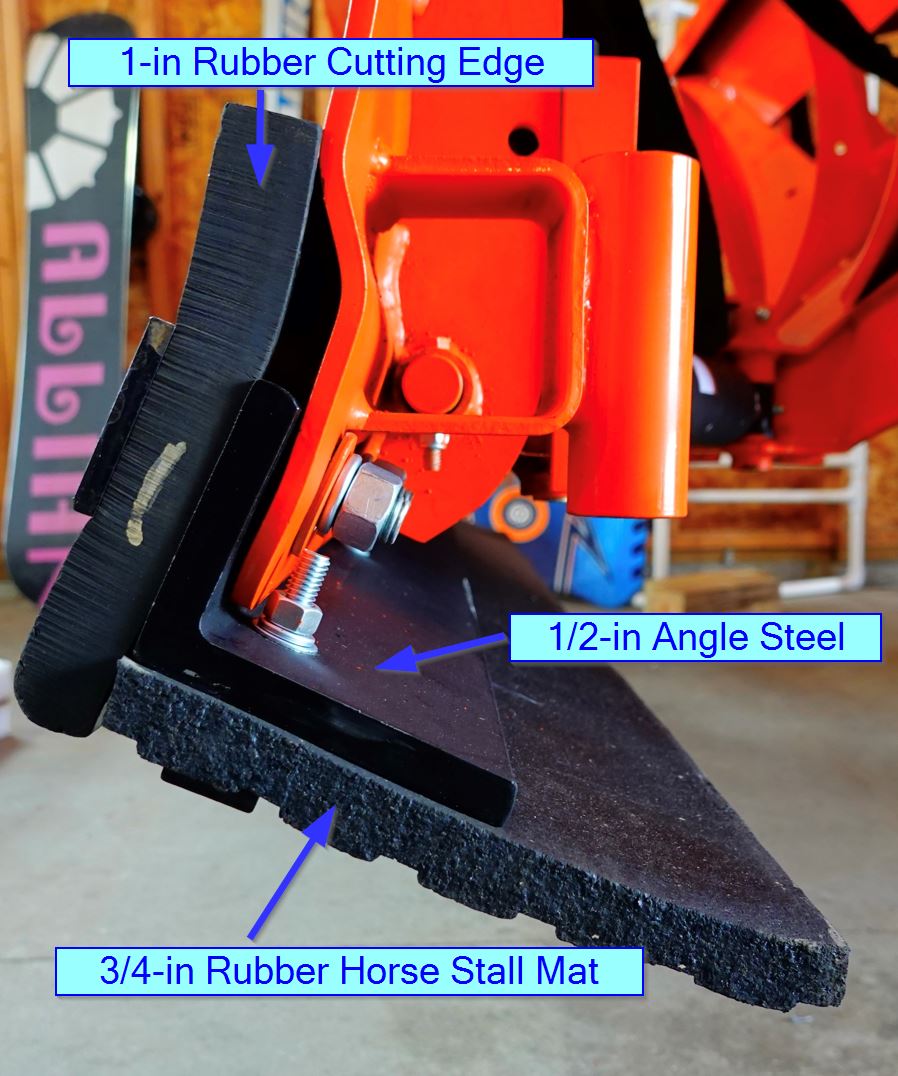
E. Steel Angle
After 4 winters of try and error, I got this idea. Cut 1/2-in steel angle to the width of the moldboard (I ordered a pre-cut angle from an online steel store). Drill holes on the steel angle and attach it on the blade as a cutting edge.
*Not really necessary but I attached a 3/4-in stall mat on the ground contacting surface of the steel angle to make the snowplow even gentler to the gravel. Additionally, the stall mat leaves nice patterns on snow, and prevents damage to concrete pad / asphalt pavement.
**In the picture, a rubber cutting edge is also installed but it doesn’t touch the ground when plowing forward. Tilt the plow forward and use it for back dragging.
Pros
- Snowplow leaves a thin layer of snow.
- Makes much less damage to the gravel.
- The most durable.
- To me, the best appearance.
Cons
- Heavy. If the snowplow itself is already too heavy for the FEL, use 3/8-in steel angle instead of 1/2-in.
- Angle steel cutting edge may apply additional stress to the moldboard due to the increased leverage (My Kubota 1/4-in steel moldboard shows no issues so far though).
Thank you very much for reading.
I have a 1/2 mile gravel driveway to plow during winter and had hard time using a FEL mounted snowplow (Kubota B2672 front blade) initially on BX23S and currently on LX2610. Especially when the ground is not completely frozen, the snowplow keeps digging into the gravel and creates a huge mess. Skid shoes didn’t really help and a technique of raising the loader a bit from the ground was not suitable to my situation since I wanted to plow with FEL in float mode to follow the undulation of the ground. I knew frame mounted snowplows work better than the FEL mounted ones due to less down pressure but didn't want to buy a quick hitch just for a snowplow.
With that been said, below is my several years of try and error history. The best one (in my opinion) is the option "E" explained at the bottom, so please feel free to skip other options if you are not interested.
A. Rubber cutting edge
Replace factory steel cutting edge with an optional rubber one.
Pros
- None (from a gravel protection perspective).
Cons
- Digs into the gravel just like a steel cutting edge.
B. Rubber stall mat ver.1
Couldn’t find the original post but I learned from this forum. Cut a 3/4-in rubber horse stall mat to the width of the moldboard. Drill holes on the mat and set between the cutting edge and moldboard. Keep the other side free. Drag the mat and let the blade (and skid shoes) ride on top of the mat.
*I recommend using a utility knife to cut the rubber. Place something underneath the mat and cut it while the mat is in a convex shape to prevent the rubber from grabbing the knife. I found this method is faster than power tools and cuts very clean.
Pros
- Snowplow leaves a thin layer of snow.
- Makes much less damage to the gravel.
- As long as you use it on snow, the stall mat wears very little. Should last several seasons.
Cons
- Tractor needs to be in forward motion when lowering the snowplow.
- Lose an ability to back drag.
C. Rubber stall mat ver.2
Add chain / cable to the free side of the stall mat to keep it from hanging down when snowplow is raised on the air.
Pros
- The same as ver.1.
- Can lower the plow while the tractor is stopped or moving reverse.
- Can back drag.
Cons
- None from functional stand point, but it looks too many components.
D. Rubber stall mat ver.3
Use the stall mat in “U” shape as shown in the picture.
*It is very hard to bend the thick & hard rubber mat like this. A couple of ratchet straps and long bolts would help.
Pros
- The same as ver.2.
- The least aggressive to the gravel in all the mods I listed here.
- For me, it looks simple and clean comparing to ver.1 & 2.
Cons
- The small bend radius applies huge stress to the stall mat. I had no problem using it for a whole winter but rubber tore by the fatigue during summer storage.
*Recommend to remove the weight of the snowplow from the stall mat or remove the mat from the blade before long-term storage.
E. Steel Angle
After 4 winters of try and error, I got this idea. Cut 1/2-in steel angle to the width of the moldboard (I ordered a pre-cut angle from an online steel store). Drill holes on the steel angle and attach it on the blade as a cutting edge.
*Not really necessary but I attached a 3/4-in stall mat on the ground contacting surface of the steel angle to make the snowplow even gentler to the gravel. Additionally, the stall mat leaves nice patterns on snow, and prevents damage to concrete pad / asphalt pavement.
**In the picture, a rubber cutting edge is also installed but it doesn’t touch the ground when plowing forward. Tilt the plow forward and use it for back dragging.
Pros
- Snowplow leaves a thin layer of snow.
- Makes much less damage to the gravel.
- The most durable.
- To me, the best appearance.
Cons
- Heavy. If the snowplow itself is already too heavy for the FEL, use 3/8-in steel angle instead of 1/2-in.
- Angle steel cutting edge may apply additional stress to the moldboard due to the increased leverage (My Kubota 1/4-in steel moldboard shows no issues so far though).
Thank you very much for reading.
