sooo..this does mean it was 12 vdc huh ?, i could not figure out how it was 12 vac, and yet be wired to the reg/rec as well ?. this told me, it was 12vdc as most systems are. if this is the case ?, thank you for setting it right.I hate to tell you but the original wiring for the lights was 12V and it was supplied buy the rectifier.
View attachment 131494
View attachment 131495
Not so new here with a couple of B6000's
- Thread starter trevoroni
- Start date
If the AC connection going out of the rectifier to the S post of the light switch is 12V DC then it is connected directly to the Yellow AC wire coming from the generator and to the G2 terminal when the switch is on which is also AC coming directly from the Generator.I hate to tell you but the original wiring for the lights was 12V and it was supplied buy the rectifier.
View attachment 131494
View attachment 131495
The lights might be 12V DC but the DC power would be coming from the B terminal on the light switch.
I'm confused why there are 3 wires from the generator going to the light switch at all.
This post from Dave_eng seemed to make sense but looking at it again I don't think that is correct either.
It looks like when the light switch is turned on the B and T terminals are connected which supplies 12V to the lights and the S and G2 terminals are connected which connects another leg of the generator together to supply more power...I have marked up the 3 wire B6000 wiring diagram in two formats. JPEG and pdf. The pdf is attached and the JPEG is immediately visible. Depending upon your computer and printer one format may print more clearly than the other.
View attachment 80564
In the box showing the circuit diagram of the Main Switch, the Starting Switch and the Light Switch the light switch box says both positions 1 & 2 are the same. One position is not brighter than the other.
The dynamo is putting out 3 phase AC voltage. One pair of these phases is used to charge the battery thru the rectifier. These are colored Purple and blue,
Another pair is putting out AC to the headlight. These are colored Yellow and Purple,
If you try replacing your existing headlights with LED's most LED's wont work on AC. A few owners have reported success with LED's but I have not seen this myself but these products are always evolving.
The headlights are not high and low beam. The headlight brightness will increase with higher engine rpm.
Dave
Is this correct?
I hate figuring out electrical circuits.
Last edited:
fried1765
Well-known member
Equipment
Kubota L48 TLB, Ford 1920 FEL, Ford 8N, SCAG Liberty Z, Gravely Pro.
I wondered about that 2Ga order.Must have been tired last night...
I ordered the replacement wire last night based on looking at the wiring diagram...
AV3 is not 3ga... It's more like 12ga!
Should have used my brain looking at the actual wires.
Luckily I've got lots of 12ga wire and fittings here. The 2ga stuff is going back, or I'll add it to my stock for future projects.
I went through the rest of the small wires in the loom tonight and it looks like the wire to the solenoid got the worst of it and I'll replace it.
The rest of them have a few wear spots in the insulation so I'll electrical tape and/or heat shrink those spots before heat shrinking the whole lot together again.
I'm tempted to seperate the wire going from the starter to the main switch and the wire going to the glow plugs from the rest of the auxiliary wires to keep this from happening again for the future owner in 60 years.
all i know is, anytime you have a reg/rec in these circuits ?..this tells me it takes ac voltage from the gen/stator..and converts the ac to dc voltage.If the AC connection going out of the rectifier to the S post of the light switch is 12V DC then it is connected directly to the Yellow AC wire coming from the generator and to the G2 terminal when the switch is on which is also AC coming directly from the Generator.
The lights might be 12V DC but the DC power would be coming from the B terminal on the light switch.
I'm confused why there are 3 wires from the generator going to the light switch at all.
This post from Dave_eng seemed to make sense but looking at it again I don't think that is correct either.
It looks like when the light switch is turned on the B and T terminals are connected which supplies 12V to the lights and the S and G2 terminals are connected which connects another leg of the generator together to supply more power...
Is this correct?
I hate figuring out electrical circuits.
North Idaho Wolfman
Moderator
Staff member
Lifetime Member
Equipment
L3450DT-GST, Woods FEL, B7100 HSD, FEL, 60" SB, 743 Bobcat with V2203, and more
You can feed one or 2 legs of AC to the switch and lights and because one of feeds is through the rectifier it blocks the AC effect and makes it DC, it's called clipping, or half wave rectifying.
they use mutiple poles to change the amperage (Low/ High) to the lights.
FYI: Incandescent bulbs do not care if you feed them AC or DC they work the same.
You can also feed AC to an LED but it bust have the capacity to withstand
the old dynamos (three wire) were three pole /three phase or delta dynamos, and the newer dynamos (2 wire) are 2 phase.
They work the same, just one less pole to work with.
Last edited:
Thanks for your awesome info Wolfman.
I got the wiring harness almost buttoned up tonight.


Just have to put ends on the wires for the main switch from the starter and to the glow plugs, shorten the ones going to headlights that are wrapped around the air intake, and get rid of the wire nuts under the be dash for the light circuit.
I got the wiring harness almost buttoned up tonight.
Just have to put ends on the wires for the main switch from the starter and to the glow plugs, shorten the ones going to headlights that are wrapped around the air intake, and get rid of the wire nuts under the be dash for the light circuit.
Got the spacer bolted up to the frame and loader... Minus 1 bolt.
I'll have to die grind the hole a bit since it was off enough to not line up.

And I finished fixing up the wiring harness.
Everything works as it should. I didn't take any pictures of the finished product but it's not much different than the ones above.
I'll have to die grind the hole a bit since it was off enough to not line up.
And I finished fixing up the wiring harness.
Everything works as it should. I didn't take any pictures of the finished product but it's not much different than the ones above.
I got the rebuilt injectors and the new glow plugs that I put in the old one swapped into the new one tonight.
They both seem to start the same as before the swap.
Next up is swap the rad hoses and take the rototiller off the old one and then it should be ready to sell.
They both seem to start the same as before the swap.
Next up is swap the rad hoses and take the rototiller off the old one and then it should be ready to sell.
Took the rear blade off and put the rototiller on. Not as easy as a normal 3 point hitch rototiller, took about 45 minutes but I think next time would be more like 30.


Also spray painted the PTO reverser because I had some orange paint left.

Also spray painted the PTO reverser because I had some orange paint left.
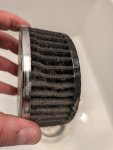
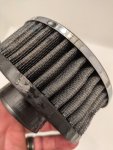
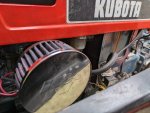
Cleaned and oiled the air filter


And changed the hoses around on the loader valve to something that made more sense to me.

Oh and changed the rubber boot.
It's not quite the right size but it's better than what was on it.

And then rototilled the garden.
And changed the hoses around on the loader valve to something that made more sense to me.
Oh and changed the rubber boot.
It's not quite the right size but it's better than what was on it.
And then rototilled the garden.
Attachments
-
318.7 KB Views: 83
-
367.2 KB Views: 89
-
415.5 KB Views: 87
Question for those more knowledgable than me about these diesel engines...
If I were to swap the injector pumps between the new and old tractor would I have to swap the shims too? Are the shims based on the engine or pump?
And I wouldn't have to do anything with the injector timing would I?
Just wondering if it would be an easy test to see if that is why the old one wouldn't start very easy before I get rid of it, or fix it for the new owner and possibly get a few more dollars.
Russell King
Well-known member
Lifetime Member
Equipment
L185F, Modern Ag Competitor 4’ shredder, Rhino tiller, rear dirt scoop
Bought some cheap clamp on pallet forks.


For $150 loonies delivered from Amazon they look pretty good.
I was hoping that the spreader bar was long enough that I could push them all the way out to the edge of the side of the bucket but it's a couple of inches too short.
The chain catches are too narrow for the 3/8" chain so I'll probably grind the slots so it'll fit.
And I might take the inner tube on the spreader bar to work and have it lengthened to fit the length of the bucket.
I'll see how it works as is. It seems pretty solid.
Another thought is to get another set of the forks without the spreader bar ($100) and make a custom spreader bar with some expanded mesh on the bottom for debris forks when needed.
I've got a lot of willow tree's and cleaning up the fallen branches in the spring is usually 5 to 8 4x10ft trailer loads heaping full.


