Clutch replacement, was not expecting this

Russell King

Well-known member
Lifetime Member

Equipment
L185F, Modern Ag Competitor 4’ shredder, Rhino tiller, rear dirt scoop
Jun 17, 2012
5,503
1,492
113
Austin, Texas
I was all turned around and was thinking that was rear of engine not front of transmission! I guess I need to stop and look at the picture before answering posts, and maybe get a bigger screen.

Glad you found it.
 

North Idaho Wolfman

Moderator
Staff member
Lifetime Member

Equipment
L3450DT-GST, Woods FEL, B7100 HSD, FEL, 60" SB, 743 Bobcat with V2203, and more
Jun 9, 2013
31,098
7,063
113
Sandpoint, ID
When you reinstall all of it use RTV on all mating surfaces that will help keep the water out.
 

BastropMetal

Member
Lifetime Member

Equipment
L3400
Dec 20, 2022
31
19
8
Texas
Finally have the time to start putting this all back together. Looking over everything closely, the adjustment bolts on the clutch assembly don't look to be adjusted properly.


1000006243.jpg


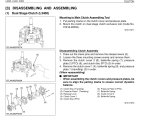
As shown in the manual below the gap between the pressure plate and the head of the bolt should be a 1mm, but as it sits in the picture above its nearly 5mm. Does this distance shift once the assembly gets installed?

clutch1.jpg

Additionally the adjustment bolts on this assembly are different than what I took off the tractor. The end of the OEM bolt has a square head on it. When installed this permits you to loosen the lock nut and then adjust the bolt (its still pretty tedious). But on this replacement it doesnt have this square head., and there is hardly any extra bolt length to adjust. It does not appear to be possible to adjust this once its in the tractor.

clutch2.jpg


The manual contains a number of specs and dimensions to check to put the clutch assembly together. I bought this one as a whole unit hoping all that had been done and I could just install it but now I'm not as sure. From what I've seen on other threads, taking the assembly apart and putting it back together can be pretty tedious.

Thanks in advance for any feedback.
 

Attachments

North Idaho Wolfman

Moderator
Staff member
Lifetime Member

Equipment
L3450DT-GST, Woods FEL, B7100 HSD, FEL, 60" SB, 743 Bobcat with V2203, and more
Jun 9, 2013
31,098
7,063
113
Sandpoint, ID
Finally have the time to start putting this all back together. Looking over everything closely, the adjustment bolts on the clutch assembly don't look to be adjusted properly.


View attachment 144190

As shown in the manual below the gap between the pressure plate and the head of the bolt should be a 1mm, but as it sits in the picture above its nearly 5mm. Does this distance shift once the assembly gets installed?

View attachment 144192
Additionally the adjustment bolts on this assembly are different than what I took off the tractor. The end of the OEM bolt has a square head on it. When installed this permits you to loosen the lock nut and then adjust the bolt (its still pretty tedious). But on this replacement it doesnt have this square head., and there is hardly any extra bolt length to adjust. It does not appear to be possible to adjust this once its in the tractor.

View attachment 144193

The manual contains a number of specs and dimensions to check to put the clutch assembly together. I bought this one as a whole unit hoping all that had been done and I could just install it but now I'm not as sure. From what I've seen on other threads, taking the assembly apart and putting it back together can be pretty tedious.

Thanks in advance for any feedback.
Yes all the adjustment change when it's installed.
On a new clutch assembly they should all be set correctly you shouldn't have to adjust anything on it.

I will also bet your looking at the wrong surface to measure to.
1734208629019.png
 

BastropMetal

Member
Lifetime Member

Equipment
L3400
Dec 20, 2022
31
19
8
Texas
Thank you Mr. Wolfman.

I have a few side questions. I have a L3400D tractor. Looking through the exploded diagrams, its hard to tell which ones I should be looking at some times.

For instance, on kubotausa.com here are the options for flywheel diagram assemblies.

1734285403365.png


1734285582499.png


I dont have an HST. My serial number has no letters. its a little over 59,000. Its not clear to me at all which of these I should be using. And its important because when you click on each of the diagrams you get some different part numbers.
 

North Idaho Wolfman

Moderator
Staff member
Lifetime Member

Equipment
L3450DT-GST, Woods FEL, B7100 HSD, FEL, 60" SB, 743 Bobcat with V2203, and more
Jun 9, 2013
31,098
7,063
113
Sandpoint, ID
That tractor is an oddity in that it was produced with two different engines D1703, and D1803 over it's production.
What is the motor size and serial number.
It's stamped on the block facing up right beside the injection pump.

And really the flywheel and bell Housing have very little to do with the clutch and presure plate.
 

BastropMetal

Member
Lifetime Member

Equipment
L3400
Dec 20, 2022
31
19
8
Texas
My nearly 2 month saga is hopefully approaching its conclusion, here are the two halves:

front.jpg

rear.jpg


I replaced the rear main seal when i had everything apart. That went pretty smooth I think.

I learned the hard way that the 6 flyhweel bolts are not evenly spaced which means that the flywheel mounts to the crank in only one rotational orientation. I eventually got that figured out though.

I had the flywheel resurfaced. Its in a good shape, but while wrangling it into the bell housing I wasnt as careful as I should have been with the cleanliness of my hands. It got some grease and grime on it. Is it safe to spray brake cleaner on it while its in there? If not, how would you clean it up at this point? Hopefully I dont have to take it back out.

Anyone have any last minute advice or suggestion on things I should check or do before putting it back together? I dont want to have to split this thing again.

Thanks to everyone for the help on this. I hope everyone has a Merry Christmas!
 
  • Like
Reactions: 1 user

North Idaho Wolfman

Moderator
Staff member
Lifetime Member

Equipment
L3450DT-GST, Woods FEL, B7100 HSD, FEL, 60" SB, 743 Bobcat with V2203, and more
Jun 9, 2013
31,098
7,063
113
Sandpoint, ID
Yes you can use brake parts cleaner on it.

One thing that I hope doesn't bite you in the backside is turning the flywheel.
Every manual say do not turn the flywheel as it changes critical dimensions.

Remember to seal all the surfaces (this includes the surface from engine to bellhousing) to keep water out.
 

BastropMetal

Member
Lifetime Member

Equipment
L3400
Dec 20, 2022
31
19
8
Texas
Well, thats not good. I did not see that disclaimer in the manual, anyhwere. Just did another search of my soft copy and am not seeing that anywhere. I am not doubting you, but I thought I was being thorough and careful with doing all this work and then this comes out of nowhere, very frustrating.

I googled around and found this thread where you mention that: https://www.orangetractortalks.com/forums/threads/flywheel-resurfacing.33655/

I just looked up a replacement, about $1000. I'd certainly prefer not to spend $1000 if I dont have to, but I'd prefer not to put it together and have to take it back apart again also.

Also, sepereately - I did find my engine serial numer. D1703 HL1406. Based on that I should use one of the top two parts diagram from my 12/15 post, but its still not clear which of them is right for me.
 

whitetiger

Moderator
Staff member

Equipment
Kubota tech..BX2370, RCK60, B7100HST, RTV900 w plow, Ford 1100 FWA
Nov 20, 2011
2,981
1,431
113
Kansas City, KS
Kubota has been back and forth on resurfacing a flywheel. I just checked and this is still the latest information.
 

Attachments

jaxs

Well-known member

Equipment
B1750HST
Jun 22, 2023
765
581
93
Texas
Good job cleaning that up. It looks much different than when you began.
 

StephenR

Member
Feb 12, 2024
40
21
8
Kentucky
In my younger years I split several tractors and never saw that kind of rust in any of them. Generally, no rust at all. Most were in Kentucky and the last was in central Alabama so there wasn't any heavy salt in the area.

I would take everything out that's possible, wire brush it clean. Then spray it with a spray lube, wipe it dry and replace everything greasing all the moving parts. Brush anti-seize on the splines and throw out bearing sleeve to protect them.

Since you are replacing all the clutch parts, they should be good for years to come.

Good luck with it.
Steve.
 

BastropMetal

Member
Lifetime Member

Equipment
L3400
Dec 20, 2022
31
19
8
Texas
Thanks for sharing the bulletin. According to the table I should be using figure 1 and

A = 38.5
B = 13.5
C = 1
D = 2

The first statement says you can remove up to 1.5mm. But if thats true, I dont understand how dimension A has to be held to 0.05mm. Any amount of clutch surface material removed will shrink dimension A by exactly the amount that was removed. How can you remove up to 1.5mm but then also have to hold A to a tolerance of 0.05mm

I used a very nice set of mitutoyo calipers and got

A = 38.4 -out of spec by 50 microns!
B - 13.16 - this one is quite a bit out of spec, not sure how this is possible. It was kinda tough to measure because that surface is pretty rusty. I'm not confident on this one.
C = 0.8mm
D = 2.0 - dead on some how - this dimension should shrink by exactly the amount that was machined

Very frustrating. Not sure what to do. I realize its important to "trust the manual" - but spending a grand and waiting 10 days or more for this thing to show up is going to be very irritating. Putting it back together only to not work would be more irritating.

It makes no sense to me how a 35kp tractor that maxes out at ~2300 RPM cannot have its flywheel machined, but for automobiles with 10x the horsepower and triple the rpm its just fine. I realize I'm ranting at clouds here, but today has not been a great day.

1734910438724.png
 

whitetiger

Moderator
Staff member

Equipment
Kubota tech..BX2370, RCK60, B7100HST, RTV900 w plow, Ford 1100 FWA
Nov 20, 2011
2,981
1,431
113
Kansas City, KS
But if thats true, I dont understand how dimension A has to be held to 0.05mm.
A = 38.5mm (+/- 0.05mm)
B = 13.5mm (+/- 0.05mm)
C = 1.0mm (+/-0.05mm)
D = 2.0mm (+/-0.05mm)

t makes no sense to me how a 35kp tractor that maxes out at ~2300 RPM cannot have its flywheel machined, but for automobiles with 10x the horsepower and triple the rpm its just fine.
That is quite a rant to include in response to a bulletin from Kubota giving the flywheel dimensions and the permissible amount that may be removed.
 

BastropMetal

Member
Lifetime Member

Equipment
L3400
Dec 20, 2022
31
19
8
Texas
Yes, it was a rant, as my last sentence acknowledged. It was a pretty frustrating day. The first sentence in my post was me thanking you for including the bulletin.

To the first part of what you quoted; I was aware that it meant 38.5 +/-0.05mm. My point remains that it doesnt make sense (at least to me) how the bulletin says you can machine away up to 1.5mm from the clutch flywheel surface, but the A dimension thickness can't deviate from 38.5mm +/- 0.05. Dimension A includes the thickness of the clutch flywheel surface. Removing any thickness from the clutch flywheel surface removes the exact same thickness from dimension A.
 

North Idaho Wolfman

Moderator
Staff member
Lifetime Member

Equipment
L3450DT-GST, Woods FEL, B7100 HSD, FEL, 60" SB, 743 Bobcat with V2203, and more
Jun 9, 2013
31,098
7,063
113
Sandpoint, ID
Yes, it was a rant, as my last sentence acknowledged. It was a pretty frustrating day. The first sentence in my post was me thanking you for including the bulletin.

To the first part of what you quoted; I was aware that it meant 38.5 +/-0.05mm. My point remains that it doesnt make sense (at least to me) how the bulletin says you can machine away up to 1.5mm from the clutch flywheel surface, but the A dimension thickness can't deviate from 38.5mm +/- 0.05. Dimension A includes the thickness of the clutch flywheel surface. Removing any thickness from the clutch flywheel surface removes the exact same thickness from dimension A.
They had to write it up that way because there are mutiple flywheel designs and each different dimension has a different effect.

By your numbers you're right on the edge of use.
Forget the B number as it's irrelevant in your use, it's only a clearance issue, and there is enough tollerance
Compare your C and D measurements as those 2 measurements are the one's that will make your clutch release or not, or engage or not.
Looking at your pic's you have taken material off of C surface but not the D surface which will make that clutch slip.
 

Runs With Scissors

Well-known member

Equipment
L2501 TLB , Grappel, Brush Hog, Box Blade, Ballast box, Forks, Tiller, PH digger
Jan 25, 2023
2,605
3,052
113
Michigan
It makes no sense to me how a 35kp tractor that maxes out at ~2300 RPM cannot have its flywheel machined, but for automobiles with 10x the horsepower and triple the rpm its just fine. I realize I'm ranting at clouds here, but today has not been a great day.

I don't envy your choice, but I stopped having automotive flywheels ground a long time ago.

I have never had good luck when I did, so I made it "my policy" to just replace them.

But with that being said, automotive flywheels tend to be a lot cheaper it seems,....so I dunno????????

Not a good comparison, but I replace the sh!tty dual mass flywheel in my Ram when it went bad, with a "performance grade" Valair kit and the total cost for everything was ~1K (flywheel, Pressure plate, TO bearing, hydraulics..etc)

But at 1K for just the flywheel, I can understand the reluctance to replace it.

Good luck.
 
  • Like
Reactions: 1 user

mcmxi

Well-known member
Lifetime Member

Equipment
***Current*** M6060HDC, MX6000HSTC & GL7000 ***Sold*** MX6000HST & BX25DLB
Feb 9, 2021
5,484
6,647
113
NW Montana
I was aware that it meant 38.5 +/-0.05mm. My point remains that it doesnt make sense (at least to me) how the bulletin says you can machine away up to 1.5mm from the clutch flywheel surface, but the A dimension thickness can't deviate from 38.5mm +/- 0.05. Dimension A includes the thickness of the clutch flywheel surface. Removing any thickness from the clutch flywheel surface removes the exact same thickness from dimension A.
The drawings that you show are dated compared to current GD&T standards. If I were creating a drawing of the flywheel I'd have a feature control frame calling out flatness of the flywheel surface that the clutch disc contacts. The location of that surface would be controlled by another dimension. The point is that the surface of the flywheel needs to be as flat as possible, but the location of that surface isn't as critical.

Here's an example of a feature control frame with flatness.
 

Attachments

Last edited:

BastropMetal

Member
Lifetime Member

Equipment
L3400
Dec 20, 2022
31
19
8
Texas
I decided to buy the flywheel. While waiting for its arrival I went back over everything and wanted to double check my work.

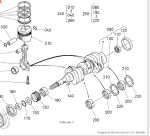
Does my rear seal install look correct? I have no experience with this so I'm just basing it off of looks, but I'm worried its sitting too deep in there.

1736025649579.png


Thanks for any feedback.


I realized that the clutch kit that I had bought included a pilot bearing. I tested the one on the tractor and I was glad I did because it felt a little rough. I googled around and found some youtube videos of people showing a method with a dowel and grease. Its a pretty neat method and it worked pretty well. I was pleased with myself until I put it next to the one that came with the kit.

1736024394153.png


For the original one (left) the OD is dead on 32mm and the ID is just short of 15mm.

For the one I got with the kit the OD is 28mm and the ID is 12mm.

Very frustrating. I have ordered the correct one now, but this involves more waiting.
 

Attachments

North Idaho Wolfman

Moderator
Staff member
Lifetime Member

Equipment
L3450DT-GST, Woods FEL, B7100 HSD, FEL, 60" SB, 743 Bobcat with V2203, and more
Jun 9, 2013
31,098
7,063
113
Sandpoint, ID
I think the seal looks fine, you should be able to see where the old seal rubbed on the crank sleeve, compare to that mark.

It always bugs me when a kit parts don't match.
Did you compare the the old clutch pack and clutch disks to make sure they matched?