Hello All.
After finishing my L35 and wanting to actually use it, the time has come to refurb the backhoe.
Come join me on this journey through rust, grease, leaking seals, and bad hoses to a land not so far away.
Warning: If you decide to do this work, have lots of sacrificial clothes, Advil and a good sense of humour!
Both swing cylinders had leaks around the dust seals, and I knew the hoses were all the wrong length and old. Pins and/or bushings are worn from lack of grease - but throw some elbow grease and a few parts at it, and heck...
This post deals with the swing cylinders and related, because I haven't yet completed the Dipper and bucket cylinders.
I also discovered a few things I thought I'd pass on to y'all that you may or may not know about.
Here are some pics of the BEFORE and AFTER with some notes.
I had to heat up the Pin areas for the swing cylinders/body to remove their pins which were rusted in place. After using a lot of PB Blaster and heat, I cut off the mounting bracket on the pins (you can see the bolt holes in the top for them) and then I used a 1" steel rod about a foot long and my trusty mallet to beat the pins from the top and out the bottom.

Dipper
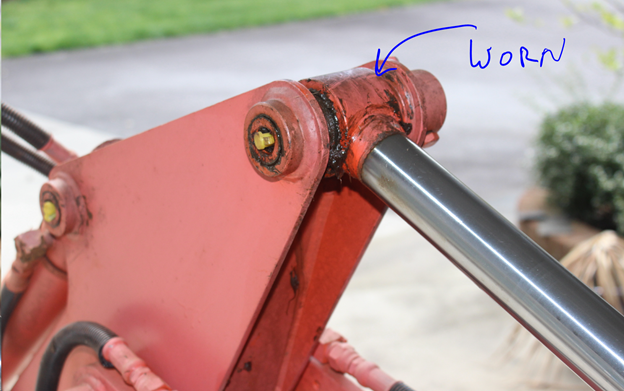
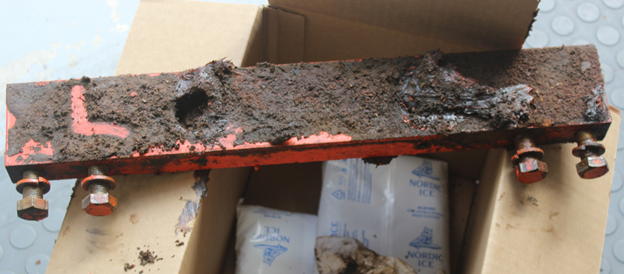
Top support for the swing cylinders
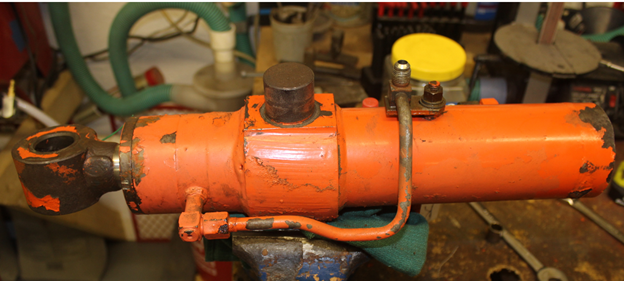
Right Swing Cylinder (Left is basically same cylinder)
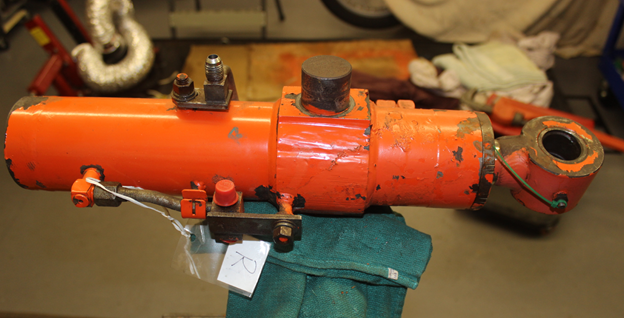
Right Swing Cylinder
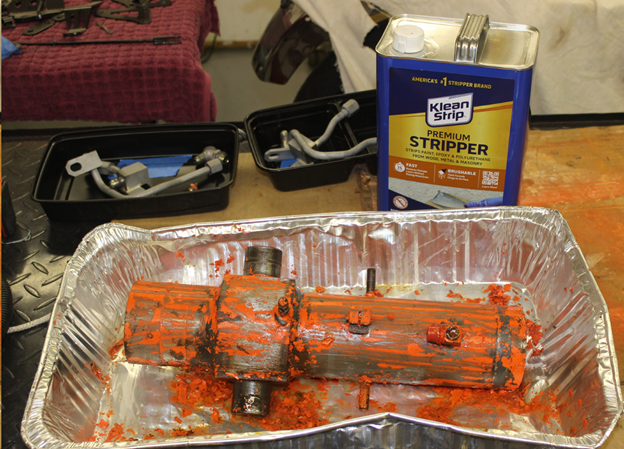
To remove the paint, I used the new (and expensive Kleen Strip Premium). No more Methyl Chloride folks. That is unless you're in a business. This actually works but still not as good as the old stuff.
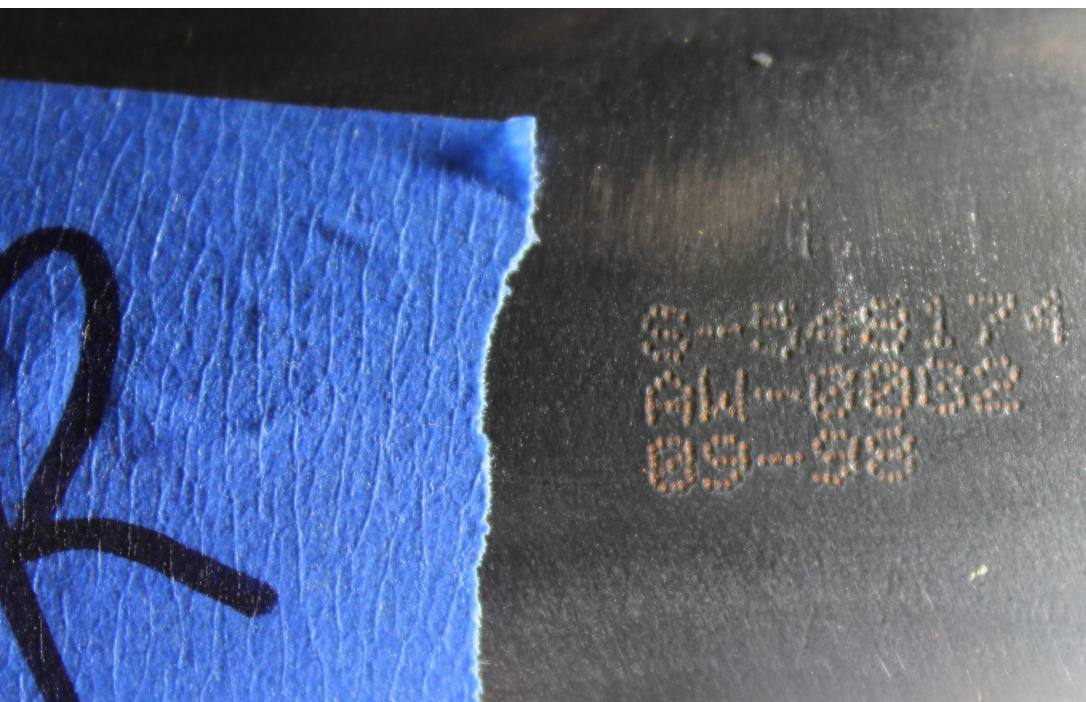
Then it got interesting. I actually found part numbers and dates on the cylinders so I took their respective pictures.
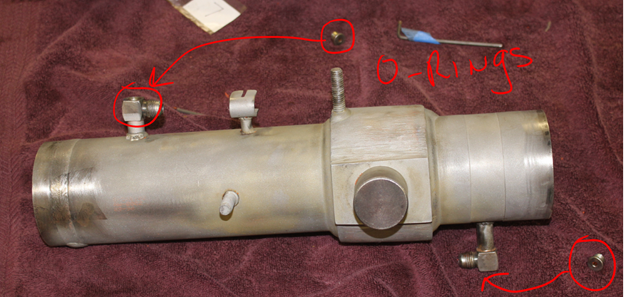
Note that there are ORINGS under the caps shown here.
Powdercoating primer and final color. Same for the hard lines.


Completed with new bushings pressed in the rods after powdercoating.
CONTINUED
After finishing my L35 and wanting to actually use it, the time has come to refurb the backhoe.
Come join me on this journey through rust, grease, leaking seals, and bad hoses to a land not so far away.
Warning: If you decide to do this work, have lots of sacrificial clothes, Advil and a good sense of humour!
Both swing cylinders had leaks around the dust seals, and I knew the hoses were all the wrong length and old. Pins and/or bushings are worn from lack of grease - but throw some elbow grease and a few parts at it, and heck...
This post deals with the swing cylinders and related, because I haven't yet completed the Dipper and bucket cylinders.
I also discovered a few things I thought I'd pass on to y'all that you may or may not know about.
Here are some pics of the BEFORE and AFTER with some notes.
I had to heat up the Pin areas for the swing cylinders/body to remove their pins which were rusted in place. After using a lot of PB Blaster and heat, I cut off the mounting bracket on the pins (you can see the bolt holes in the top for them) and then I used a 1" steel rod about a foot long and my trusty mallet to beat the pins from the top and out the bottom.
Dipper
Top support for the swing cylinders
Right Swing Cylinder (Left is basically same cylinder)
Right Swing Cylinder
To remove the paint, I used the new (and expensive Kleen Strip Premium). No more Methyl Chloride folks. That is unless you're in a business. This actually works but still not as good as the old stuff.
Then it got interesting. I actually found part numbers and dates on the cylinders so I took their respective pictures.
Note that there are ORINGS under the caps shown here.
Powdercoating primer and final color. Same for the hard lines.
Completed with new bushings pressed in the rods after powdercoating.
CONTINUED
Last edited:

