Hi Folks,
I thought I'd summarize the RC54-G20 deck rebuild I just completed in a separate posting here.
You'll thank me for posting thumbnails instead of the full-size images! Just click on the thumbnail for an enlargement.
I started this rebuild a week ago, after finding the spindle bearings fried on all 3 spindles. I ordered a complete set of bearings, seals, and the internal snap rings from HD Switch on eBay. The kit was listed as for the RC60 deck, but after some careful scrutiny of part numbers for both decks, I was pretty certain that the parts would fit the RC54. And, I was correct.
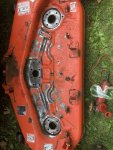
After disassembly, I cleaned up the deck shell, which had some surface rust starting under an accumulation of wet clippings. Here is the deck shell after prep, and prior to epoxy paint:

By far, the most difficult part of rebuilding the spindles was removing those HEAVY 2" internal snap rings which position the bearings. Here's a tip: Any consumer grade snap ring pliers (costing less than $20) are NOT up to the task! Another challenging part of the rebuild was pulling the pulleys off the spindles. One of them popped right off, but I had to use a gear puller on the other two. Tapered shafts would have been nice...
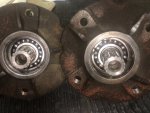
Here's a pic of the two outer spindles, showing the newly installed lower bearings from the bottom side:

I show this pic so you can see the slight recess to receive the lower seal. It's important to get the lower seal driven in deep enough so that it is in that recess, or the blade boss will rub on it. One of the seals that I removed was incorrectly installed at the factory, and it was quite torn up by the blade boss. I used PVC couplers as a cheapie bearing and seal drivers. The other thing I did is toss the cleaned up spindles in the deep freeze overnight. Before installing them on the spindles, I put the bearings in a 200F oven for a half-hour. They dropped right into place, just a light drive to seat them.
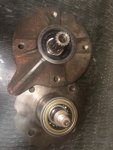
Here are the outer spindles with seals installed. I bedded them in a tiny bit of Ultra Black silicone sealant (between the outer edge of the seal and the housing):

I wire-wheeled the surfaces of the hubs that contact the deck - they were quite rusty. When I reinstalled them, I put a thin layer of grease on that surface to preserve it. Also did the same for the Holder Plates that go on the top of the deck and which the 4 mounting bolts go through.
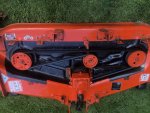
Here's the deck with everything installed, finished:

The pivot on the tensioner was rusted up so that it was pivoting on the bolt, trying to wear a hole through the deck. This, due to lack of grease. Punched out the bushing and cleaned up the bearing surfaces with fine sandpaper. I ended up replacing most of the grease zerks. Had no luck finding these grease zerks in the aftermarket - they're a special thread. Not 1/4-20, not M6. Close to $3 each at the Kubota dealership! Yikes.
A few words about the gearbox. Once you pull the blade boss off the lower end of the center spindle, the gear box assembly easily pulls right out. I found the inside pristine, even though there was evidence of leaking oil. Someone had recently topped up the gear oil, not too late. The two seals were both about half worn-out, so I replaced both of them, but the bearings were all in fine shape.
And now, some comments on parts and part numbers. The bearing kit I bought included 6 bearings, but the center spindle on my deck only ever had one bearing near the bottom. So, I ended up with an unused new bearing. That's OK. Three of the four bearings in the gear box are the same as the spindle bearings.
The original spindle bearings were Koyo brand, part number 6205. The replacement bearings had no markings on them, but they fit perfectly.
The original upper seals were NOK brand, part number BE1878E. The replacement upper seals were marked HD/S, part number 4120.
I could not make out any markings on the original lower seals, because they were all badly torn up. The replacement lower seals were marked HD/S, part number 5528.
I purchased the two seals for the gearbox from the Kubota dealership. $24 each! Yikes. They were NOK brand, part number AE1377H.
As I mentioned above, the input shaft bearings (2) and the lower output shaft bearing in the gearbox are the same as the spindle bearings.
The original upper output shaft bearing is Koyo brand, part number 62/32.
Let me know if you want me to post Kubota part numbers for this deck, I have the Parts List for it. Interestingly, the Parts List shows two spindle bearings in the center spindle housing, but my deck was built with only the lower one, and there was no snap ring groove that would position an upper spindle bearing.
Can't wait to get mowing! But, it's going to rain here all day...
-Paul
I thought I'd summarize the RC54-G20 deck rebuild I just completed in a separate posting here.
You'll thank me for posting thumbnails instead of the full-size images! Just click on the thumbnail for an enlargement.
I started this rebuild a week ago, after finding the spindle bearings fried on all 3 spindles. I ordered a complete set of bearings, seals, and the internal snap rings from HD Switch on eBay. The kit was listed as for the RC60 deck, but after some careful scrutiny of part numbers for both decks, I was pretty certain that the parts would fit the RC54. And, I was correct.
After disassembly, I cleaned up the deck shell, which had some surface rust starting under an accumulation of wet clippings. Here is the deck shell after prep, and prior to epoxy paint:

By far, the most difficult part of rebuilding the spindles was removing those HEAVY 2" internal snap rings which position the bearings. Here's a tip: Any consumer grade snap ring pliers (costing less than $20) are NOT up to the task! Another challenging part of the rebuild was pulling the pulleys off the spindles. One of them popped right off, but I had to use a gear puller on the other two. Tapered shafts would have been nice...
Here's a pic of the two outer spindles, showing the newly installed lower bearings from the bottom side:

I show this pic so you can see the slight recess to receive the lower seal. It's important to get the lower seal driven in deep enough so that it is in that recess, or the blade boss will rub on it. One of the seals that I removed was incorrectly installed at the factory, and it was quite torn up by the blade boss. I used PVC couplers as a cheapie bearing and seal drivers. The other thing I did is toss the cleaned up spindles in the deep freeze overnight. Before installing them on the spindles, I put the bearings in a 200F oven for a half-hour. They dropped right into place, just a light drive to seat them.
Here are the outer spindles with seals installed. I bedded them in a tiny bit of Ultra Black silicone sealant (between the outer edge of the seal and the housing):

I wire-wheeled the surfaces of the hubs that contact the deck - they were quite rusty. When I reinstalled them, I put a thin layer of grease on that surface to preserve it. Also did the same for the Holder Plates that go on the top of the deck and which the 4 mounting bolts go through.
Here's the deck with everything installed, finished:

The pivot on the tensioner was rusted up so that it was pivoting on the bolt, trying to wear a hole through the deck. This, due to lack of grease. Punched out the bushing and cleaned up the bearing surfaces with fine sandpaper. I ended up replacing most of the grease zerks. Had no luck finding these grease zerks in the aftermarket - they're a special thread. Not 1/4-20, not M6. Close to $3 each at the Kubota dealership! Yikes.
A few words about the gearbox. Once you pull the blade boss off the lower end of the center spindle, the gear box assembly easily pulls right out. I found the inside pristine, even though there was evidence of leaking oil. Someone had recently topped up the gear oil, not too late. The two seals were both about half worn-out, so I replaced both of them, but the bearings were all in fine shape.
And now, some comments on parts and part numbers. The bearing kit I bought included 6 bearings, but the center spindle on my deck only ever had one bearing near the bottom. So, I ended up with an unused new bearing. That's OK. Three of the four bearings in the gear box are the same as the spindle bearings.
The original spindle bearings were Koyo brand, part number 6205. The replacement bearings had no markings on them, but they fit perfectly.
The original upper seals were NOK brand, part number BE1878E. The replacement upper seals were marked HD/S, part number 4120.
I could not make out any markings on the original lower seals, because they were all badly torn up. The replacement lower seals were marked HD/S, part number 5528.
I purchased the two seals for the gearbox from the Kubota dealership. $24 each! Yikes. They were NOK brand, part number AE1377H.
As I mentioned above, the input shaft bearings (2) and the lower output shaft bearing in the gearbox are the same as the spindle bearings.
The original upper output shaft bearing is Koyo brand, part number 62/32.
Let me know if you want me to post Kubota part numbers for this deck, I have the Parts List for it. Interestingly, the Parts List shows two spindle bearings in the center spindle housing, but my deck was built with only the lower one, and there was no snap ring groove that would position an upper spindle bearing.
Can't wait to get mowing! But, it's going to rain here all day...
-Paul
Last edited:

