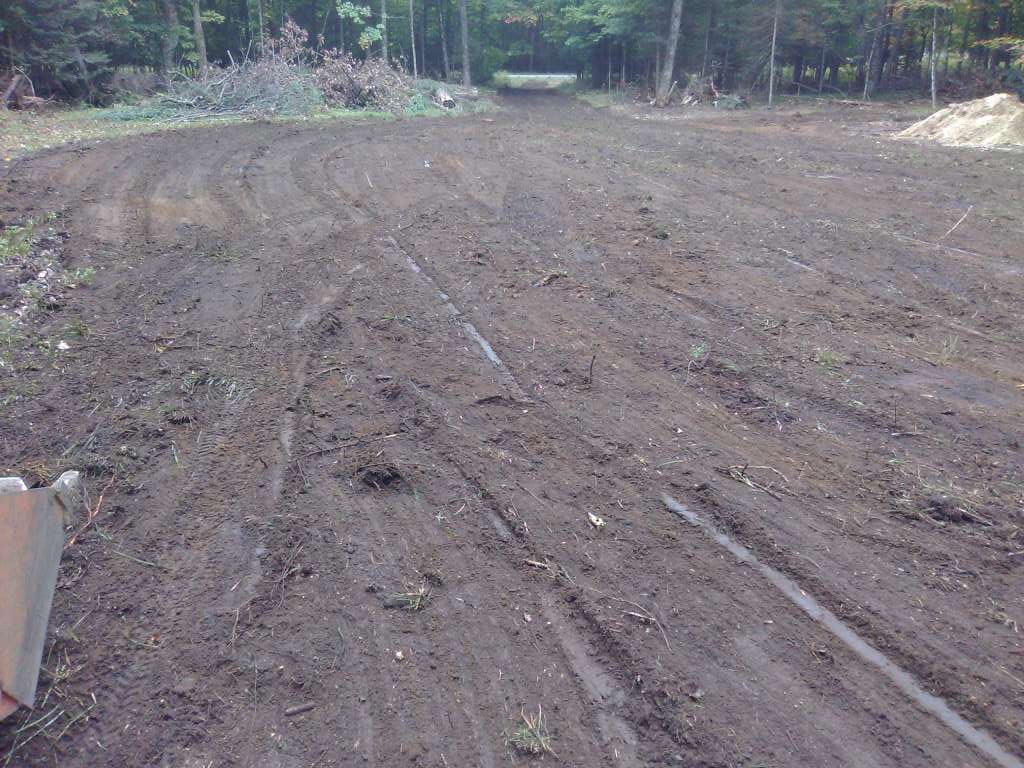
Home made land plane

torch

Well-known member

Equipment
B7100HSD, B2789, B2550, B4672, 48" cultivator, homemade FEL and Cab
Jun 10, 2016
2,619
869
113
Muskoka, Ont.
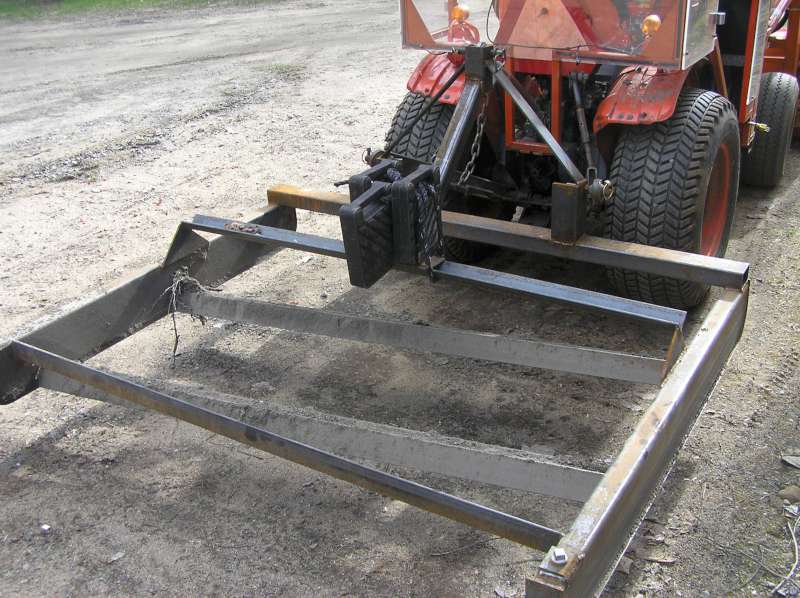
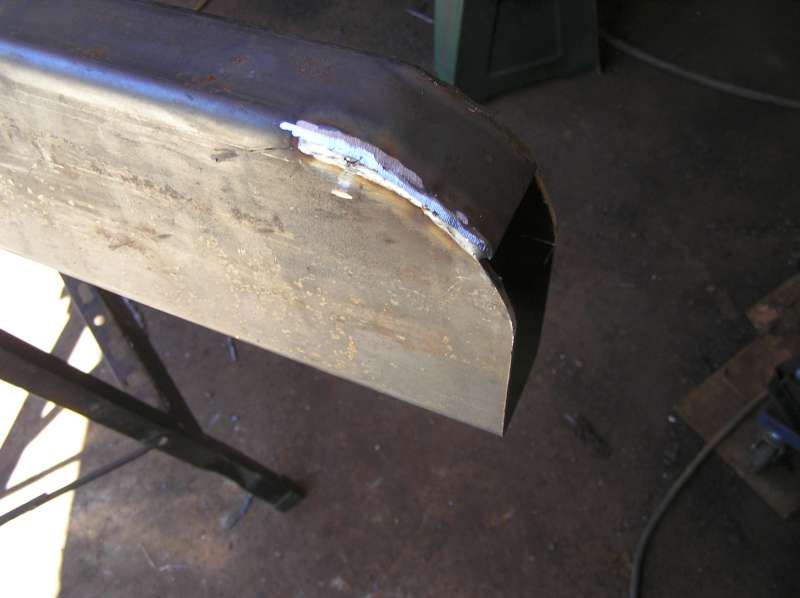
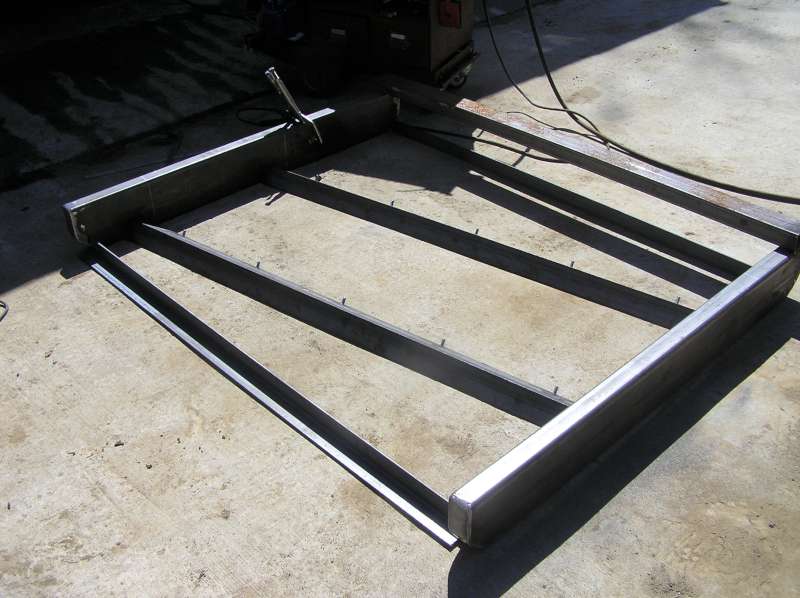
I started with 2x6 .188 wall rectangular tube for the side rails, and rounded up the bottom corners. I took some time to make sure these welds are tight, as I plan to fill the rails with WWF for additional weight if needed:


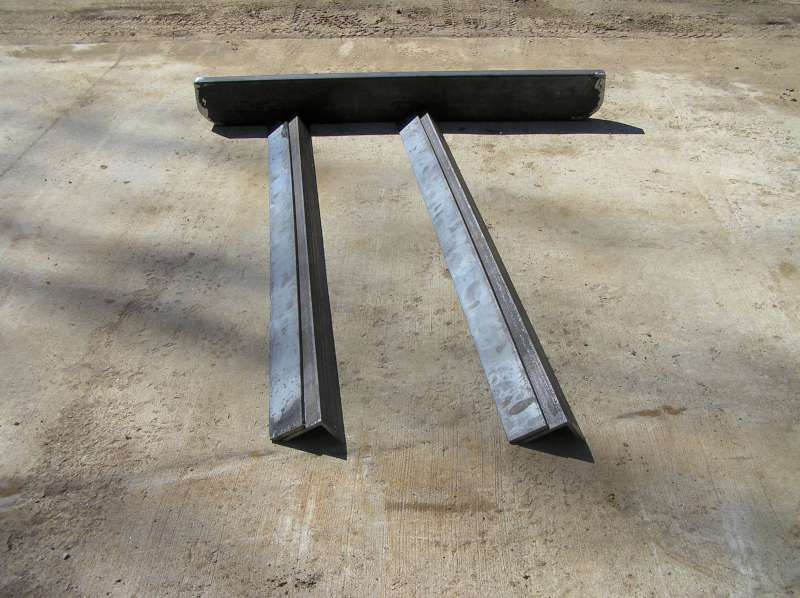
Some 3-1/2" x 2-1/2" x 1/4" angle iron looks like a nice cutting angle, and will support a piece of 3" x 3/8" flat bar.


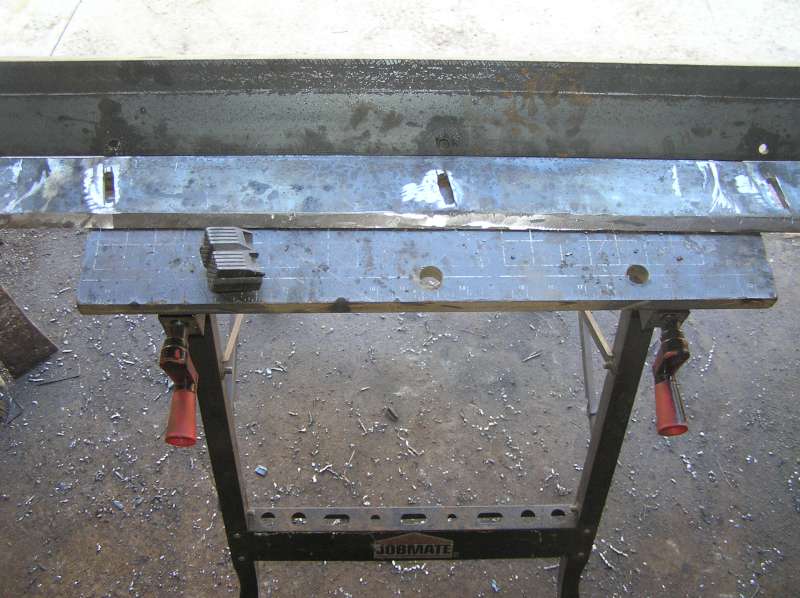
I ground the edges not-quite-sharp, and slotted the holes (at the appropriate angle) for adjustment.


I've seen everything from 5° to 30° suggested as the appropriate angle. I picked 10°. It looked "right" to me. But then, what the heck do I know? I've never used one -- for that matter, I didn't even know what a land plane was a year ago. Your Mileage May Vary.


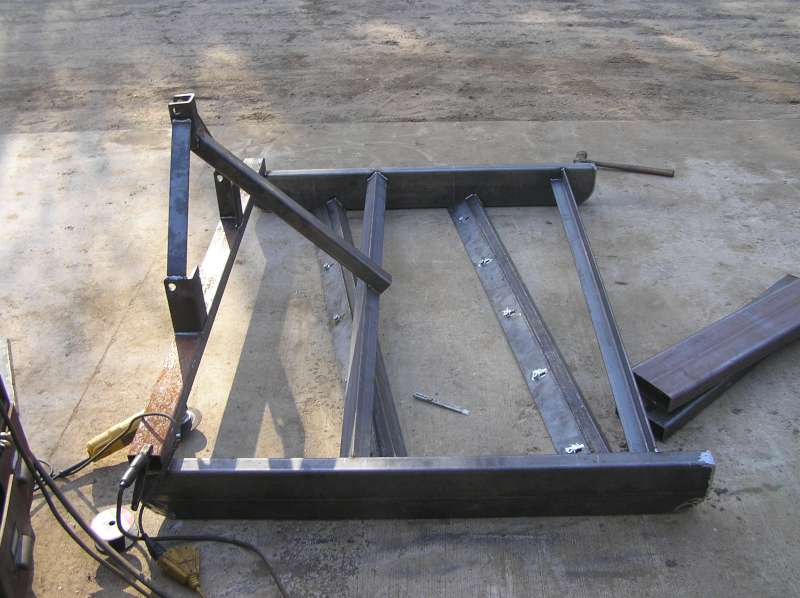
The angles for the hitch were easier to figure: I just copied my snowblower's dimensions:


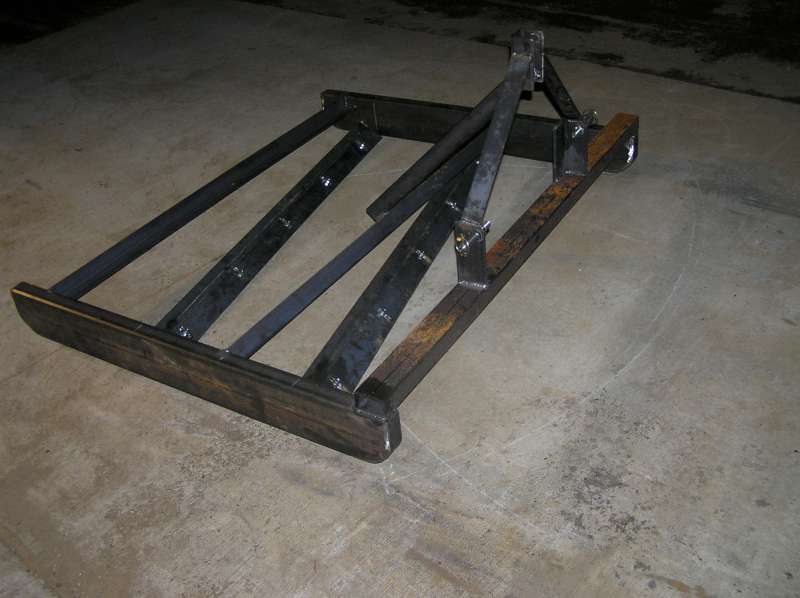
And finally, I turned some pins for the lift arms. Now for some testing and paint:
 
  • Like
Reactions: 4 users

North Idaho Wolfman

Moderator
Staff member
Lifetime Member

Equipment
L3450DT-GST, Woods FEL, B7100 HSD, FEL, 60" SB, 743 Bobcat with V2203, and more
Jun 9, 2013
30,249
6,404
113
Sandpoint, ID
I have been using mine for 2 years now, he is some things I would note:

Your going to want to swap out the flat bar for AR400-500 steel don't worry about cutting an edge on it, it will do it naturally in about a few passes, the reason I say this is the flat bar your using will not last very long at all as it's way too soft of steel.

Permanently affix the blade at 1/2" below the side ski's, as the slots and bolts won't hold and the blade as will just slide up, these suckers rattle a ton when they work.

You will need more support for your center top link, as the way it is now the angle will bend and change the dimensions of your sides and bow the blades, there will be a fair amount of force put on the top link in order to keep the right angle on the skis front to back.

Your angle of attack looks excellent you should get nice roll out of it. ;)
 
  • Like
Reactions: 1 user

Tooljunkie

Well-known member
Lifetime Member

Equipment
L1501,home built carry all, mini plow blade.
May 13, 2014
4,150
33
48
60
Lac Du Bonnet, Manitoba,Canada
Great advice, i hope to build one this summer. I plan on hard surface weld on leading edge. Just reweld as it wears. 10 degrees is the angle i use when sharpening my lathe cutting tools, so i like that angle also. The more weight you add the beefier the three point brackets need to be. A section of side rail tubing across the rear part would be good support for the 3pt bracket.

Its your build, if what you choose works then run it. As wolfman mentioned, the slotted plates will take a beating if its anything like my driveway,gravel on pit run and coconuts making their way to the surface after every winter.
Its amazing what happens to mild steel when its pounded on continously.
 

torch

Well-known member

Equipment
B7100HSD, B2789, B2550, B4672, 48" cultivator, homemade FEL and Cab
Jun 10, 2016
2,619
869
113
Muskoka, Ont.
Your going to want to swap out the flat bar for AR400-500 steel don't worry about cutting an edge on it, it will do it naturally in about a few passes, the reason I say this is the flat bar your using will not last very long at all as it's way too soft of steel.
Yes, the W44 was for proof-of-concept. I realize it won't stand up to heavy use. Long term plan is to either replace with harder material or build up the cutting edge with hardfacing rod. Distortion control is going to be an issue with hardfacing though. I'm going to try the suggestion of going begging for cast-off edges from the local highway plowing contractor.

Permanently affix the blade at 1/2" below the side ski's, as the slots and bolts won't hold and the blade as will just slide up, these suckers rattle a ton when they work.
I have also read advice that the leading blade should be 1/2" below the runners but the trailing blade should be flush, as it's just there to spread material evenly. The Land Pride owner's manual suggests the right side should be lower than the left side to aid in crowning.

At the moment, I have the front right corner down about 1", the front left and rear right corners about 1/2", and the rear left flush. It definitely cut more from the right side, but didn't seem to spread it left very aggressively. Not enough horizontal angle? Too much cutting angle?

You will need more support for your center top link, as the way it is now the angle will bend and change the dimensions of your sides and bow the blades, there will be a fair amount of force put on the top link in order to keep the right angle on the skis front to back.
Hmmm. I was actually planning on replacing the top link with a piece of chain -- just something to lift it clear of the ground, without interfering with the float as I transition at the top and bottom of the hill in the driveway. Ideally, the tractor should only be pulling, the side rails should fulfill the leveling function, right?

Great advice, i hope to build one this summer. I plan on hard surface weld on leading edge. Just reweld as it wears.
As I touched on above, distortion control will be an issue. Even bevelling the edge into a cutting edge warped the flat bar in that direction. It will probably be necessary to hardface both edges progressively to retain some semblance of straight. On the other hand, we're talking about a gravel driveway here, so maybe I'm over-thinking it. :)

10 degrees is the angle i use when sharpening my lathe cutting tools, so i like that angle also.
Just to be clear: the 10° angle is left-to-right. The cutting angle (or "angle of attack" as Wolfman put it) is closer to 35°.

The more weight you add the beefier the three point brackets need to be. A section of side rail tubing across the rear part would be good support for the 3pt bracket.
More weight would be good. It does bounce around a bit back there, especially until it gets a buildup of material on the blades. I estimate the existing weight to be about 200 lbs. It's just under 5' wide. Research suggests the optimum weight is between 50 and 100 lbs per foot of width, so I need to add at least 50lbs -- filling the rails with WW fluid should get me that much, but I may need to add a tray to hold some concrete. For now, I found that a slow travel speed helps a lot.

if its anything like my driveway,gravel on pit run and coconuts making their way to the surface after every winter.
Similar. The bed is glacial till -- mostly sand with some fist-sized river rock that pops up once in a while. I've built on that with loads of crushed granite over the years.
 

torch

Well-known member

Equipment
B7100HSD, B2789, B2550, B4672, 48" cultivator, homemade FEL and Cab
Jun 10, 2016
2,619
869
113
Muskoka, Ont.
I'm going to have to redesign the 3ph mount for a completely different reason -- the angle iron is too low above the front blade (about 2") and material can get hung up between them. Ooops. :eek:
 

North Idaho Wolfman

Moderator
Staff member
Lifetime Member

Equipment
L3450DT-GST, Woods FEL, B7100 HSD, FEL, 60" SB, 743 Bobcat with V2203, and more
Jun 9, 2013
30,249
6,404
113
Sandpoint, ID
There is a ton of ways to pull it off. ;)

You could fill your rails with sand or fine rock, that will also help buffer sound too.

I used 2 light I beams and it works well, too much weight and the ski's will just dig in too deep.

You want a fixed top link and not a chain as the front blade will dig deeper than the back blade as you pull it forwards because the lower three point arms are above the blades.

Here is mine:


Attachments

  • Like
Reactions: 1 user

sawmill

Active member

Equipment
bx24 backhoe/fel, 48" Bush mower
Nov 16, 2014
567
125
43
ione, washington
Quote:
Originally Posted by Tooljunkie View Post
Great advice, i hope to build one this summer. I plan on hard surface weld on leading edge. Just reweld as it wears.
As I touched on above, distortion control will be an issue. Even bevelling the edge into a cutting edge warped the flat bar in that direction. It will probably be necessary to hardface both edges progressively to retain some semblance of straight. On the other hand, we're talking about a gravel driveway here, so maybe I'm over-thinking it.

If you hardface the cutting edge, figure how far you can travel with one rod. Then start that far back from one end and weld towards the end. Then start the next rod that far back from the start of the first rod and weld towards the start of the first rod. Continue that process all the way across the cutting edge and that will let the heat dissipate as you weld. You'll get a lot less warpage.;)
 

North Idaho Wolfman

Moderator
Staff member
Lifetime Member

Equipment
L3450DT-GST, Woods FEL, B7100 HSD, FEL, 60" SB, 743 Bobcat with V2203, and more
Jun 9, 2013
30,249
6,404
113
Sandpoint, ID
If you use AR-400 or AR-500 steel for the cutting edge you won't need to hard face it as it's already abrasion resistant steel. ;)
 

torch

Well-known member

Equipment
B7100HSD, B2789, B2550, B4672, 48" cultivator, homemade FEL and Cab
Jun 10, 2016
2,619
869
113
Muskoka, Ont.
UPDATE:

After some tinkering, I refined the design a bit:


I added 2-1/2" wide runners to the bottom of each rail as a replaceable rub rail, and I added 3/4" pipe plugs to the top of each rail so I could fill them with WWF. I raised the forward cross-brace so it wouldn't interfere with the flow of damp material over the front blade, and added some suitcase weights to that.

As for the blades themselves, first of all the good: the angle seems to work well and the adjustment slots did not move.

Now the bad: As Wolfman pointed out, plain HR flatbar is way too soft. I kind of knew that, but was still amazed at just how fast it wore away. The front leading edge lost 1/2" in just a few hours of intermittent testing. Also, the adjustment slots were too long, permitting the end of one blade to bend away from the support a bit.

I did manage to hunt down some abrasion resistant steel. It is not normally carried by anyone I deal with, but the biggest supplier happened to have a 10' piece of 3/8" x 3" armour plate that was ordered in for a customer who never returned to claim it. He gave me a deal because he was happy to get rid of it, but it was still bloody expensive stuff! Close to $150. I don't think I spent that much on the rest of the land plane combined!

Also very tough stuff to work. I did manage to cut it with the bandsaw, after slowing the blade speed down as low as it would go and applying lots of dark sulphur cutting oil. Drilling the mounting holes took all afternoon, using M35 cobalt steel bits! This stuff seems to work harden, so slooow speed, high pressure, plenty of cutting oil was necessary. Even then, I still had to resharpen the bit after each hole and split the point every second sharpening. I still managed to break one bit and splinter two more.

If I was to make another, I think I would try a few passes of hardfacing rod on regular old HR flat bar next time. I would increase the width of the flat bar from 3" to 4" or even 5" to reduce warping. It would be cheaper than the abrasion resistant stuff and far easier to work with!

I didn't bother to try sharpening the cutting edge. In the very brief test last night, it seems to bounce a bit more, doesn't cut in as quickly, but also doesn't seem to pluck the big rocks out the way the sharp edge did.
 
  • Like
Reactions: 1 user

bearskinner

Active member

Equipment
BX25D, snowblower, PHD, Grapple, Snow blade, land Plane
Sep 1, 2014
926
241
43
N. Idaho
IMG_5291.jpg
I copied WM's land plane, after borrowing it to grade out my driveway and private road. The AR steel was half the cost of the metal, but it shows Zero wear after a couple seasons of use. The one I built is lighter than Wolfman's, and it doesn't dig too deep, but you need to play with the adjustment. I use my BX, and he has a larger tractor, so a bit heavier is fine for him
 

Wbk

New member
Feb 20, 2013
307
0
0
St Adolphe Manitoba Canada
If your looking for some material with a cutting edge ask the caretaker at the local arena what they do with their old blades off of the Zamboni or Olympia 84"long. I used one for a angle blade I built several years ago, if you go that route be very careful as they are really sharp. They're not hard to cut, a chop saw or zip blade on an angle grinder.
 

shelkol

Active member

Equipment
bx-2200, Woods BH6000 backhoe, Tach-N-Go quick attach bucket, snow blower
Nov 12, 2015
195
160
43
Westford, Massachusetts
shelkol.com
I only want to level out my lawn so I'm thinking light duty. I have lots of decomposed leaves to spread. I have 3" channel from heavy duty relay racks, so 6' long. I also have some 3" angle for cross pieces. I would look around for retired snow plow cutting edges. Does this sound too light duty.
 

torch

Well-known member

Equipment
B7100HSD, B2789, B2550, B4672, 48" cultivator, homemade FEL and Cab
Jun 10, 2016
2,619
869
113
Muskoka, Ont.
Decomposed leaves may clump instead of spread. The materials sound strong enough, but you may want to add some weight if you ever use it on a harder surface. I welded a steel box on top of mine that I can throw a few concrete block in when I do the driveway.
 

animals45

Active member

Equipment
L3301l
Apr 22, 2021
269
84
28
Mabie CA
I know this is a old thread , but incase the OP is still reading this I have 2 questions .
What is the length of your sides ?
How far apart are the front & rear blade ?
How far from the front is the first blade ?
thanks
animals45
 

North Idaho Wolfman

Moderator
Staff member
Lifetime Member

Equipment
L3450DT-GST, Woods FEL, B7100 HSD, FEL, 60" SB, 743 Bobcat with V2203, and more
Jun 9, 2013
30,249
6,404
113
Sandpoint, ID
I know this is a old thread , but incase the OP is still reading this I have 2 questions .
What is the length of your sides ?
How far apart are the front & rear blade ?
How far from the front is the first blade ?
thanks
animals45
Foul you asked 3 questions.

Make any of them any dimension you want.
The longer the sides the more it will float
The distance from front blade to back blade is dependent on you side length.
I think mine starting blade is a foot back?
 
  • Like
Reactions: 1 user

torch

Well-known member

Equipment
B7100HSD, B2789, B2550, B4672, 48" cultivator, homemade FEL and Cab
Jun 10, 2016
2,619
869
113
Muskoka, Ont.
I'm still here. Unfortunately, so is the snow on top of the land plane. But going by memory, the sides were about 48" long. The apex of the angle iron supporting the front blade was approximately 12" from the front of the front right rail, (Placing the leading edge of the blade itself around 8-1/2" from the front) and swept back about 10° from right to left. The rear blade parallels the front, with about 18" separation.

Note that as originally built, the middle bracing was simply welded between the rails, above the front blade. This did not provide sufficient clearance, especially for damp soil and clumps of vegetable matter like grass or weeds. I cut it out and raised it up, like so:


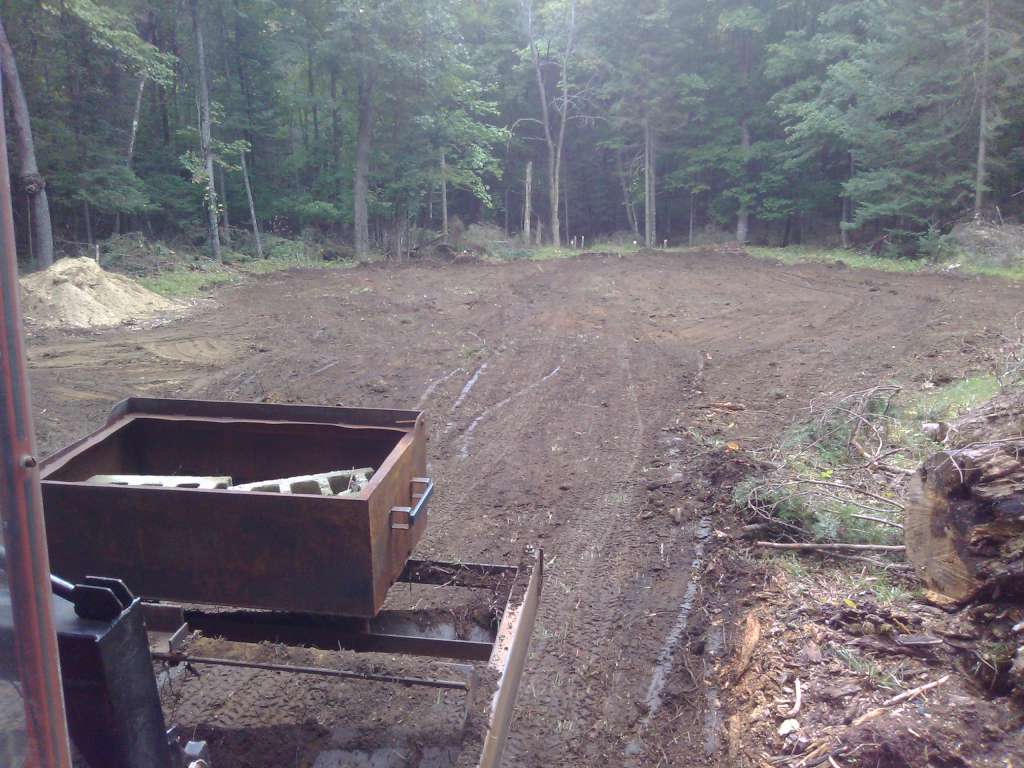
I also found that the weight is best placed to the rear, since (as Wolfman pointed out early on) the thing has a tendency to rock forward as the front blade digs in. I happened to have a big steel box in the scrap pile, so I simply mounted it over the rear blade and load it with cinder blocks as required. 2 blocks seems to be the sweet spot.


To fill in low spots faster, bump the 3ph lift slightly to reduce pressure on the front blade; the weight over the rear will keep that blade down close enough to spread the material. Similar principle to a box blade, although not nearly as aggressive.

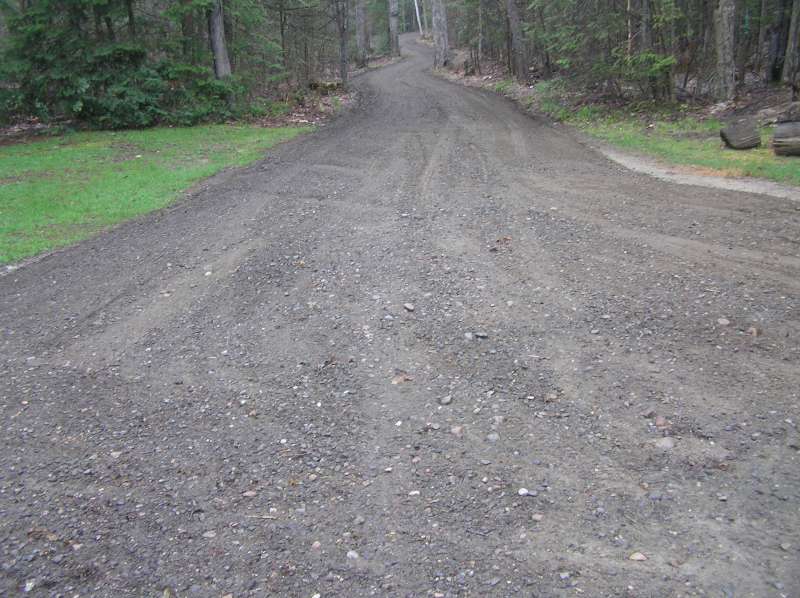
Overall it works well. Gravel:


Dirt:


For a finer finish, or at the end of a pass, lift the plane, drive forward, drop it and reverse to back-blade.
 
  • Like
Reactions: 1 users

Ridelght

Well-known member
Lifetime Member

Equipment
2022 Kubota L4060 Polaris Rangerxp800 Ford 3400
Feb 16, 2022
434
293
63
Ohio
I started with 2x6 .188 wall rectangular tube for the side rails, and rounded up the bottom corners. I took some time to make sure these welds are tight, as I plan to fill the rails with WWF for additional weight if needed:


Some 3-1/2" x 2-1/2" x 1/4" angle iron looks like a nice cutting angle, and will support a piece of 3" x 3/8" flat bar.


I ground the edges not-quite-sharp, and slotted the holes (at the appropriate angle) for adjustment.


I've seen everything from 5° to 30° suggested as the appropriate angle. I picked 10°. It looked "right" to me. But then, what the heck do I know? I've never used one -- for that matter, I didn't even know what a land plane was a year ago. Your Mileage May Vary.


The angles for the hitch were easier to figure: I just copied my snowblower's dimensions:


And finally, I turned some pins for the lift arms. Now for some testing and paint:

Dude that is awesome craftsmanship !!!! great looking piece of equipment !!!
 

animals45

Active member

Equipment
L3301l
Apr 22, 2021
269
84
28
Mabie CA
Thanks for all the reply's . I'm thinking out loud here , I have a few ( 3 ) tongue's from mobile homes . Their @ 3/16 Ibeam steel , you folks think that's thick enough for using on the sides ?
thanks
animal
oh yea . as far as the 3 questions when I asked for 2 . Blame it on my prescription drugs ;)
thanks
again
animals45