When you can't sleep.......................

Runs With Scissors

Well-known member

Equipment
L2501 TLB , Grappel, Brush Hog, Box Blade, Ballast box, Forks, Tiller, PH digger
Jan 25, 2023
2,735
3,260
113
Michigan
Well there I am Sunday morning with about 10,000 things that I "should be" doing......But there is one thing that has been on my list for a while and it's eating at me.

Every time I walk by this press with the factory "handle and ball" on it, I hear it mocking me......

IMG_3466.JPG


I gotta get ready for the Prarie Dog shoot coming up soon, so I have to get set up for 22-250 and 223's but first I have some 45 to do.

So there I sat for a "3 day marathon" trying to get caught up on 45 before I change over to a different caliber.

Well that little stint, left me with a sore right palm for 3 days.....(get you mind out of the gutter....it was from seating primers you sicko ;))

So thats it, I'm going to buy a "roller handle" upgrade.


Even before the words came out of my mouth, (because I was talking to myself), I said "F that, I own 3 lathes, a CNC plasma cutter, 2 welders and a 3D printer....I'll be damned if I'm gonna "buy one".....I'm gonna make one."

So there I am at 0330 laying (lying?) in the rack, wide awake, thinking about it.....Screw it.....Off to the shop.

I was thinking of making it out of 1 single piece, but I don't have the proper stock, so I decide the best way is going to be to modify the original somehow.

So after a few cups of coveffe, I get a plan going.

I will unscrew the original "ball" and make and an "adaptor " that has the roller handle incorporated into it.

I kick around the idea of cutting the "ball" apart, and using the nut on the inside as a base for the adaptor because I have never "successfully" internally threaded anything.


IMG_3467.JPG


But then I get mad at myself for being a "pu$$y" afraid of failure.....To hell with it, I get an idea and run with it.

I have this stock from that time I made those bolts for that hydraulic cylinder project that the @TheOldHokie encouraged me to make.

Here is the left over stock and as it turns out, I will have enough for 2 tries, just in case I screw it up.

IMG_3468.JPG


It appears to be the perfect size. So the plan is to thread this block internally, and then weld on a post for the roller handle to go on.

IMG_3469.JPG


As I was digging and looking, I came across a shaft from a "failed attempt" at reviving an old ass outboard. I think is was the impeller shaft.

IMG_3470.JPG


Now I just gotta figure out how to "internally thread" something....sucessfully..

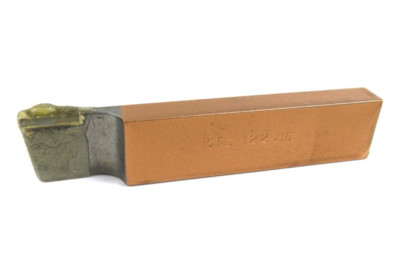
So I start digging through all my sh!t looking for the best "internal threading tool"

I finally find the perfect one, It happens to have come with the last lathe I bought, and its an insert type so I dont have to grind anything....YAY!!!!!!!

BUT I'LL BE DAMNED!!!!!!!!!!

I have at least 30 F'ing K worth of tools....at least........But I dont have a goshdamn T-5 torx bit to change out the damn bit that is chipped.........AGHHHHHHHHHHHH

Well, I guess it's "old school" grind and pray time.

I find this one, so its off to the grinder with "fish tail" to try and grind it.

I get it to what I hope is "good enough" ...only time will tell.


IMG_3474.JPG


Using the tailstock and a dead center, I set it up so that its "theoretically" at the center line of the piece...I hope.


IMG_3475.JPG


So I have this old "text book" for a reference, and in it, it says that I need to turn my compound to the "other sides 29 1/2 degree angle.

But mine is not marked for that, so I decide to use a "carpenters square" to find the " zero line" then make an arbitrary mark and count 29.5'ish degrees and hope thats good enough.

(although I still don't understand the "significance" of the 29 1/2 degree thing, I do it)

so heres my mark at he 50 degree mark.


IMG_3477.JPG
 
  • Like
Reactions: 4 users

jimh406

Well-known member
Lifetime Member

Equipment
Kubota L2501 with R4 tires
Jan 29, 2021
2,499
1,945
113
Western MT
I'm behind on reloading, but I'm also behind on shooting. The mod looks interesting.
 
  • Like
Reactions: 1 users

BX25D Rookie

Active member
Lifetime Member

Equipment
2011 BX 25LB-R (dirt work, snow, and brush hogging) & 2013 BX 2370 (mowing lawn)
Mar 21, 2019
167
166
43
upstate, NY USA
My RCBS RockChucker single station press is so old, it was not even equipped with a "ball" on the end of the OEM steel straight solid bar stock press handle.
It had a relatively hard plastic "bicycle" handlebar grip instead.
Even worse than a handle with only a ball.

So I also have felt the pain in the palm from cranking out reloads.
As you stated, from seating primers.
Do it, it's a very worthwhile upgrade!

My RCBS RockChucker has a RCBS factory made Piggyback II five station progressive conversion attachment installed.
One day after about 300 rounds, i got a large blister right in the middle of my right hand palm.
It took weeks to fully heal.

After it healed, I took the stock handle, and using oxy-acetylene heat, bent/shaped it for my needs.
I couldn't even begin to bend it when cold, even red hot, it was a challenge.
Then I cross drilled the end, and installed a chunk of redi-rod.
I used a spare 1/2" drive chrome deep socket as my "roller" handle.

No more pain in the palm!

IMG_20240110_174706792_HDR by cee_Kamp 32ACP, on Flickr

IMG_20240110_174714244_HDR by cee_Kamp 32ACP, on Flickr

IMG_20240110_174721357_HDR by cee_Kamp 32ACP, on Flickr
 
  • Like
Reactions: 3 users

McMXi

Well-known member
Lifetime Member

Equipment
***Current*** M6060HDC, MX6000HSTC & GL7000 ***Sold*** MX6000HST & BX25DLB
Feb 9, 2021
6,232
7,858
113
Montana
My RCBS RockChucker single station press is so old, it was not even equipped with a "ball" on the end of the OEM steel straight solid bar stock press handle.

My RCBS RockChucker has a RCBS factory made Piggyback II five station progressive conversion attachment installed.
I still have the first press that I bought back in 1992 which was an RCBS RockChucker. I added the PiggyBack II progressive conversion around 1994 and it's still a really good press. I also added a Redding powder thrower about 10 years ago which is a lot better than the RCBS one. I have a Redding on the Hornady LNL too.

I have a Hornday LNL also like the one shown by @Runs With Scissors but also with a Redding powder thrower. About 10 years ago I swapped out the handle for a modified Dillon handle that I converted. I made risers out of other scrapped parts for two or my four presses. I have a Dillon 550 with a factory riser and a Redding Big Boss II.

rcbs_riser_09.jpg


lnl_riser_09.jpg


lnl_riser_06.jpg
 
  • Like
Reactions: 2 users

McMXi

Well-known member
Lifetime Member

Equipment
***Current*** M6060HDC, MX6000HSTC & GL7000 ***Sold*** MX6000HST & BX25DLB
Feb 9, 2021
6,232
7,858
113
Montana
Speaking of gunroom projects, about seven years ago I welded up a custom heavy-duty shelving system for my gunroom.

shelving_02.jpg


complete.jpg
 
  • Like
Reactions: 2 users

dirtydeed

Well-known member
Lifetime Member

Equipment
B2650 BH77, U27-4R2, BX23TLBM, box blade, rear blade, flail mower, Stump Grinder
Dec 8, 2017
3,250
4,335
113
Wind Gap, PA
RWS,

Like you, I hated that factory handle...

I took the easy way out depending on how I feel that day 😁

Short throw

LNL Short throw.JPG


long throw

LNL long throw.JPG
 
  • Like
Reactions: 2 users

Runs With Scissors

Well-known member

Equipment
L2501 TLB , Grappel, Brush Hog, Box Blade, Ballast box, Forks, Tiller, PH digger
Jan 25, 2023
2,735
3,260
113
Michigan
Lots of cool reloading stuff out there for sure, and tons of ways to organize them.

I was considering getting a Rock Chucker for the rifle stuff, and keeping the LNL for pistol....but I digress....


back to the story.

So I count my way back to 29 1/2 degrees on the opposite side of normal and get every thing aligned.


IMG_3479.JPG


Now I'm ready to take my first pass.

Although its tough to see, the first pas looks pretty good.


IMG_3483.JPG


Oh and I can't forget to mention how this new to me 'Grizzly lathe" with the quick change gear box has changed my "shop life".....It's simply amazing.........( And, Yes, I know it's technically a "Shop Fox "however since it's mine, it now "identifies" as a Grizzly)


This little chart and quick change gear box along with

IMG_3478.JPG


This DRO........are total "game changers"....They almost make it seem like I know what I'm doing.....almost..

IMG_3482.JPG


Anywhoo....after what seems like an eternity of taking passes due to what I belive is called "spring back" or "flex back? of the boring bar. I get what I call "not really acceptable, but its gonna have to work" internal threads.

This internal threading is difficult. I'm not sure what exactly happened, but I think my toolpost loosened up and "boogered up" the threads on the last few passes.......DAMN IT!!!!!!!!

IMG_3486.JPG


or/and possibly I went a little to deep.... a combination of the 2????...I dunno.....

If this was going on the Space Shuttle I would be more concerned, but since it's my press, I'm just going to use it. It does thread on, just not as "good" as I had hoped for.

We will call this "1/2 assed, good nuff"

IMG_3485.JPG
 

Runs With Scissors

Well-known member

Equipment
L2501 TLB , Grappel, Brush Hog, Box Blade, Ballast box, Forks, Tiller, PH digger
Jan 25, 2023
2,735
3,260
113
Michigan
So on to my Nemisis....."parting off"......I dread this........I have never been any good at this. I usually just try and use a bandsaw when I can, but I have heard of this weird thing.

"They" claim that if you put the parting off blade in "up-side down" , and run the lathe backwards, that it will work a lot better.

After mulling over the geometry of this in my head for quite a while, I fail to understand how this will help.

I half think that it is an "internet prank" to see who will try it (Just like taking one of those big square lantern batteries apart to reveal they are filled with AA batteries....hahahah....( my brother fell for it)

Well F'it. I',m gonna try it.

So I install the blade in "up-side down" but when I do that, it sits so low that I can't get the blade to the mid point.....So here is my "Red Green set up"

IMG_3488.JPG


But you can see how high on the tool post the holder is. Here is a shot from the top.


IMG_3489 2.JPG


So as "Wonky" and unsafe as this looks, I'm gonna try it.
IMG_3487 2.JPG


IMG_3490 2.JPG


WELL I'LL BE DAMNED.........IT WORKED!!!!!!!

That was the easiest thing I have ever "parted off" .....No chatter, no screaming from the part, no vibrations, no smoke pouring off the part, no jumping around, no breaking the cutter......No swearing and cursing and throwing things about the shop..........

Just a nice smooth, clean cut. I even forget to use cutting fluid until the very end.

I guess it was not an "internet prank".....That actually worked!!!!!

It still boggles my mind. I can't for the life of me figure out why that worked........

I was so excited, I forgot to take a pic...hahahah

Now its on to the horizontal bar for the roller handle.
 
  • Like
  • Haha
Reactions: 3 users

Runs With Scissors

Well-known member

Equipment
L2501 TLB , Grappel, Brush Hog, Box Blade, Ballast box, Forks, Tiller, PH digger
Jan 25, 2023
2,735
3,260
113
Michigan
I chuck up the "donor bar" and make some "thumbnail sketch" marks on about where I think things should be.


IMG_3493 2.JPG


so after I turn the bar down to the proper diameter, I have to thread the end. I have succesffully done external threads....just not a lot of them.

I was going to use a die to thread it, but I want to get better with the lathe, so I decide to try and thread it on the lathe.

So I get her all lined up with the "fish tail"


IMG_3498.JPG


Then switch the gears to their proper settings according to the chart (Man this is nice to be able to do it that fast!!!!!!!!)

Take my first "scratch pass".......Perfect.....

IMG_3499.JPG


So I start taking passes and everything is going great.

I have a smile from "ear to ear"......until..........

Well I was getting a bit "cocky" and took my hand off the "disengagement lever", and when it came time to stop in the "chamfered area", I grabbed the wrong damn lever in a panic, and "over shot' it.

DAMN IT ALL TO HELLLLL!!!!!!!!!!


IMG_3500.JPG


Well again, I reason that since it will be "under the handle" for probably the next 50 years, the only one that will know is "you guys" and the person that has to remove the handle in the year 2075, so it's time to part it off.

I use my "new found knowledge" and my "wonky set up" and she "parts off" like a dream.


IMG_3504.JPG

IMG_3505.JPG


Now its off to the "welding area" to finish her up after putting that "custom bend" it with the press brake.

I also decide that the internal threads I did, are not going to "pass muster"........So I swallow my pride and play my trump card, and I just weld it.

IMG_3507.JPG


After tigging it together, I spray it with a bit of that "bed liner rattle can" stuff I have left over, and install it.


IMG_3509.JPG


It works great.

Much better than that stupid ball.

I burned a Sunday, some electricity, and some tig rod all to save 55 bucks. :ROFLMAO: :ROFLMAO: https://inlinefabrication.com/collections/hornady-lock-n-load-ap-ergo-roller-lever

However I learned a few things and had a good time making it, so I guess we will "chalk that up" to "entertainment value" 🍻

The End.
 
Last edited:
  • Like
Reactions: 5 users

Yooper

Well-known member
Lifetime Member

Equipment
3901 LA525
May 31, 2015
1,598
724
113
NE Wisconsin
Here is a quick way to make an internal threading bar and it is nice and rigid also.

IMG_2751.JPG
 
  • Haha
  • Like
Reactions: 1 users

BX25D Rookie

Active member
Lifetime Member

Equipment
2011 BX 25LB-R (dirt work, snow, and brush hogging) & 2013 BX 2370 (mowing lawn)
Mar 21, 2019
167
166
43
upstate, NY USA
It depends where you live for the in stock/in a physical store, availability of odd/weird sized taps.
When you're doing a job, and you need a tap RIGHT NOW, locating/sourcing a tap just can add additional pain & suffering to the job. When I do threading on a lathe, it's usually because it's external threads on a part, and there is no other way to get the threads on the part. Something a tap & die set cannot perform.

Thread milling using CNC, I'm not equipped for doing that.

I have done some internal threading on a lathe, but I think the last time was close to 25 years ago.
My sister inherited an antique "Magee" brand natural gas cooking stove/oven from around 1900 vintage.
It had been in my Grandparents home in New Jersey for at least 80 years.

When they sold their home and moved closer to family, in the 1980's, my sister got that antique stove.
As it was common back then, the pilot lights for the stove top burners ran continuously.
(commonly called a "free standing" pilot light)
To light a stove top burner, you pushed a knob on the front, cracked open a stove top burner hand operated gas valve, and the pilot lights "flared up" with a significantly longer flame, and lit the stove top burner.

My sister got the old Magee stove converted to propane and continues using it in her home today.
Think about that for a moment, she's using a cooking stove/oven combo unit that was manufactured
right around 1900. And it still operates!

The pilot light "jet" is shaped like a men's top hat from long ago. Made from brass.
About 3/16" in diameter, and 3/16" tall. The solid top of one of the original 100 year old jets,
(100 years old at that time it failed) the brass pilot light jet enclosed top/upper surface fractured away, and left a six inch tall flame going straight up, instead of the four individual flames that should have gone out at the four primary points of a compass. Each pilot light jet had the ability/purpose of lighting
any/all of four individual stove top burners.

I made her a replacement pilot light jet out of brass.
Something like a #80 twist drill bit for the continuously operating flame orifice size.
The tough part was the internal threading done with a tiny/miniature internal boring bar type threading tool.

I did successfully make my sister that unique custom made brass pilot light jet which obviously cannot be bought anyplace.
I also said a prayer, that nothing else broke on that antique Magee stove.

My sisters Magee stove/oven is larger than this one pictured, and also a "mirror image" flipped.
On the Magee, the oven/broiler is on the left side, and the stove top is bigger area, it has eight stove top burners, two pilot lights, where each pilot light will light any of four stove top burners, plus one small additional burner just for keeping a cooking pot warm. It is downright amazing that a stove/oven unit made about 125 years ago, still operates as designed, unlike modern appliances which today will likely have a life expectancy of less than 10 years.

Stove by cee_Kamp 32ACP, on Flickr
 
  • Like
Reactions: 2 users

Lil Foot

Well-known member
Lifetime Member

Equipment
1979 B7100DT Gear, Nissan Hanix N150-2 Excavator
May 19, 2011
7,728
2,866
113
Peoria, AZ
Runs With Scissors- I really enjoy the lathe posts, with a few minor differences, (DRO& different QC tool post) that is my lathe- paint is even faded, oily, & chipped in exactly the same way.:) (but yours is newer/prettier)

I usually have 3 different cutoff tools setup for various cuts, but one is always upside down for all steel parting, and it is carbide.
 

Runs With Scissors

Well-known member

Equipment
L2501 TLB , Grappel, Brush Hog, Box Blade, Ballast box, Forks, Tiller, PH digger
Jan 25, 2023
2,735
3,260
113
Michigan
Runs With Scissors- I really enjoy the lathe posts, with a few minor differences, (DRO& different QC tool post) that is my lathe- paint is even faded, oily, & chipped in exactly the same way.:) (but yours is newer/prettier)

I usually have 3 different cutoff tools setup for various cuts, but one is always upside down for all steel parting, and it is carbide.
Thanks for the comments. 🍻

I am still stymied by how/why "parting off "worked so well in this ass-backwards position.

I do not like the tool holder being up so high on the tool post, but I could not think of any other way to hold it.

Do they sell a "taller tool holding" device for this type of a parting operation?

I am considering trying to either

#1) mill one out myself from a block of steel

or

#2) Taking 2 of the standard tool holders and welding them on top of each other, to create a "a single, taller one"

I have been looking, but haven't found any "taller tool holders" options yet.
 

Runs With Scissors

Well-known member

Equipment
L2501 TLB , Grappel, Brush Hog, Box Blade, Ballast box, Forks, Tiller, PH digger
Jan 25, 2023
2,735
3,260
113
Michigan
As I was typing that last reply, it occurred to me that maybe simply "turning it over" would work.

As it happens, the tool holder is drilled and tapped for the adjustment screw on both sides.

So I ran downstairs and tried it..........It got me "close".

IMG_3515.JPG
 

Lil Foot

Well-known member
Lifetime Member

Equipment
1979 B7100DT Gear, Nissan Hanix N150-2 Excavator
May 19, 2011
7,728
2,866
113
Peoria, AZ
Here are what I use currently.
First pic shows a the 1" x 1/2" brazed carbide tool I use upside down. It was originally cut down to fit a smaller machine, thus the spacer block.
100_0438.JPG
100_0439.JPG
100_0440.JPG
 

Lil Foot

Well-known member
Lifetime Member

Equipment
1979 B7100DT Gear, Nissan Hanix N150-2 Excavator
May 19, 2011
7,728
2,866
113
Peoria, AZ
I think this is the tool in it's original form.
I think I remember narrowing it from 1/4" to .156, or maybe It came that way.
It is stronger if you leave it wide, but cuts with more tool pressure, and wastes material.
I'm sure there are narrow ones out there somewhere.
 

Lil Foot

Well-known member
Lifetime Member

Equipment
1979 B7100DT Gear, Nissan Hanix N150-2 Excavator
May 19, 2011
7,728
2,866
113
Peoria, AZ
Also, you see a green plastic cap on the side of the cross slide.
It covers a screw (deep inside) that holds/adjusts the cross slide acme thread nut to the slide.
It was loose when I got my machine, causing repeatability issues.
When I attempted to tighten it, I found that hole was packed solid with chips, congealed oil, and possum guts.
I think it took an hour to clear it, so I put a plug in to keep it clear for possible future access.
 

Runs With Scissors

Well-known member

Equipment
L2501 TLB , Grappel, Brush Hog, Box Blade, Ballast box, Forks, Tiller, PH digger
Jan 25, 2023
2,735
3,260
113
Michigan
Here are what I use currently.
First pic shows a the 1" x 1/2" brazed carbide tool I use upside down. It was originally cut down to fit a smaller machine, thus the spacer block.
View attachment 152116 View attachment 152117 View attachment 152118
It just hit me like a sack of hammers......

Look how much adjustment you have on your set up. (Green circle)

I think I just fingered out why I am having such a hard time doing the "upside-down" thing with the parting tool.

If I am decoding this properly, the numbers in red indicate you have BXA tooling.

Is that correct?


Untitled.jpg